Import images
Bitmap images can be inserted, pasted or scanned into the software for use as digitizing backdrops. For both manual and automatic digitizing purposes, ‘clean’ images, sometimes referred to as ‘cartoons’, work best. Scanners introduce noise, while graphics packages perform ‘dithering’ and ‘anti-aliasing’ to improve image print quality.
 |  |
| Traced image scanned | Auto-digitized |
You can scale and transform images after importing, but it is generally better to do so during scanning. Scaling afterwards may distort the image.
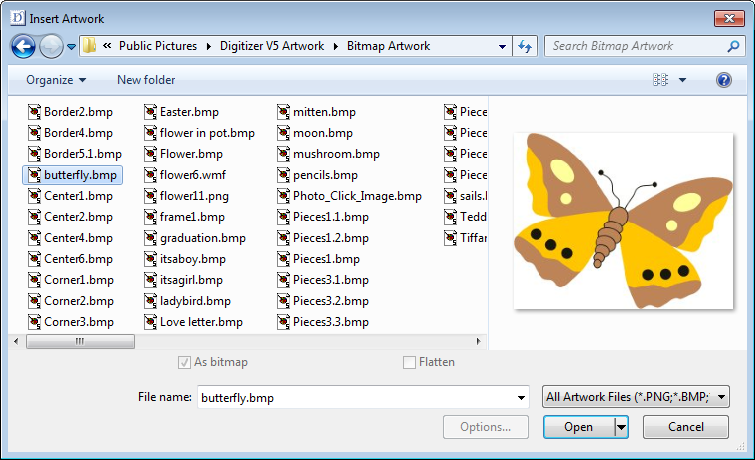
 | Use Artwork / Auto-Digitize / Standard > Insert Artwork to import graphic files - both bitmap and vector - for use as digitizing backdrops or for auto-digitizing. This tool is also available via File menu. |
Insert artwork
You can load bitmap images of various formats for use as digitizing backdrops. Vector graphics are converted to bitmap images upon insertion.
- Go to the Artwork toolbox and select Insert Image.
The Open dialog allows you to navigate to artwork folders and open artwork in both bitmap and vector formats.
.
Image transparencies
Support is provided for transparent backgrounds in 24 bit and 32 bit images.
![]()
If an image contains a transparent background:
- The background is automatically excluded from auto-digitizing.
- The image is automatically cropped to its visible extents.
Avoid using images that contain semi-transparent or transparent pixels within image color areas as these cause poor results when reducing the color count. The resulting pixels may end up as holes inside the image or significantly reduce color areas to the point where they are unnecessarily removed from the embroidery results.
 | Click Standard > Copy to copy the selection and place it on the clipboard. This tool is also available via Edit menu. |
 | Click Standard > Cut to cut the selection and place it on the clipboard. This tool is also available via Edit menu. |
 | Click Standard > Paste to paste contents of the clipboard. This tool is also available via Edit menu. |
Copy & paste images

You can copy and paste an image into the software by copying it directly from another embroidery design or graphics application and pasting it into your design. Simply select the image you want to copy and paste and press <Ctrl + C>. Open the design file into which you want to insert the image. Click the Paste icon or press <Ctrl + V>.
.
You will need to resize the image to fit within the dimensions of the selected hoop.
 | Use Artwork > Dim Artwork to show stitches more clearly when digitizing. |
Dim artwork
To dim a backdrop, click the Dim Artwork toggle. This can be useful when using artwork as a digitizing backdrop.

While digitizing, you may want to hide the artwork altogether. Use the View toolbar or simply press <D> to toggle on or off.
 | Use Artwork > Lock to lock selected objects into position for protection. This tool is also available via Arrange menu. |
Lock artwork
Lock artwork or other objects to prevent them from being moved or modified by accident by clicking the Lock key or pressing <K>. For example, locking backdrop images holds them in place as you digitize or edit the embroidery objects near them. Remember, however, to click Unlock All prior to using automatic digitizing methods.