Coffee cozy
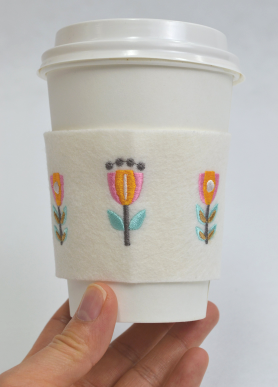 Save the trees and your hands! Use this stylish little reusable coffee sleeve so that you don’t burn your hands on hot drinks. A perfect little gift when paired with a coffee shop gift card.
Skill: Beginner
Time: 30 min software time, 20 minutes sewing time
Required: Digitizer V5 software.
Features: Combine Designs, Reshape, Cycle Used Colors, Color Wheel, Resequence by Color.
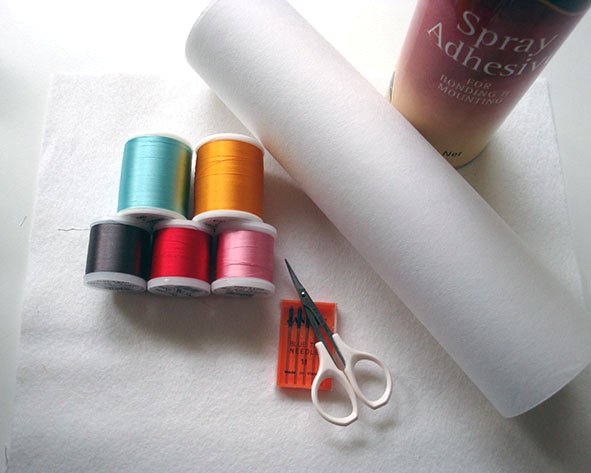 | What you’ll need...
|
Let’s get started
 | Use Standard > Open Design to open an existing embroidery design. |
 | Use Manage Designs > New From Selected to create new designs based on designs selected in the embroidery library. |
Open coffee cozy template
- Go to the Windows Start menu or desktop and click the link to your embroidery software.
- Note the 'toolboxes' on the left side. These contain the main tools you will use, from start to finish.
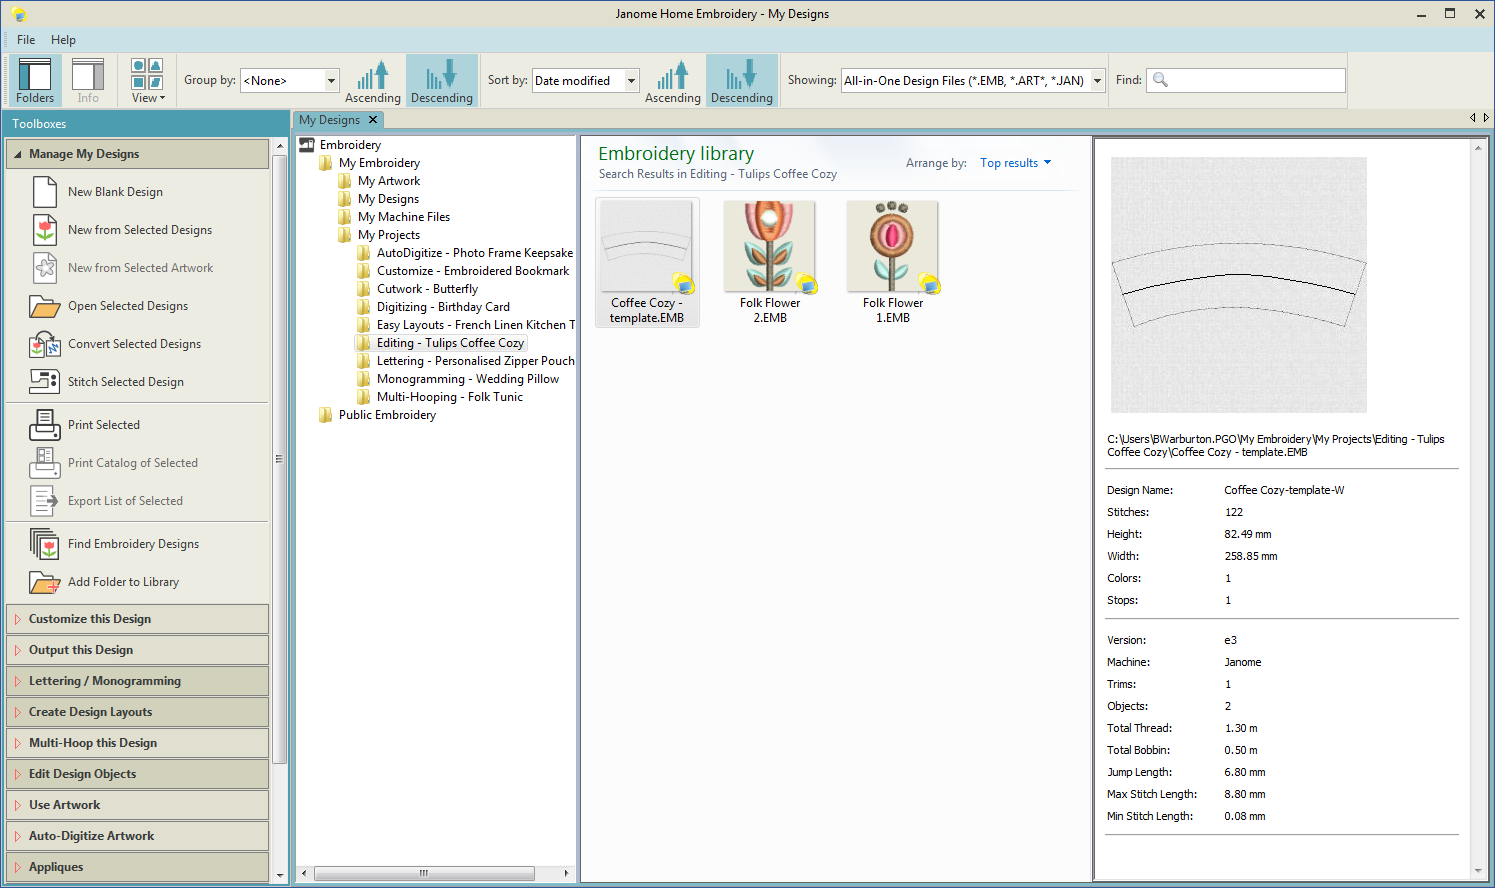
- Select Manage Designs. The Embroidery Library will appear in the design window.
- Navigate to My Embroidery > My Projects > Editing - Tulips Coffee Cozy. Select the file 'Coffee Cozy - template' and click New From Selected. The template file will open in new design window leaving the original file unchanged.
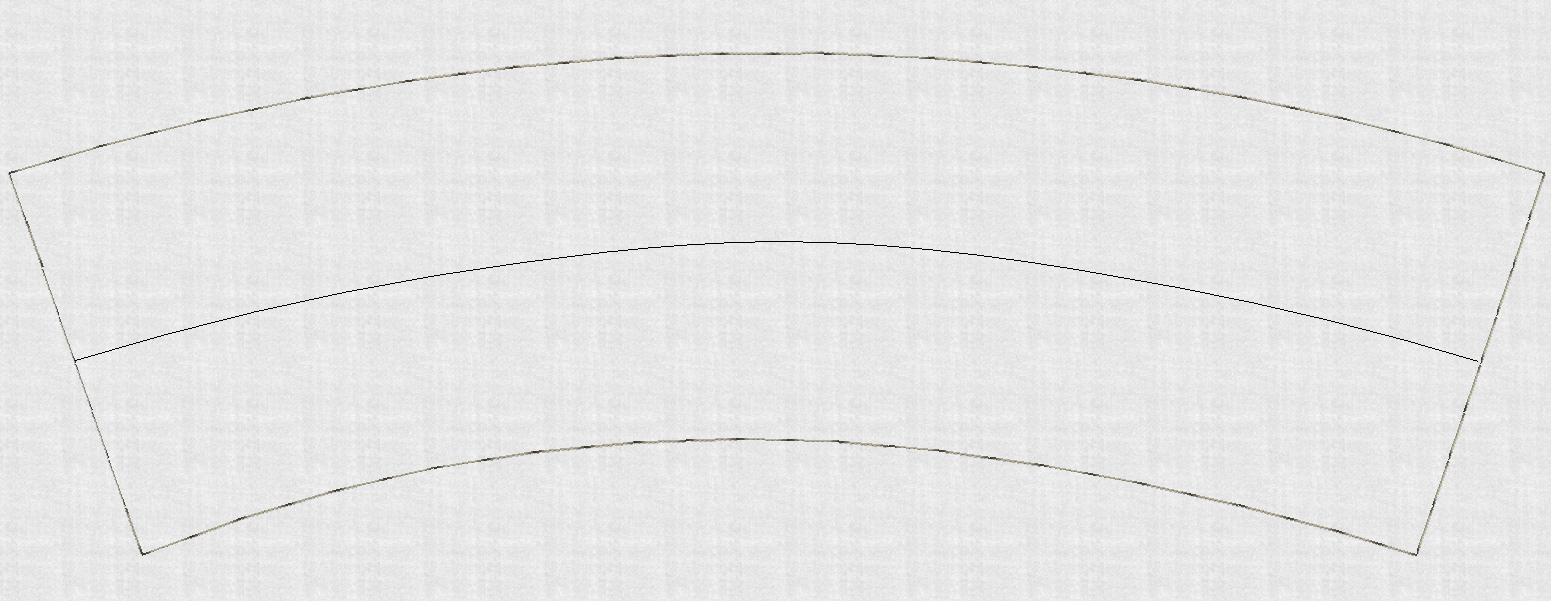
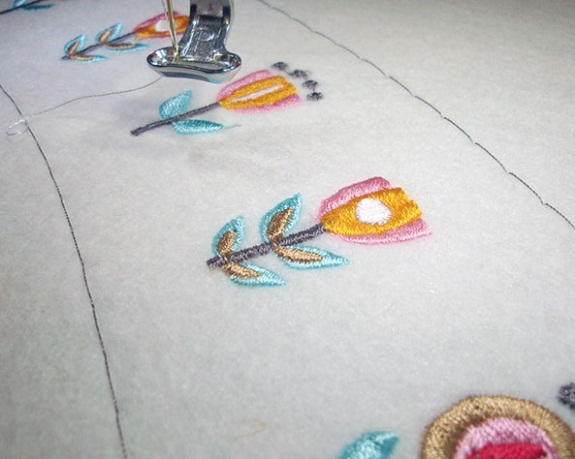
We have used a basting stitch to mark out the template. There’s also a vector line draw across the center of coffee cozy. This is to help us align the objects later on.
.
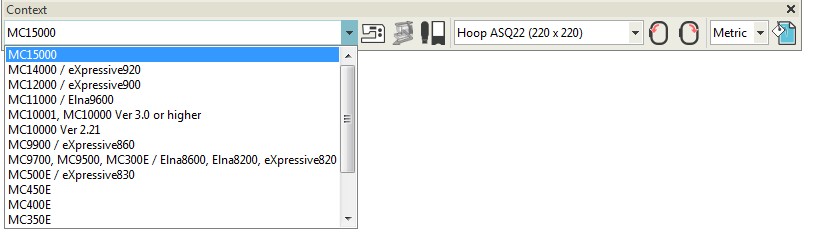
Choose your machine
The software supports various sets of machine model. Some machines can be connected by cable directly to your PC via the USB port. Some read ATA PC cards and/or USB memory sticks. Choose your preferred machine model. This in turn will determine your hoop selection.
 | Use Customize Design / Standard / Layout > Insert Design to insert another embroidery design into the current design. Design palettes are merged. This tool is also available via File menu. |
Insert designs
- Go to the Customize Design toolbox and select Insert Designs.
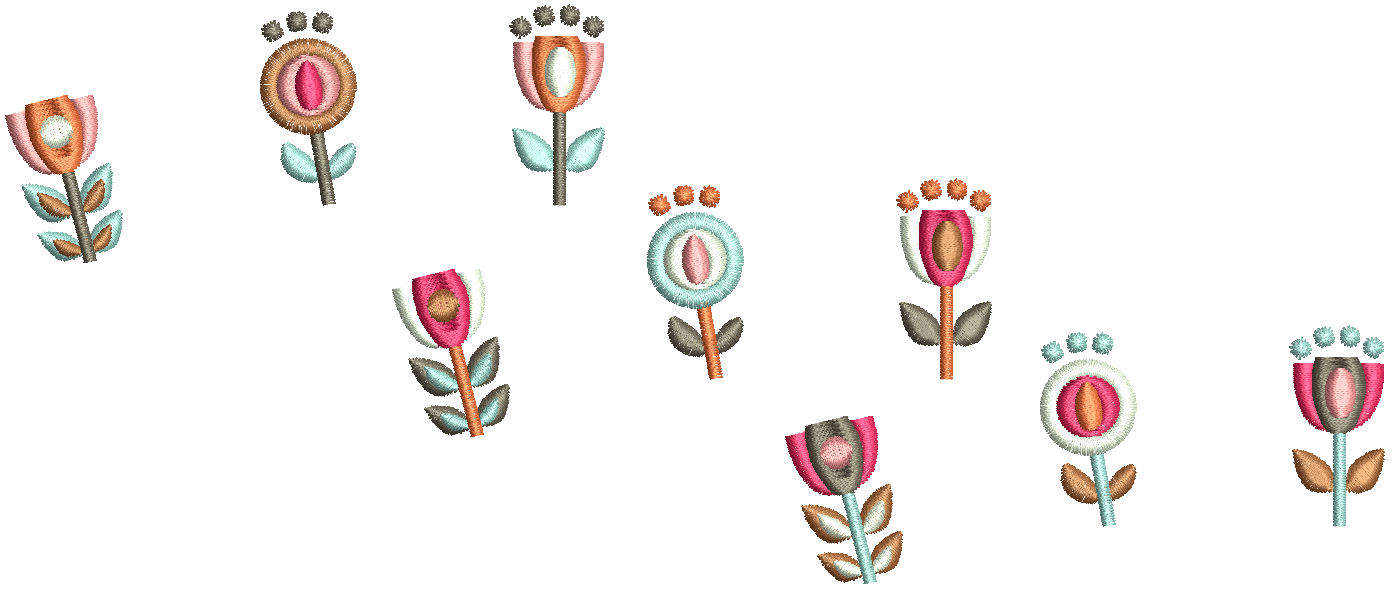
- Go to the same project folder, select both Folk Flower designs and click Open.
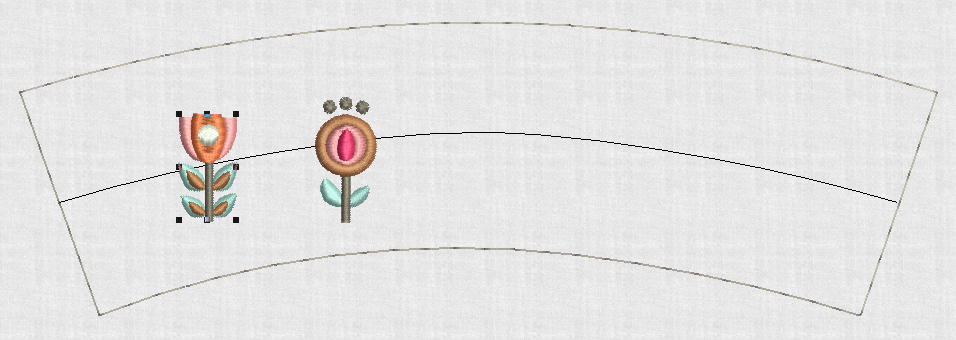
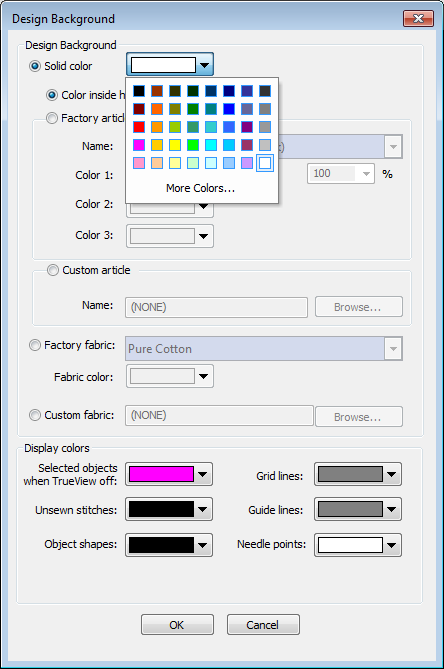
- Go to the Customize Design toolbox and click Background & Display Colors. Or right-click the design window and select Background & Display Colors from the popup menu. In the dialog, set the background color to white.
Make new flower
Thought you needed to know how to digitize to create something new? Think again! With just a few edits we will create a third flower.
 | Use Customize Design / Context > Background and Display Colors to set colors, fabrics, or articles as design backgrounds. |
 | Use Context / Layout > Duplicate to create a copy of a selected object in the same position. The duplicate is placed at end of stitching sequence. This tool is also available via Edit menu. |
 | Use Context / Layout > Duplicate with Offset to create copy at a preset offset position. Use to create regular patterns of duplicate objects. |
Duplicate flower
For this step, we're going to duplicate one of the flowers.
- Select Folk Flower 2.
- Right-click and drag a clone to the center of the coffee cozy. Alternatively, use one of the Duplicate tools under the Layouts toolbox. We’re now going to make some edits to make this flower unique from the other two for added interest.
 | Use Context > Group to group a selection of objects. Or press <Ctrl+G>. This tool is also available via Arrange menu. |
 | Use Context > Ungroup to ungroup to a grouped selection. Or press <Ctrl+U>. This tool is also available via Arrange menu. |
Edit flower
- With the flower still selected, click Ungroup or press <Ctrl + U> so you can work on individual parts of the flower.
- For this flower, we'll remove the lower leaves. Drag a bounding box around them and press <Delete> to remove.
Similarly, select the gold centers of the upper leaves, and press <Delete>.
Again, drag a bounding box around the two remaining leaves and nudge them down the stem with the arrow keys.
 | Use Select > Select Object to select an object or group. Or drag a selection marquee to select multiple enclosed objects or groups. |
 | Use Select > Reshape to adjust object outlines, stitch angles, start and end points, curved lines, etc. |
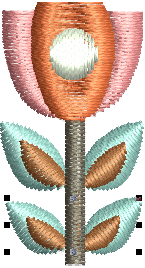
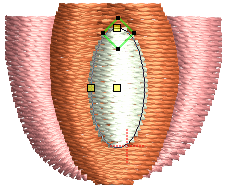
Reshape white center
Now we’ll look at the white center of the tulip.
Click to select it.
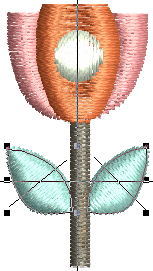
Using the selection handles, click and drag to elongate the object.
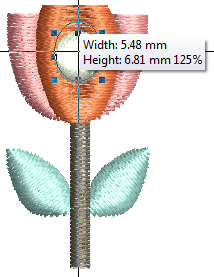
Alternatively, use the Context toolbar to set dimensions as shown and press <Enter>. Make sure to disable the Proportional Scaling lock before you do so.
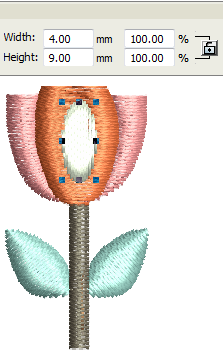
- Finally, select the Reshape tool and move the green diamond entry point to the top to change the stitch angle from vertical to horizontal.
.
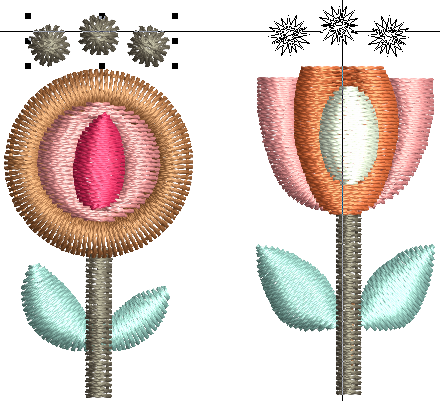
Duplicate flower parts
Now for the final touch on our new flower...
- Select the other folk flower and ungroup.
- Select the candlewick dots above the flower, and right-click and drag to clone.
- Drag the new line of dots to sit above the new flower.
| Use Select > Reshape to adjust object outlines, stitch angles, start and end points, curved lines, etc. |
Extend line of dots
So that the dots cover the full width of the tulip, we'll extend them.
- With the object still selected, click the Reshape tool. You will see some colored nodes appear around the object.
- Simply drag the yellow squares to the edges of the tulip on both sides. This will increase the number of candlewick dots to four.
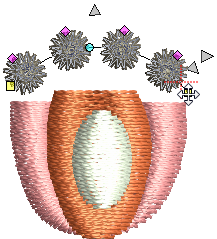
Now your new flower is complete!
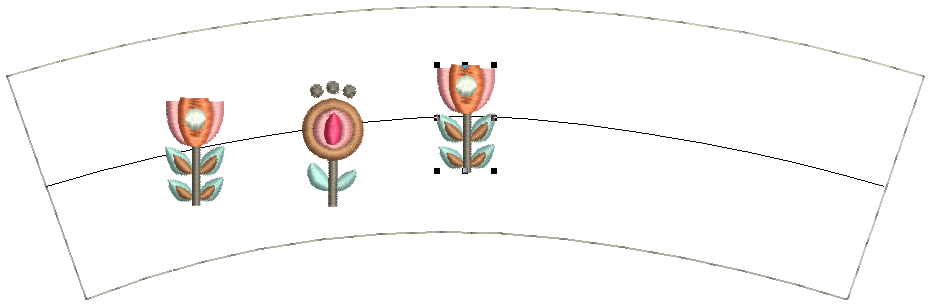
Create design layout
Now we need to align and space the flowers evenly, and duplicate them to complete the design.
 | Click View > Zoom Out to display design at half its current size. |
 | Click View > Show Grid to show or hide grid. Right-click for settings. |
Position flowers
- Zoom out so that you can see the whole design.
- Drag a box around each of the flowers and press <Ctrl + G> to group.
- Turn on the grid.
- Selecting the new flower, position it at the center of the coffee cozy template.
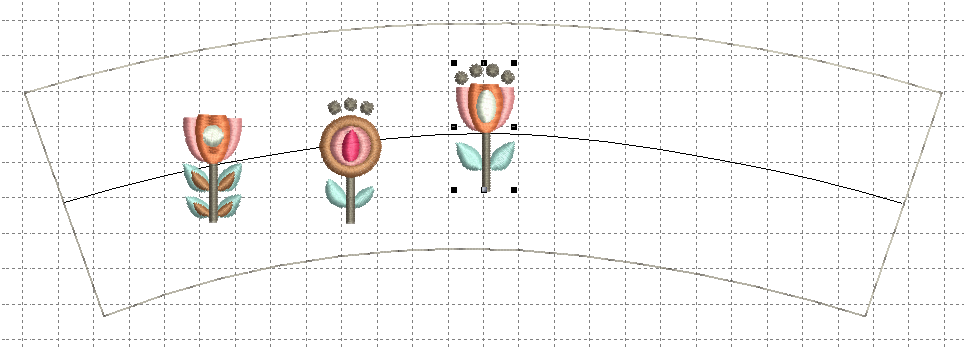
- Click and drag the other flowers into position along the center line.
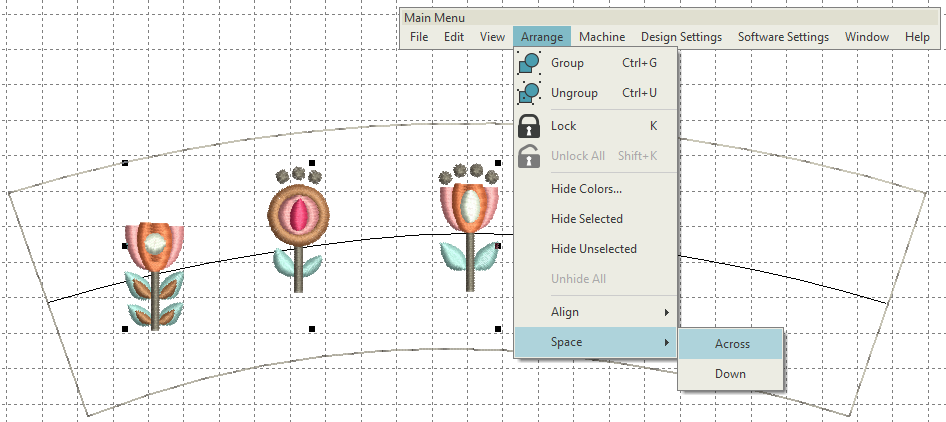
- If you want to make sure the flowers are evenly spaced, select all flowers and use the Space Evenly Across command available from the Arrange menu. Alternatively, right-click and select the same command from the popup menu.
.
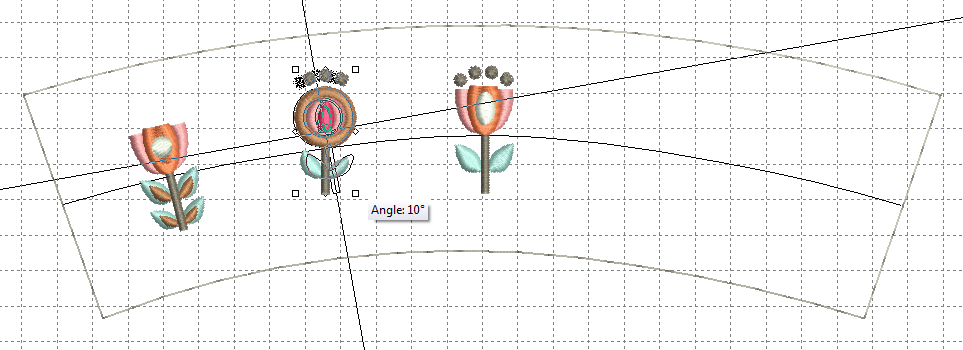
Rotate flowers
We want the flowers to follow the curve of the coffee cozy template.
- To do this, select a flower and click a second time. The selection handles turn into rotation handles.
- Click a handle and drag to rotate the entire flower on its axis.
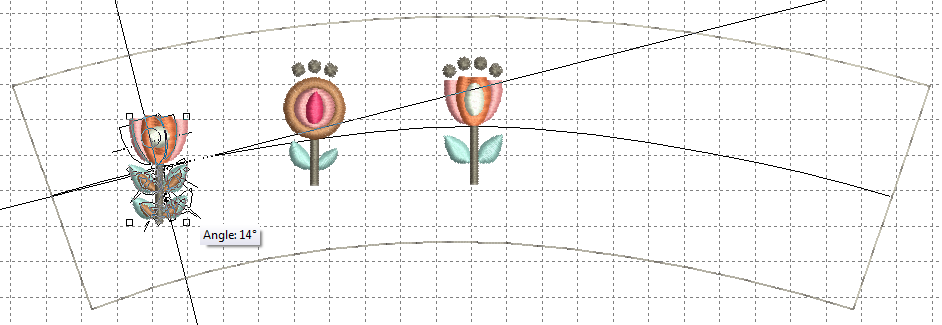
- Repeat with the second flower. Approximately 9 degrees should do it.
 | Use Layout > Mirror-Copy Horizontal to mirror and copy selected objects horizontally. |
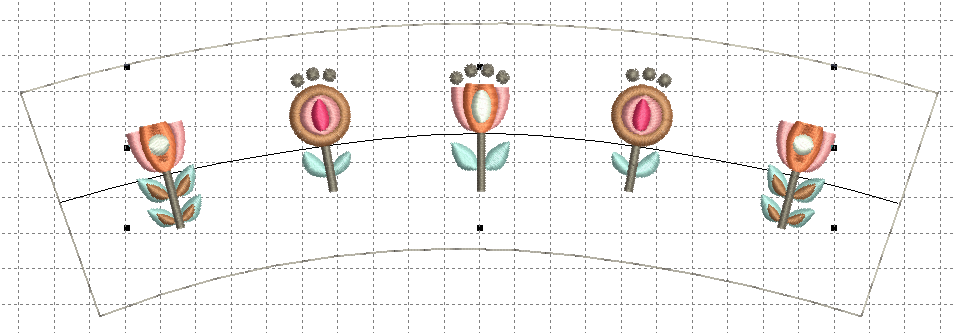
Duplicate layout
- Select the two flowers on the left, leaving the center flower unselected.
- Go to the Layouts toolbox and select the Mirror-Copy Horizontal tool.

- Simply align the center line with the center of the coffee cozy template and click. The copies are mirrored around that center line.
Experiment with colors
 | Use Customize Design > Cycle Used Colors to cycle through combinations of used colors. Left- or right-click. |
The software provides tools for you to change entire color schemes. Let's experiment.
- Go to the Customize Design toolbox and select the Cycle Used Colors tool. This tool is so easy, all you have to do is keep clicking it, while it cycles through all the possible color combinations using the colors in the design.
- Stop when you find a combination you particularly like. Experiment with the background fabric turned on.
Need more inspiration? The Color Wheel tool uses color theory to inspire more color combinations. See also Design colors.
Prepare design for stitching
Ever sat in front of your embroidery machine, changing threads back and forth? Never again!
 | Use Edit Objects > Resequence Manually to show or hide Resequence docker. Use it to resequence objects and color blocks in a design. |
 | Use Edit Objects > Optimize Color Changes to optimize design by reducing color changes to a minimum, while maintaining color layers. |
 | Use View > Stitch Player to simulate embroidery design stitchout onscreen in either stitch or TrueView. |
Optimize color changes
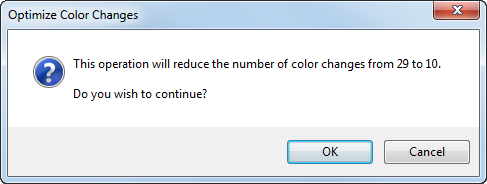
At the moment, because we have inserted two flowers and then duplicated them, the color changes come to 28. There’s an easy way to fix this...
- Go to the Edit Objects toolbox and open the Resequence docker. This shows you the order that the design is going to stitch in, and therefore how many color changes you will need to make on your machine.
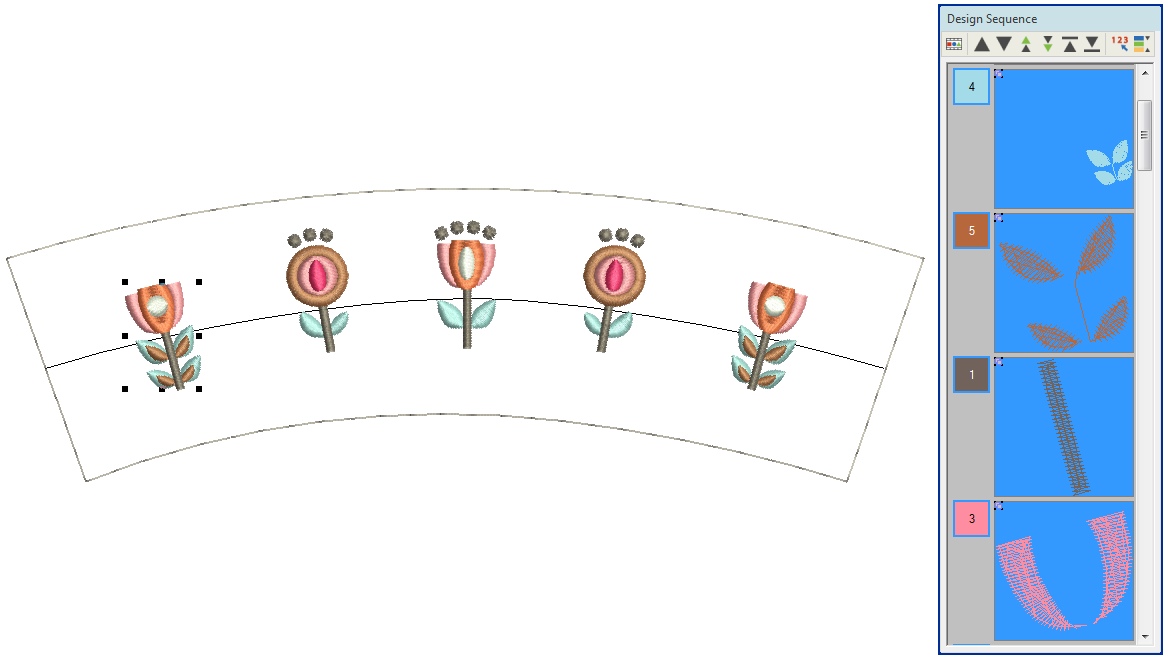
- Select the Optimize Color Changes tool. In one click, the software will minimize color changes.
You can also manually resequence objects in the Design Sequence docker by dragging them into your preferred order. You have to be careful in reordering colors, however, that you don't inadvertently cover up objects that are supposed to be stitched on top.
.
Preview stitchout
Preview the stitchout by running the Stitch Player and studying the simulation.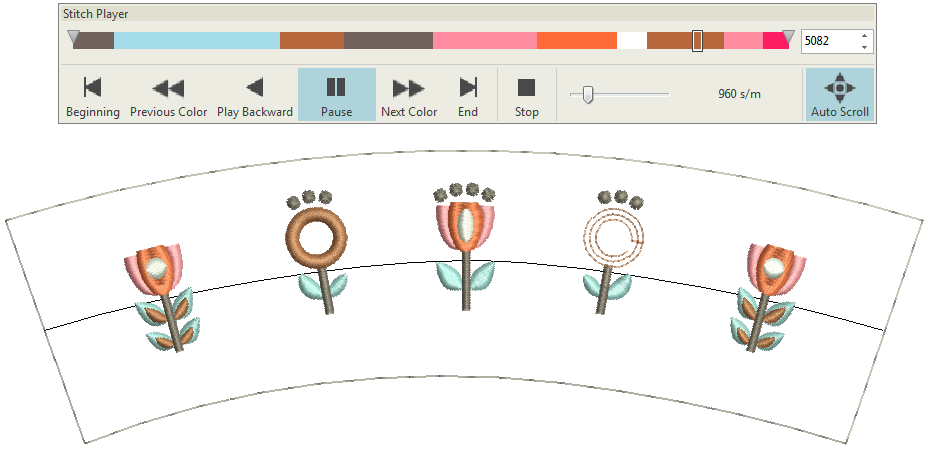
 | Click View > Show Hoop to show or hide hoop. Right-click for settings. |
 | Use Context > Rotate Hoop Left 90° to rotate selected hoop in 90° increments to the left. |
 | Use Context > Rotate Hoop Right 90° to rotate selected hoop in 90° increments to the right. |
Select hoop
Now we’re going to select the hoop that the machine will use, and ensure the design fits within the stitching area.
- Right-click the Hoop icon. You’ll see a droplist of all available hoops.
- Select one that will fit the dimensions of the design. In this case we’ve selected Hoop GR.
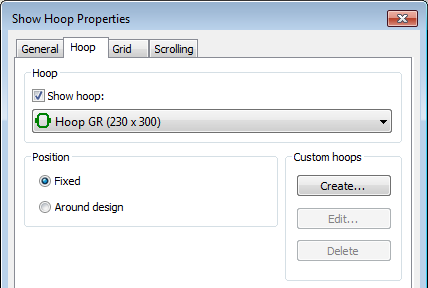
- Usually you would leave the default position to Around Design, but this time change it to Fixed.
- Click OK and your hoop will appear around your design. If it doesn't, make sure the Show Hoop icon is toggled on.
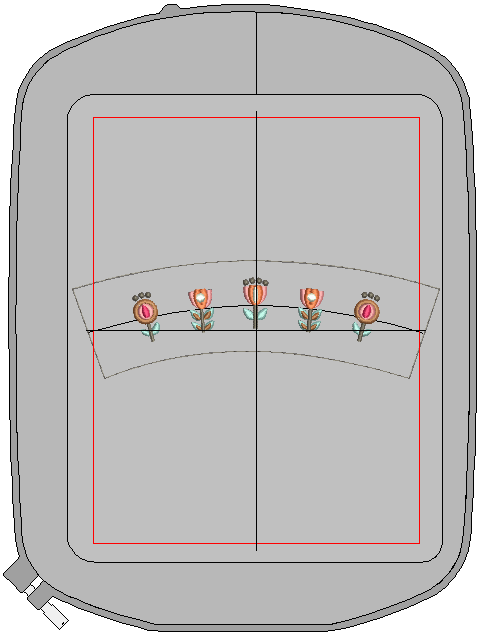
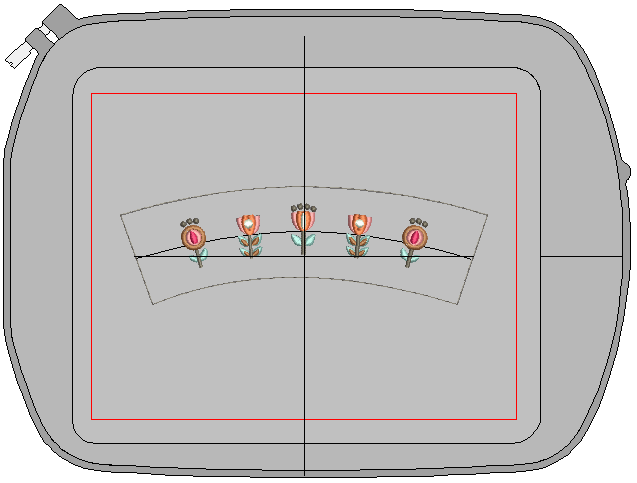
- You will need to rotate the hoop so the design fits within the hoop boundary.
Output design
Now we’re ready to send our design to the embroidery machine!
 | Use Output Design > Save Design As to save the current design with a different name, location or format. |
Save design
- Go to the Output Design toolbox and choose Save Design As. To make it easy to keep track of your designs, the default location is a folder called ‘My Designs’ in the Embroidery Library.
- Create a file name and save the design as native EMB to ensure you retain all the valuable information stored in the design file.
 | Use Output Design > Export Design to export the current design to a machine file for stitching. |
Convert to machine format
- Now select Convert to My Machine Format. You can then find the format your machine reads. If you’re not sure, check the instructions provided with your machine.
- This stitch file will be saved in a folder called 'My Machine Files' for easy reference later on.
- You can then transfer this file to your machine. This could be through cable, wireless or USB stick or through a connection application provided with your machine.
.
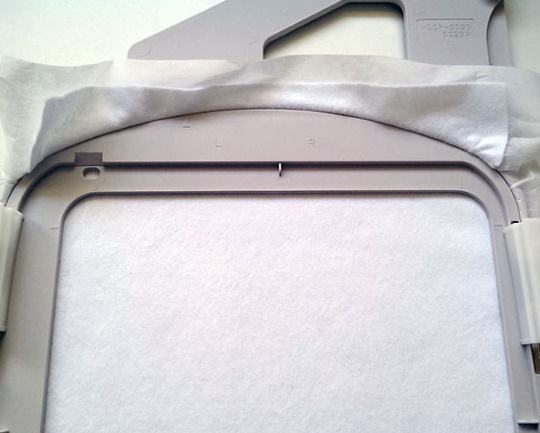
Hoop felt & stitch out
We are going to stitch out our coffee cozy design on felt. This will provide insulation for the cozy.
- Lightly spray your stabilizer with adhesive spray and smooth your felt on top.
- Simply line up over the bottom part of your hoop and press the top piece firmly down to secure.
Now you are ready to thread up your machine and start stitching!
Finalize project
.
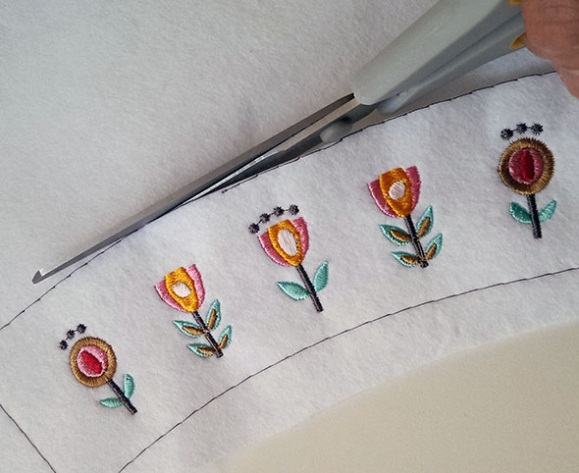
Construct coffee cozy
Now comes the fun part...
Simply cut along the basting stitches of the coffee cozy. Remove any loose threads.
Fold your coffee cozy in half, right side up, and sew a 1/8 seam using a zigzag stitch right along the edge. You may choose a tone-on-tone thread or make a statement with a contrasting one.
- Now you’ll never mix up your coffee with someone else’s! Plus, you’ll be saving the environment in style.
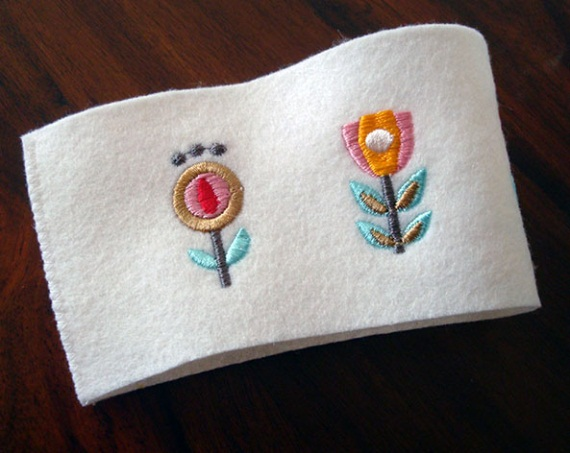
Oh, one more step… why not take a photo and share your creation!