Cutwork butterfly
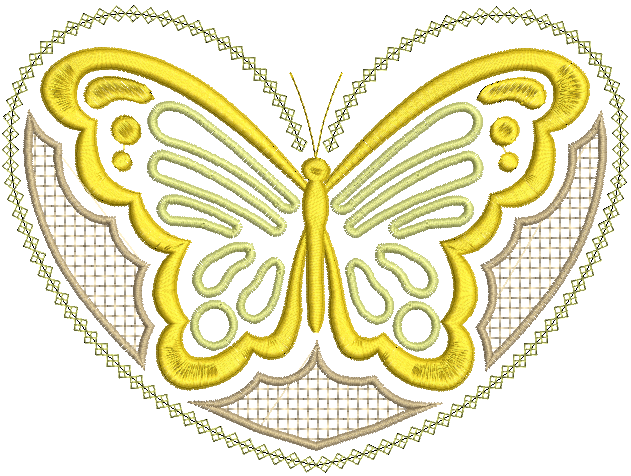
This topic provides a fully worked cutwork project to help you get started with the Cutwork feature. We're going to take a stock image file and turn it into embroidered cutwork. We'll use a motif to provide an attractive border around our design. For the purposes of the project, we'll use stock threads. You'll see just how simple and fun it is creating cutwork projects in your embroidery software.
The project assumes familiarity with basic techniques such as zooming and displaying stitches. All steps required to complete the project are provided below. For further information, you are referred to the User Guide.
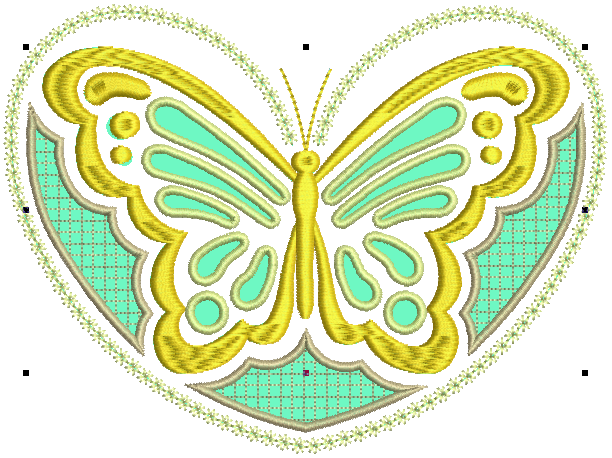
A final design is included in your My Projects > Cutwork - Butterfly folder. Check your solution against this design. It's always good practice to analyze designs to see how they have been created and keep adding to your arsenal of embroidery digitizing techniques.
Set up project
To begin with, we create and save a new design file and set up our work environment.
 | Use Customize Design > Auto Fabric to change the properties of the design for stitching on a different fabric. |
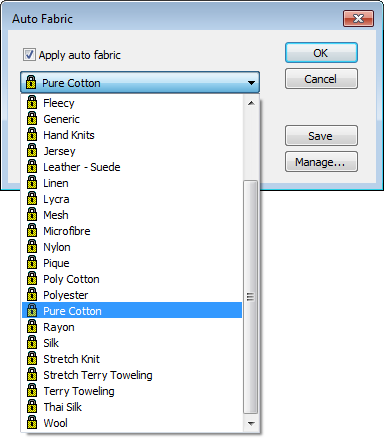
Choose fabric
The software provides a set of optimized settings so that the software will take into account the type of fabric you are stitching on.
- Open your embroidery software using the desktop icon or the Windows Start menu.
- Go to the Customize Design toolbox and select Auto Fabric.
Choose light weight fabric suitable for cutwork. See also Auto fabrics & densities.
 | Use Design Palette > Change Design Color to show or hide the My Threads docker to find threads from different charts and change design colors. |
 | Use My Threads > My Thread Charts to select the thread charts you currently have available for use. |
Set up design palette
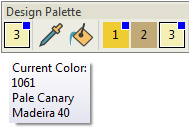
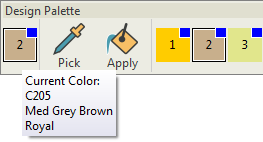
Before you start digitizing, it is good practice to analyze the artwork, work out the thread colors you want to use, and set up your design palette accordingly. The Design Palette gives you default colors to work with. For this design, we'll be using three colors - Deep Yellow, Gold, and Banana Yellow. We need to reassign these colors to color slots 1, 2 and 3.
- Click the Change Design Color button on the Design Palette toolbar.
- Click the My Thread Charts button and select the chart/s you want to use from those available. For this project, we use Madeira 40 brand but you can choose whichever thread chart you have available.
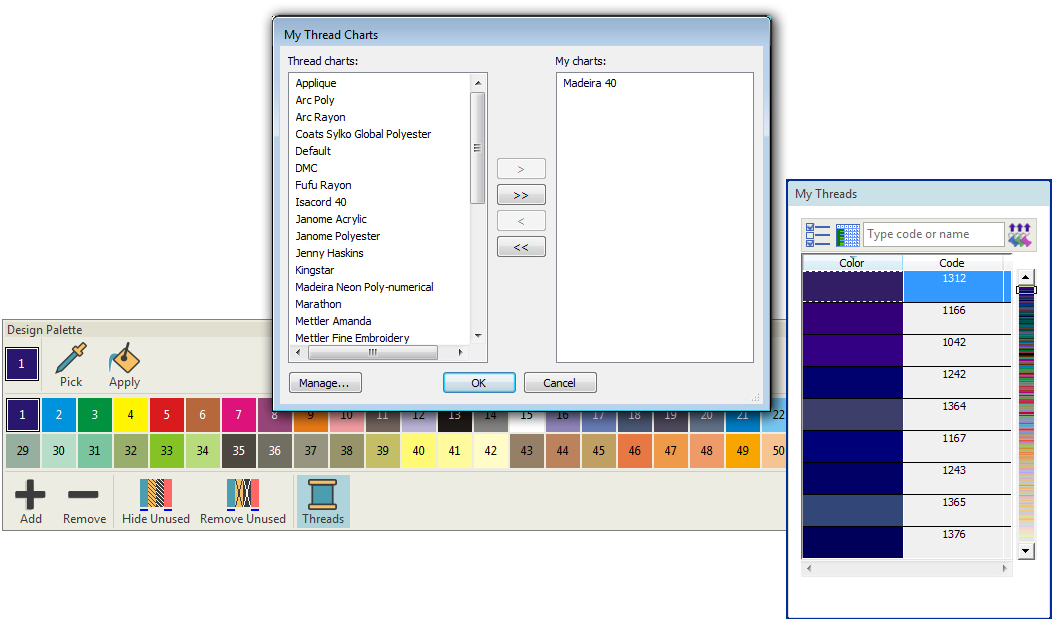
- Select a color slot, locate a color in the My Threads list, and double-click to assign to the slot. We'll assign Yellow Copper (1069), Bullion (1192), and Pale Canary (1061) to the first three color slots.
 | Use Artwork / Auto-Digitize / Standard > Insert Artwork to import graphic files - both bitmap and vector - for use as digitizing backdrops or for auto-digitizing. This tool is also available via File menu. |
 | Use View > Show Design to show or hide design elements. Click to open droplist of view settings. |
Insert artwork
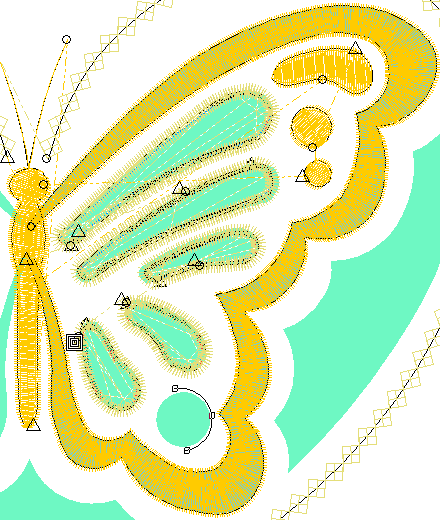
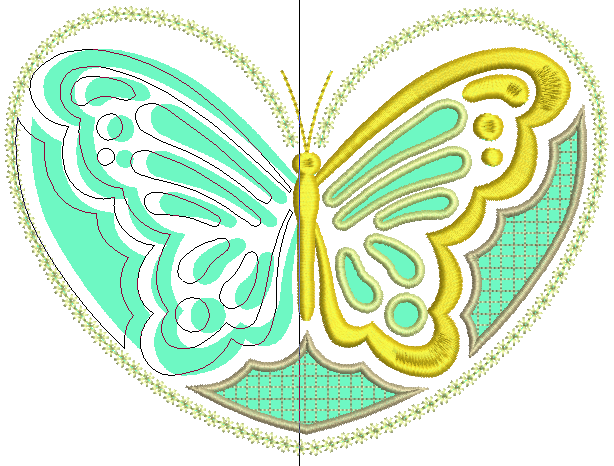
We're going to take a stock image file and turn it into embroidered cutwork.
- Go to the Artwork toolbox or Standard toolbar and click Insert Artwork. Always use this if you have electronic artwork which you want to use as a basis for a new design.
- When the dialog appears, select the 'Butterfly.png' artwork from the ... > Projects > Cutwork - Butterfly folder.

 | Use Artwork > Prepare Artwork for Embroidery to prepare bitmap images for automatic digitizing by reducing colors, removing image ‘noise’, and sharpening outlines. |
Process image
Because we will be using auto-digitizing techniques to convert parts of the artwork to embroidery, we need to process the image. The Prepare Artwork For Embroidery dialog is automatically displayed with the auto-digitize tools if the image is not yet processed.
- Select the image and click Prepare Artwork for Embroidery.

- In this case, there are only two colors in the design in any case. Click OK to accept. The artwork is now ready for use with the auto-digitizing tools.
 | Use Standard > Save Design to save the current design. |
Save project
Having set up our project, we'll save the design file to disk straight away.
- Click the Save icon and give the project a name.
- The software will default to the My Embroidery folder under Users. Navigate to the Projects folder or a folder of your choice.
- Click Save.
Remember to save your design at regular intervals.
Convert artwork to embroidery
First of all, we will convert what we can of the artwork directly to embroidery.
 | Use Auto-Digitize > Click-to-Turning Fill to digitize narrow column artwork shapes with satin stitch. |
 | Use Auto-Digitize > Click-to-Centerline to digitize centerlines in artwork with run line stitches. |
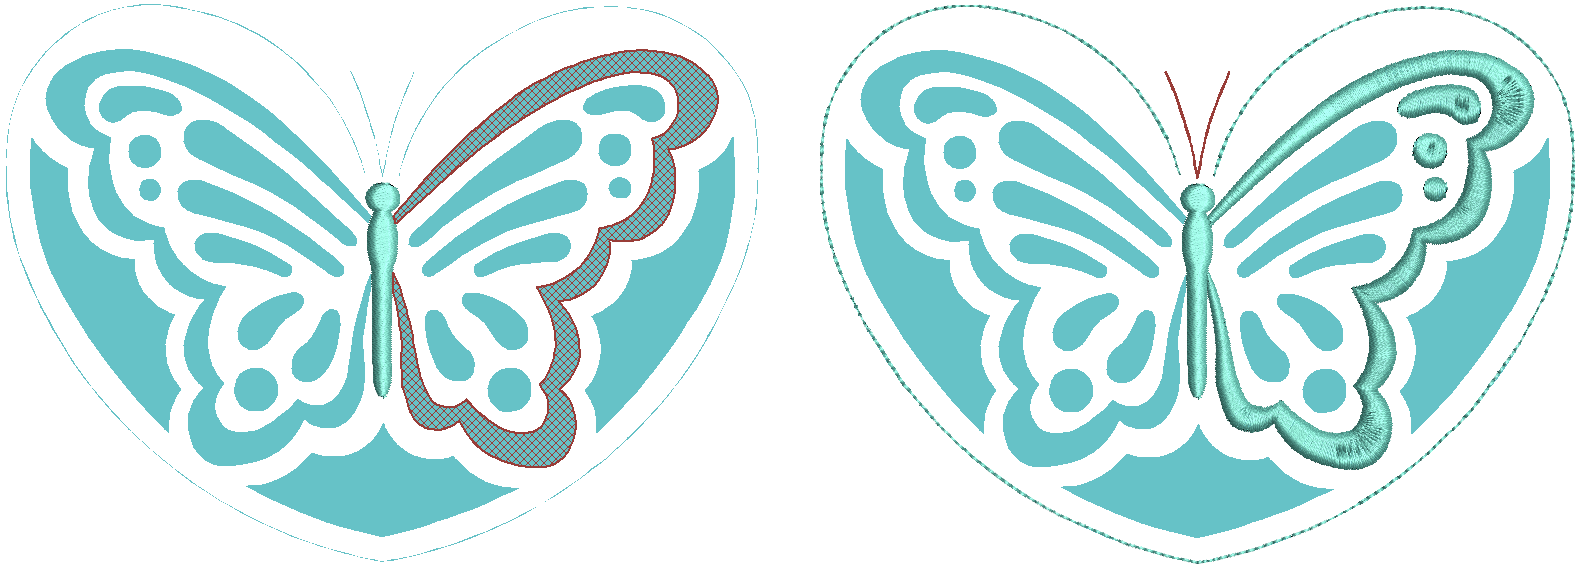
Convert butterfly body, border and wing to embroidery
In this step, we are going to convert the body, antenna, heart-shape outline, and wing details of the butterfly.
Use Click-to-Turning Fill for the right wing, three wing details and body as shown.
Use Click-to-Centerline for the antenna and the heart-shape outline.
 | Use Select > Select Object to select an object or group. Or drag a selection marquee to select multiple enclosed objects or groups. |
 | Use Select > Reshape to adjust object outlines, stitch angles, start and end points, curved lines, etc. |
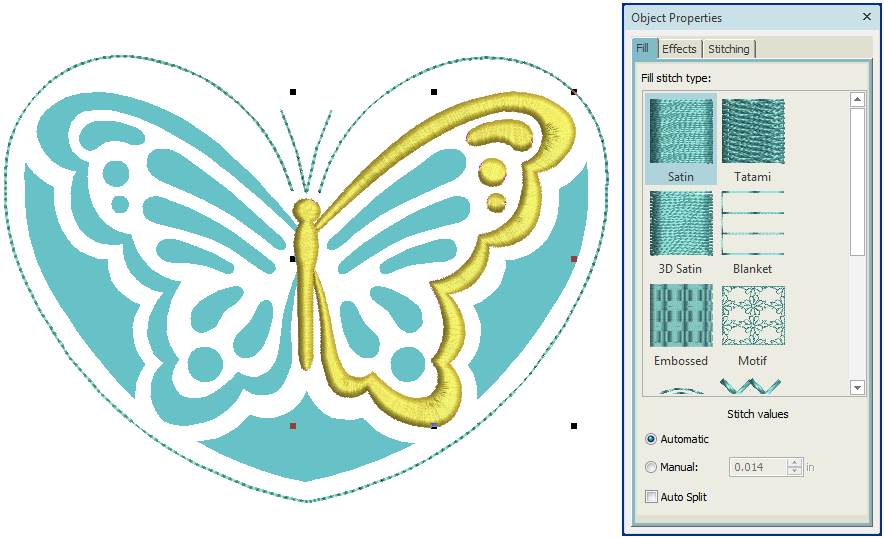
Adjust embroidery details
The converted objects use default settings. We will adjust these a little.
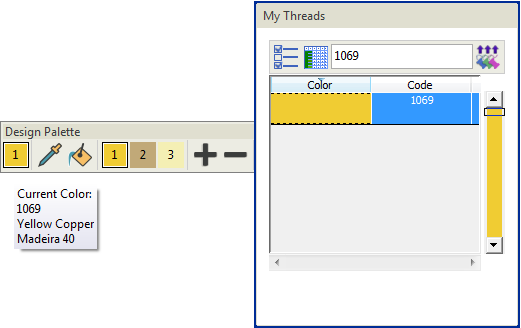
- Select the body, right wing and the three wing details and choose 'Yellow Copper' from the Design Palette.
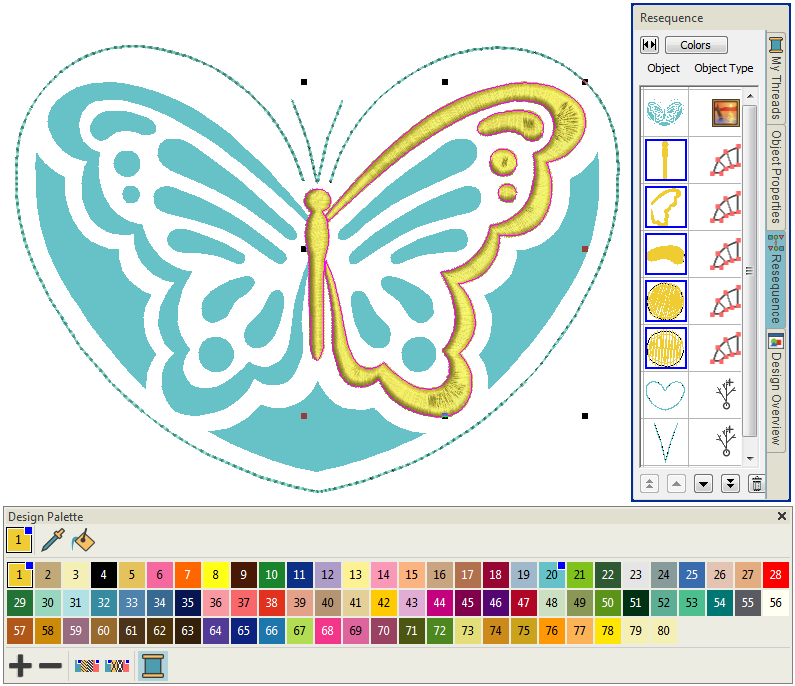
Open Object Properties and untick Auto Split. For the stitch length created when converting artwork, it is probably best to stick with satin. A nice alternative may be to use 3D Satin instead.
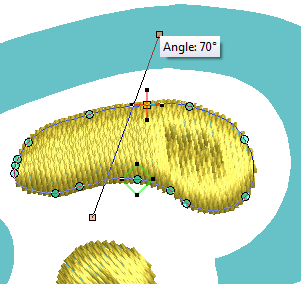
Select the object and click the Reshape tool. Notice the stitch angle of the objects is at 90°. Most fabric weave runs at 90° or 0°. As a rule of thumb, you need to set the embroidery stitching to sew in contrast to the weave.
Adjust the stitch angle by click-&-dragging the angle line as shown.
| Use Select > Select Object to select an object or group. Or drag a selection marquee to select multiple enclosed objects or groups. |
 | Use Edit Objects, Appliqué or Lettering / Monogramming > Break Apart to split composite objects - monograms, appliqués, lettering, etc - into components. Allows each to be edited individually. This tool is also available via Edit menu. |
Adjust run lines
We are now going to adjust settings for the heart-shaped border.
- First, use the Break Apart tool for the branched heart-shaped border.
- Select the border and open Object Properties. Choose Motif line.
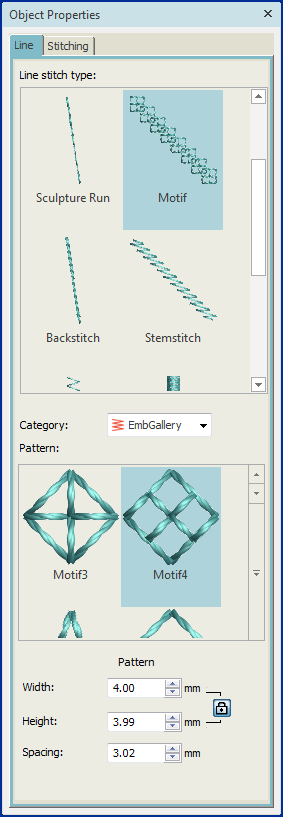
Experiment with different patterns until you find one you prefer.
- In the Design Palette, select 'yellow copper' for the antenna object and 'pale canary' for the outline.

Digitize cutwork
We can now digitize the cutwork for the butterfly wings.
 | Use Cutwork / Stumpwork > Digitize Cutwork Border to create cutwork objects with up to five layers of embroidery and cutting components, including stabilizing runs, tackdown runs, cuts, embroidery, and net fills. |
Digitize wing patterns
You digitize cutwork in much the same way as you digitize appliqué objects. However, because the number and type of cutwork components varies, you first select a border type which suits the type of work you are doing.
Click the Digitize Cutwork tool. The Cutwork docker opens.
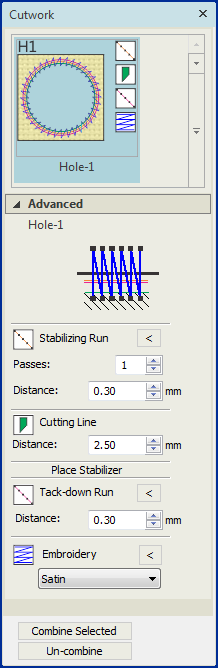
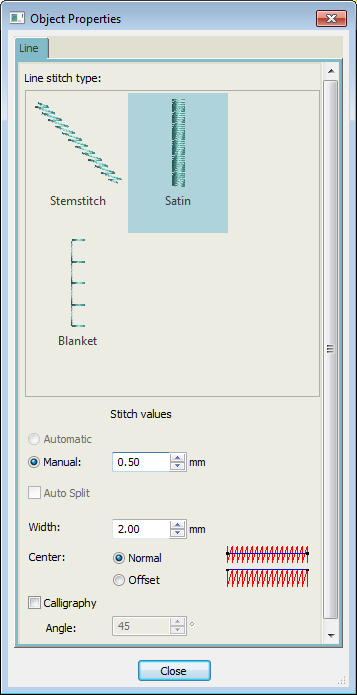
Choose the H1 border type in the Application list and choose Satin from the Embroidery droplist.
Open the Object Properties by clicking the arrow next to the Embroidery option. Set Width to 2 mm.
Choose 'pale canary' from the Design Palette and start digitizing cutwork objects for the butterfly wing.
| Use Cutwork / Stumpwork > Digitize Cutwork Border to create cutwork objects with up to five layers of embroidery and cutting components, including stabilizing runs, tackdown runs, cuts, embroidery, and net fills. |
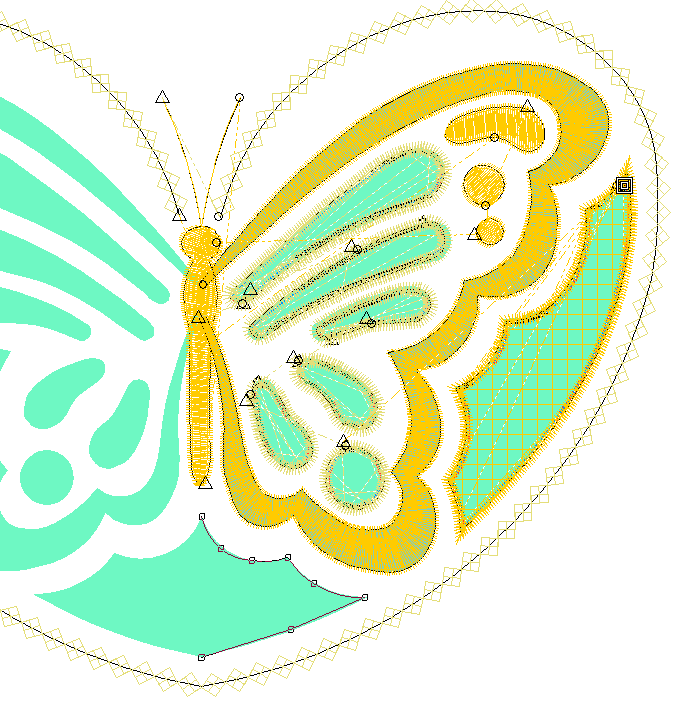
Digitize decorative cutwork panels
Having digitized the wing cutwork details, we can concentrate on the decorative cutwork panels surrounding the wings.
- This time, choose Satin Line together with the H3 border type in the Application list.
This creates a hole with 'net fill' and covered edges. A stabilizer is attached after cutting, fixed by a tackdown component, then net fill and final embroidery is stitched out.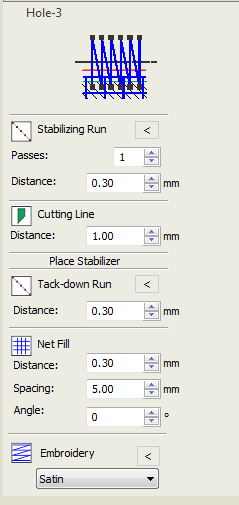
- Again selecting the Digitize Cutwork tool, digitize an outline around the decorative outer panels using the beige color.
- Digitize two objects - one on the right, and the one in the center.
Mirror wing objects
We can now duplicate the digitized objects and mirror them to create the left-hand wing of the butterfly.
 | Use Layout > Mirror-Copy Horizontal to mirror and copy selected objects horizontally. |
Mirror objects
Duplicating and mirroring not only save us having to digitize twice, but ensures a perfectly symmetrical result.
- Select all components of the right-hand butterfly wing and decorative panel.
- Go to the Layout toolbox and click Mirror-Copy Horizontal.
Drag the duplicated objects into the position.
Finalize design
Before stitchout, there are a number of steps we should take to improve the stitching sequence and minimize jumps and travel runs.
 | Use Edit Objects > Resequence Manually to show or hide Resequence docker. Use it to resequence objects and color blocks in a design. |
| Use View > Show Design to show or hide design elements. Click to open droplist of view settings. |
 | Click View > TrueView to show or hide simulation of stitched embroidery. |
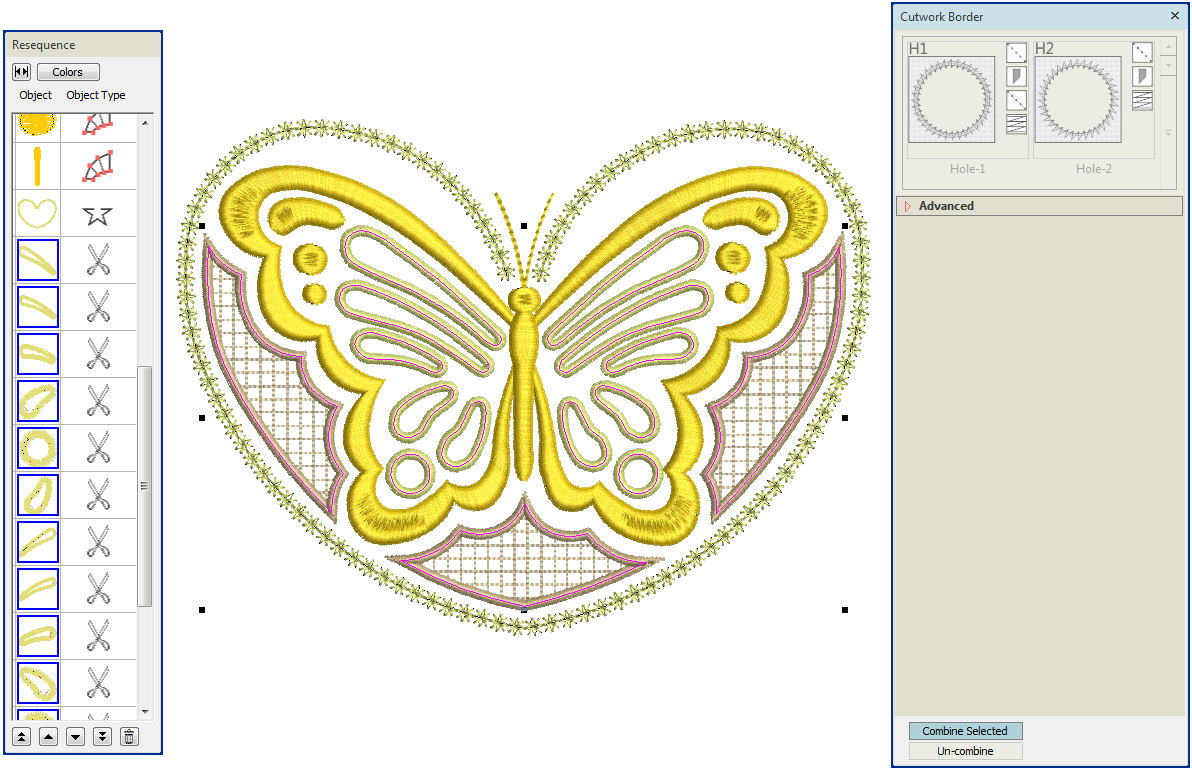
Check stitching sequence
When working with embroidery designs, you need to understand the stitching sequence, or order in which objects are stitched out. The stitching sequence is initially defined by the digitizing sequence - i.e. the order in which you created the objects. It's always a good idea to check this before stitching out. You can always fine-tune it in order to minimize color changes and travel runs.
- Turn off the artwork backdrop and turn off TrueView.
- Starting with the topmost object in the Requence docker, select each one in turn to view its place in the stitching order. Like-colors should be stitched with like and objects placed consecutively in such a way as to minimize jumps and travel runs. Details and lettering should be stitched last.
- Drag-&-drop objects or use dialog buttons to change their position in the sequence. Place them in a logical sequence to minimize the amount of movement on the machine.
- Select all the cutwork objects and click Combine Selected in the Cutwork Bar. This ensures that all cutting needle components are stitched together.
 | Use Zoom > Zoom to draw a marquee around the area you want to view in detail. |
| Use Edit Objects > Resequence Manually to show or hide Resequence docker. Use it to resequence objects and color blocks in a design. |
| Use Select > Reshape to adjust object outlines, stitch angles, start and end points, curved lines, etc. |
Check entry & exit points
We should now check entry & exit points of individual objects.
- Turn TrueView off and zoom into the design.
- Select the first object and click Reshape.
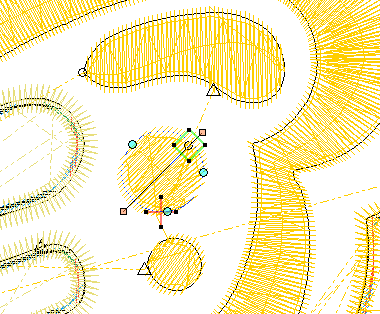
- Press the <Tab> and <Shift + Tab> key combinations to cycle forwards and backwards through the stitching sequence. The entry point is indicated by a diamond shape, the exit point by a cross. It will be clear to you if some need to be changed in order to minimize traveling distance.
- Drag-&-drop entry and exit points as necessary. Make sure each object ends as near as possible to where the next begins.
 | Use View > Stitch Player to simulate embroidery design stitchout onscreen in either stitch or TrueView. |
- Do a final check with Stitch Player.

 | Use Output Design / Standard > Print Preview to preview design worksheet. Print from preview window. |
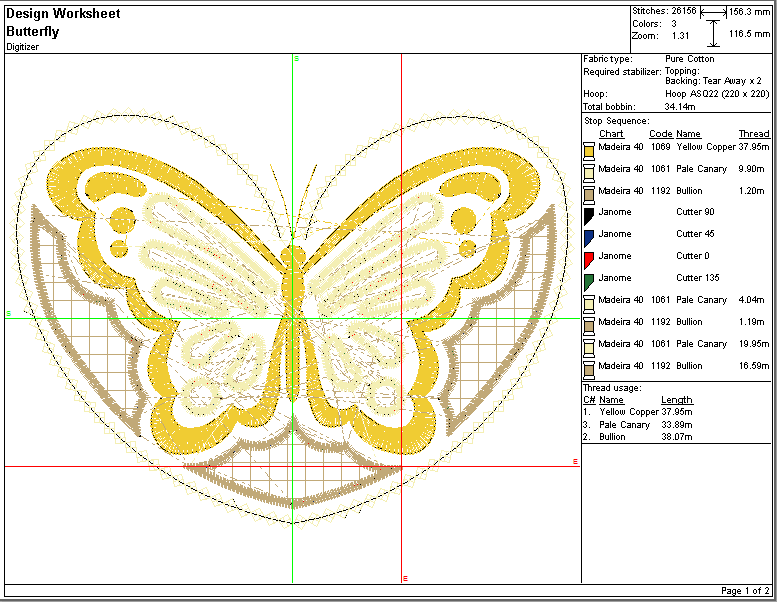
Preview design printout
Finally, let's preview the design and check our threads and other details. The design worksheet contains a design preview and essential information, including design size, color sequence, threads, fabric and required stabilizer, as well as the total amount of thread required.
Go to the Output Design toolbox and click Print Preview. In addition to thread information, the design worksheet contains information about the cutting needles and the order in which they will be used on the machine. These are listed as 'Cutter 90', 'Cutter 45', etc.
- Print out as required. You are now ready for stitchout.
A final design is included in your Projects > Cutwork - Butterfly folder. Check your solution against this design