Birthday card
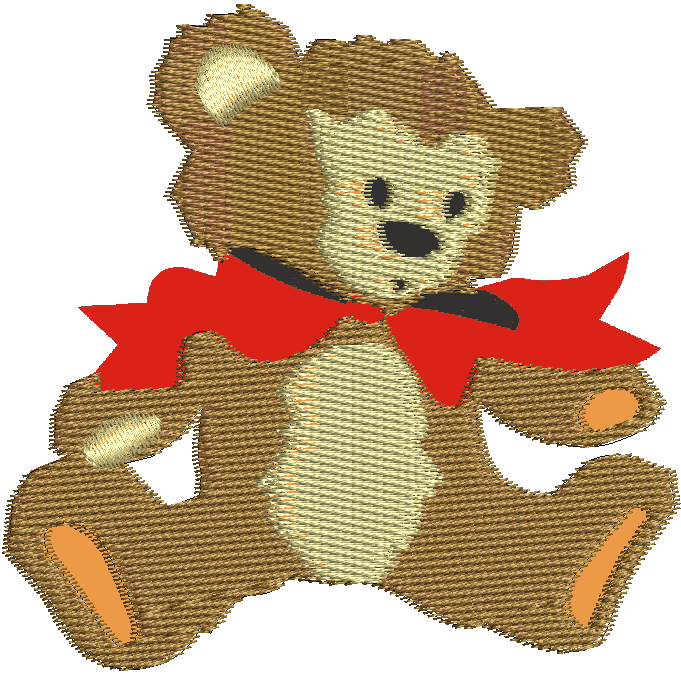
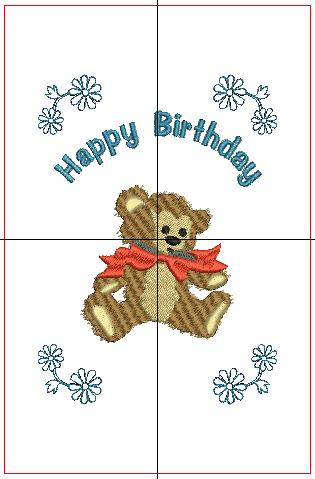 In this project, we're going to take a stock image file included in your Embroidery Library and turn it into an embroidered birthday card. We'll use a motif to provide an attractive border for the design and add some lettering. For the purposes of the project, we'll use stock threads. The project will show you a range of both manual and automatic digitizing methods to create embroidery from prepared artwork. You'll see just how simple and fun it is creating projects in your embroidery software.
The project assumes familiarity with basic techniques such as zooming and displaying stitches. All steps required to complete the project are provided below. For further information, you are referred to the User Guide.
A final design is included in your My Embroidery > My Projects > Digitizing - Birthday Card folder. Check your solution against this design. It's always good practice to analyze designs to see how they have been created and keep adding to your arsenal of embroidery digitizing techniques.
Set up project
We’re going to take a stock image file and turn it into an embroidered birthday card. To begin with, we need to open and save a new design file and set up our work environment.
Use Manage Designs > New Blank Design to create a blank design based on default fabric settings. |
 | Use Artwork / Auto-Digitize / Standard > Insert Artwork to import graphic files - both bitmap and vector - for use as digitizing backdrops or for auto-digitizing. This tool is also available via File menu. |
Get started
First, we'll set up a blank design file and import some artwork.
- Open the software using the desktop icon or the Windows Start menu.
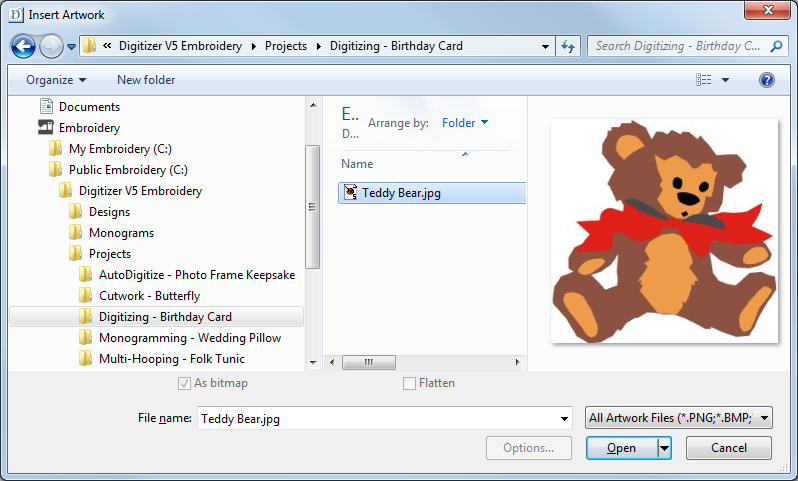
- Go to the Use Artwork toolbox and click Insert Artwork.
- When the Open dialog appears, Navigate to the Digitizing - Birthday Card folder as shown and select the ‘Teddy Bear.jpg’ artwork
 | Use Customize Design > Auto Fabric to change the properties of the design for stitching on a different fabric. |
Choose fabric
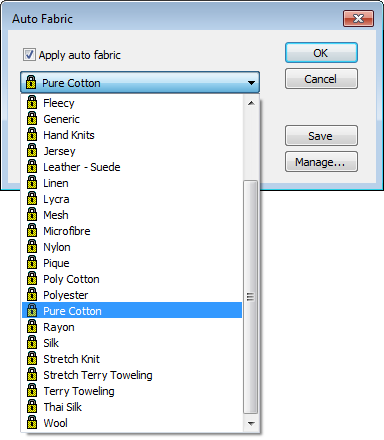
Your embroidery software provides a set of optimized fabric settings so that the software will take into account the type of fabric you are stitching on.
- Go to the Customize Design toolbox and select Auto Fabric Type.
Choose a light weight fabric or any other you wish to stitch out on. See also Fabrics & densities.
 | Use Layout > Define Work Area to open the Easy Layout Work Area dialog to define either a rectangular or round work area of a specified size. |
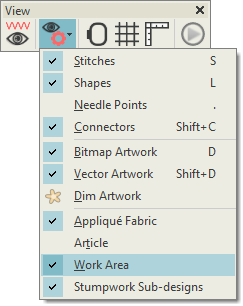
 | Use View > Show Design to show or hide design elements. Click to open droplist of view settings. |
Set up work area
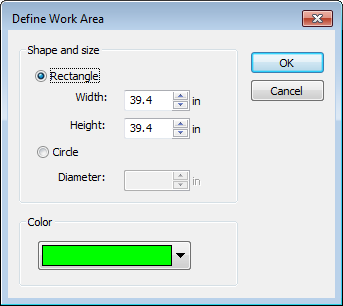
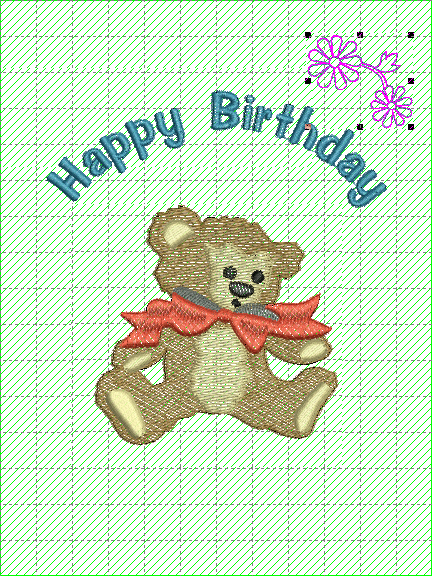
The card is 14cm x 18cm. We'll set up a work area accordingly.
- Go to the Layout toolbox and click the Define Work Area button.
- Set up work area of 12 x 16 to allow for a margin. See also Work areas.
- Make sure Work Area is activated in the Show Design droplist.
 | Use Select > Select Object to select an object or group. Or drag a selection marquee to select multiple enclosed objects or groups. |
Size artwork
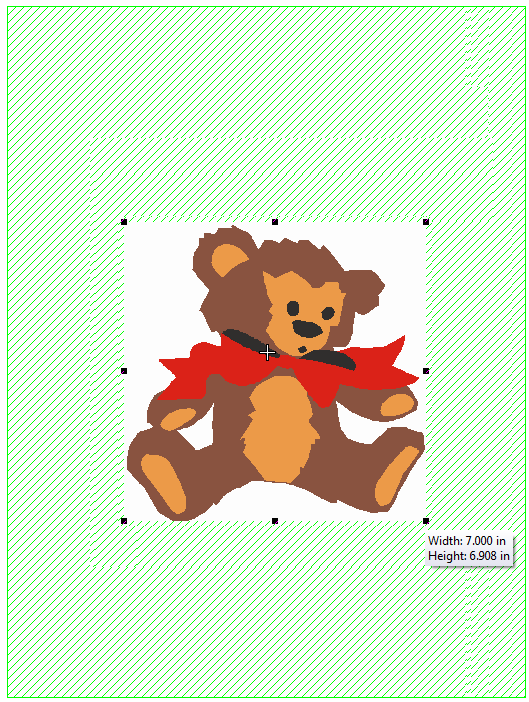
The inserted artwork is a little too big for our work area.
- Selecting it, drag the sizing handles and scale to fit, allowing enough space for lettering and borders. Roughly 7" in width should be sufficient.
- Drag it into position so it is sitting in the vertical center of the work area, leaving space for the lettering above.
| Use Select > Select Object to select an object or group. Or drag a selection marquee to select multiple enclosed objects or groups. |
 | Use Artwork > Prepare Artwork for Embroidery to prepare bitmap images for automatic digitizing by reducing colors, removing image ‘noise’, and sharpening outlines. |
 | Use Artwork > Lock to lock selected objects into position for protection. This tool is also available via Arrange menu. |
Prepare artwork
We will use a combination of manual and automatic digitizing techniques to create this design. Before applying automatic digitizing, you frequently need to improve or 'clean up' artwork. In fact, the software will not let you use the auto-digitizing tools until the image has been processed.
- Go to the Artwork toolbox.
- Selecting the image, click the Prepare Artwork for Embroidery tool.
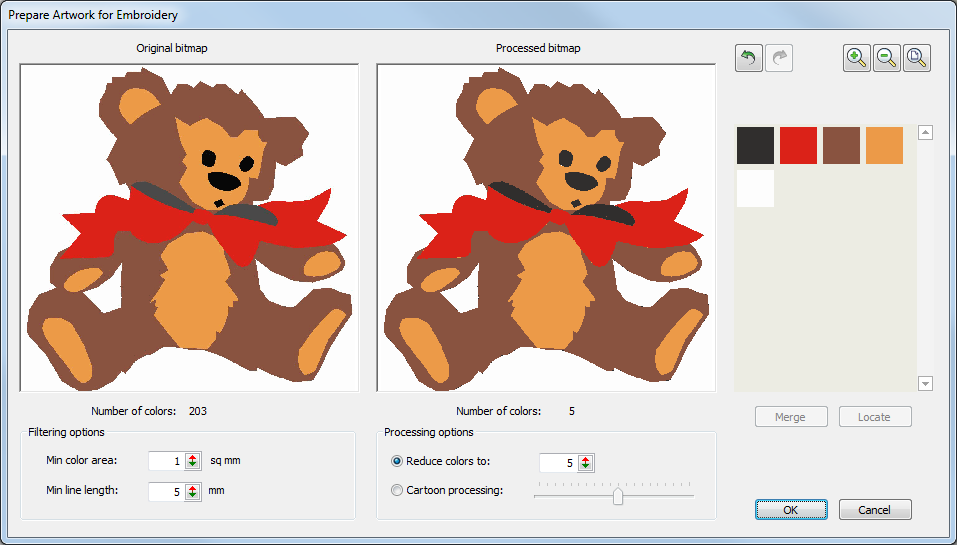
- Set the number of image colors to 5 and click OK. The artwork can now be used directly with the automatic digitizing tools. See also Process images.
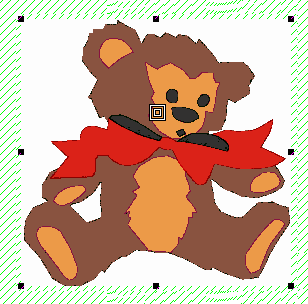
- Finally, right-click the image and select Lock from the popup menu or press <K> to prevent it from moving unintentionally.
If the artwork does not appear in design window, select Show Design > Bitmap Artwork or press <D> to make sure it is on.
 | Use Design Palette > Change Design Color to show or hide the My Threads docker to find threads from different charts and change design colors. |
Set up design palette
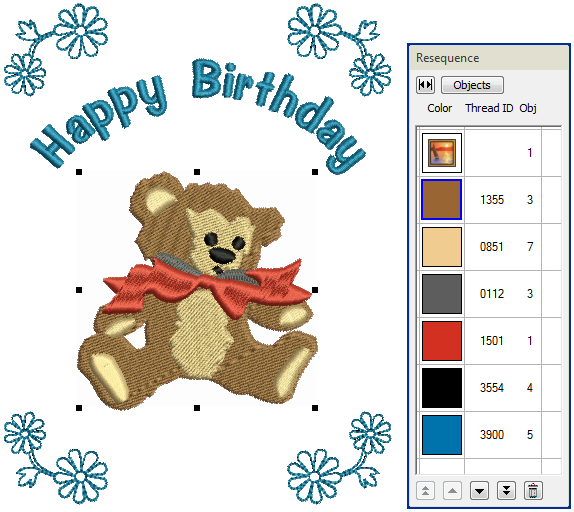
Before digitizing, it is good practice to analyze the artwork, work out the thread colors you want to use, and set up your color palette accordingly. For this design, we'll be using six colors. From the Design Palette, click Change Design Color to open the My Threads docker. From the default thread chart, choose colors shown. For this project we use Isacord 40 threads, but you can use whatever thread chart is convenient. See also Design colors.
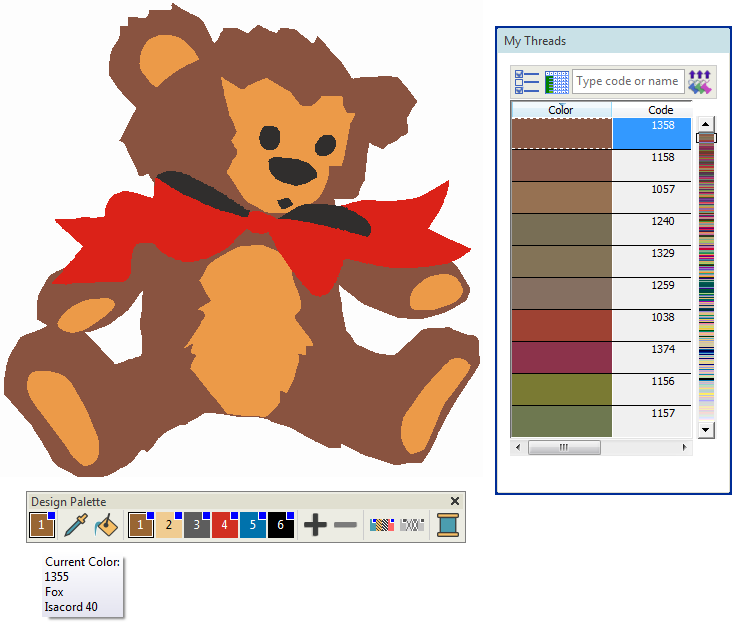
You can add, remove, or replace treads from the Design Palette at any time.
 | Use Standard > Save Design to save the current design. |
Save project
Having set up our project, we'll save the design file to disk straight away.
- Click the Save icon and give the project a name.
- Navigate to the Projects folder or a folder of your choice.
- Click Save.
Remember to save your design at regular intervals.
Digitize teddy bear head
We will now digitize the teddy bear's head using manual digitizing techniques.
 | Use Digitize > Digitize Closed Shape to create closed shapes using either outline or fill stitching. Left-click for corner points, right-click for curves. |
 | Use Context > Fill to fill closed shapes with the current fill stitch type. |
Digitize head
First, digitize the outline of the head.
- Zoom into the image by pressing <B> and dragging a bounding box around the head.
- Select brown from the Design Palette.
- Selecting the Digitize Closed Shape tool from the Digitize toolbox and make sure Fill is selected in the Context toolbar.
- Digitize an outline around the teddy's head - left-click for corner points and right-click for curve points - starting at the bottom-left. A rough outline is OK because we are attempting to imitate fur. See also Input methods.
- Overlap the gray shadow around the teddy's neck a little so that no gaps appear between adjacent areas of stitching.
- When you return to the starting point, press <Enter> to close the object and generate stitches.
| Use Select > Select Object to select an object or group. Or drag a selection marquee to select multiple enclosed objects or groups. |
 | Use Digitize > Digitize Holes to create holes in selected objects. Any closed object will do. |
Cut out face & ear
Now we need to cut out the holes for the teddy's face and ear.
- In order to cut holes for the teddy's face and ear, select the object you've just created.
- Select the Digitize Holes tool and digitize an outline of the areas you want to remove within the ear and face.
- Make sure you leave a sufficient overlap between adjacent areas of stitching.
 | Use Select > Reshape to adjust object outlines, stitch angles, start and end points, curved lines, etc. |
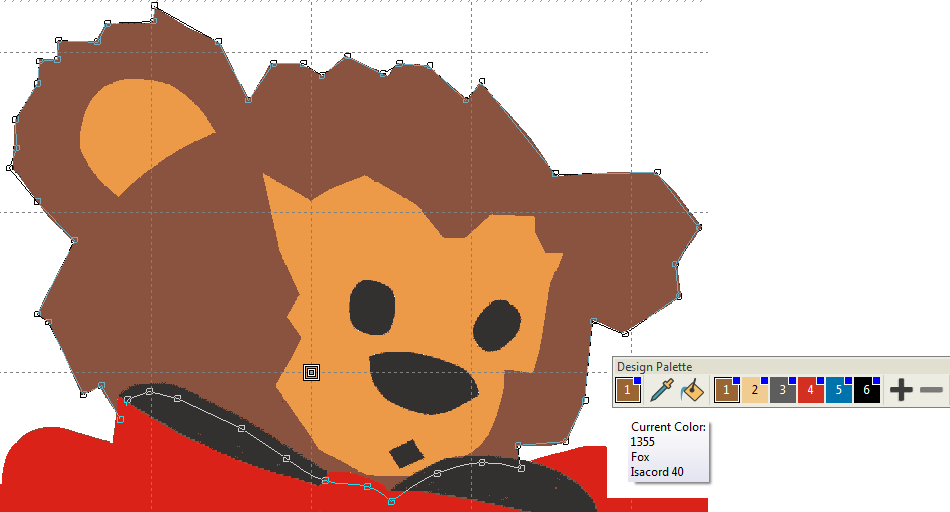
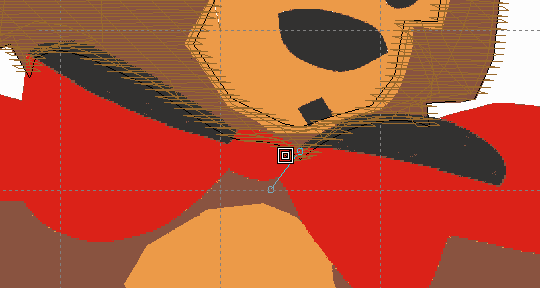
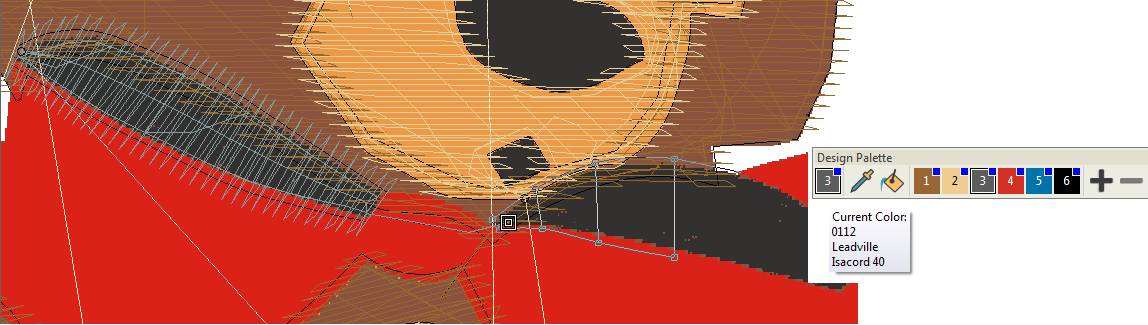
Reset entry & exit points
- Because we want to stitch out the teddy's body after the head has stitched out, we need to reset entry & exit points to minimize travel runs.
- Use the Select tool to click and select the teddy's head.
- Click the Reshape Object tool to view reshape nodes and entry & exit points. The entry point is indicated by a diamond shape, the exit point by a cross.
- Click and drag entry & exit points as shown. Make sure the stitching ends close to where the body begins.
Digitize teddy bear body
We will now digitize the teddy bear's body, again using manual digitizing techniques.
 | Use Digitize > Digitize Open Line to create a row of run or other outline stitching along a digitized line. Left-click for corner points, right-click for curves. |
Connect head to body
First we need to join the head and body areas with a travel run in order to avoid any unnecessary trim and tie-off stitches. The travel run will be hidden by the bow.
- Zoom into the image again.
- Using the Open Line tool, digitize a short connecting run from the head to the top of the body. See also Input methods.
| Use Digitize > Digitize Closed Shape to create closed shapes using either outline or fill stitching. Left-click for corner points, right-click for curves. |
| Use Context > Fill to fill closed shapes with the current fill stitch type. |
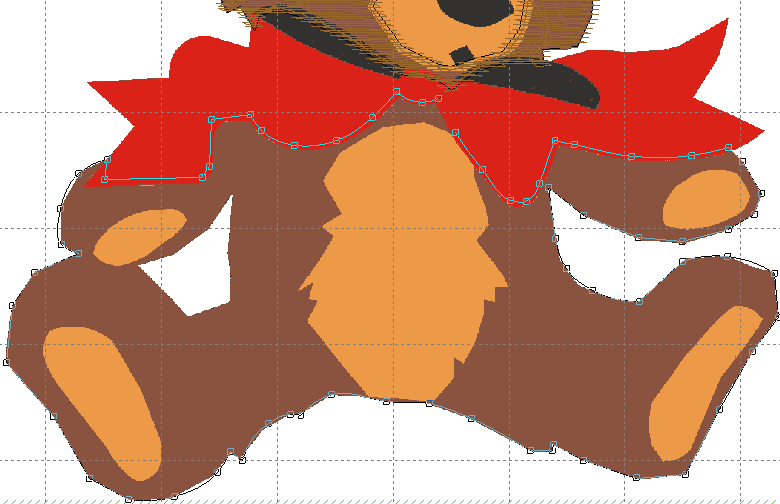
Digitize body
Now we can digitize the body using the same color we used for the head.
- Again selecting the Closed Shape tool, digitize an outline around the teddy's body - left-click for corner points, right-click for curve points. Make sure the Fill toggle is selected on the Context toolbar.
- Remember to overlap adjacent objects a little to prevent gaps forming. Because we're imitating fur, the outline doesn't have to be perfect.
- When you return to the starting point, press <Enter> to close the object and generate stitches. See also Input methods.
| Use Digitize > Digitize Holes to create holes in selected objects. Any closed object will do. |
Cut out tummy & paws
We need to cut holes for the teddy's tummy and paws.
- Select the Digitize Holes tool and digitize an outline of the areas you want to remove.
- Make sure you leave a sufficient overlap between adjacent areas of stitching.
Digitize details
We can now digitize the rest of our teddy's body including the blond body parts, the gray shadow, the red bow, as well as the face parts.
 | Use Auto-Digitize > Click-to-Fill to digitize large artwork shapes with tatami fill, preserving any holes within. |
 | Use Auto-Digitize > Click-to-Fill without Holes to digitize large artwork shapes with tatami fill, ignoring any holes within. |
 | Use Auto-Digitize > Click-to-Turning Fill to digitize narrow column artwork shapes with satin stitch. |
Digitize body parts
We could use the Closed Shape tool and manually digitize the teddy bear's blond body parts just as we did the brown areas. But because these areas stitch over top of the brown areas, and since we have already created an underlap, it is quicker to use auto-digitizing tools.
- Select a Click-to-Stitch tool and simply click the areas to be stitched in yellow thread. See also Digitize with Click-to-Stitch.
- Use Click-to-Fill for the face. This should preserve holes for eyes, nose and mouth.
- Use Click-to-Fill without Holes for the tummy.
- Use Click-to-Turning Fill for the smaller shapes.
 | Use Digitize > Digitize Blocks to digitize shapes of varying width with turning stitching. |
Digitize gray shadow
Now we can digitize the shadow behind the red bow. This object will overlap the brown of the teddy's neck, and underlap the red bow which will be the last object to stitch out. For this task we'll use the Digitize Blocks tool. This tool is ideal for digitizing borders of varying width and stitch angle.
- First select the dark grey from the Design Palette.
- Selecting the tool from the Digitize toolbox, create an outline around each of the shadow objects. Digitize the shape by marking reference points on alternate sides of the column - left-click for corner points and right-click for curve points. Remember to overlap adjacent objects a little to prevent gaps from forming. See also Input methods.
- When you return to the starting point, press <Enter> to close the object and generate stitches.
| Use Auto-Digitize > Click-to-Turning Fill to digitize narrow column artwork shapes with satin stitch. |
| Use Select > Reshape to adjust object outlines, stitch angles, start and end points, curved lines, etc. |
 | Use Auto-Digitize / Edit Objects > Smooth Shapes to remove excess reshape-nodes from embroidery objects for smoother outlines. |
Digitize red bow
Now we can digitize the red bow in the same way we digitized the teddy's blond body parts.
- Select the Click-to-Turning Fill tool and simply click the area of the artwork to be stitched in red thread.
- Change the stitch angle of the generated object using the Reshape tool. Drag-&-drop the stitch angle line to run diagonally across the shape as shown.
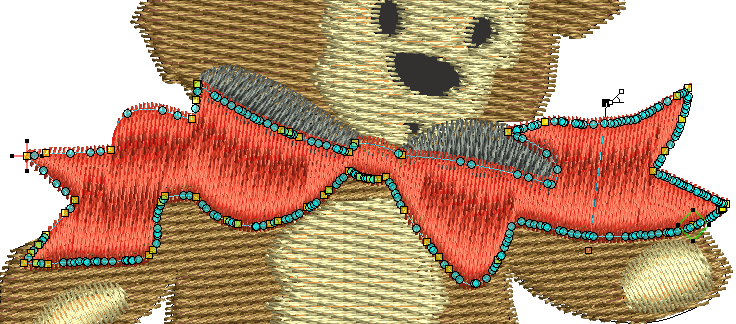
Use the Smooth Shapes tool to reduce the number of reshape nodes and even out the curves on generated objects. See also Reshape objects.
| Use Auto-Digitize > Click-to-Turning Fill to digitize narrow column artwork shapes with satin stitch. |
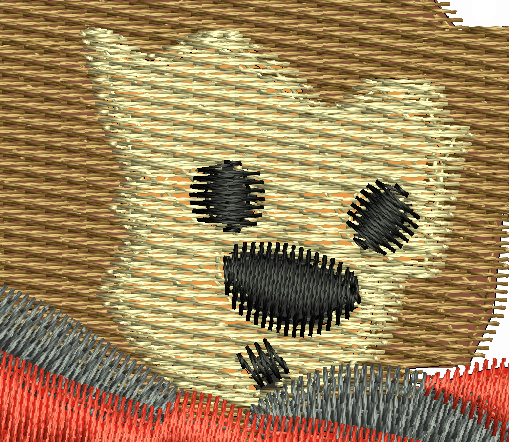
Digitize face parts
To finish off the teddy, we're going to digitize the eyes, nose and mouth.
- Select the Click-to-Turning Fill tool again and simply click the eyes, nose and mouth.
Add lettering
We'll return to do some fine-tuning of the bear, but right now we are going to add the lettering.
 | Use Lettering / Monogramming > Lettering to create embroidery lettering onscreen using native embroidery alphabets or TrueType fonts. |
| Use Select > Reshape to adjust object outlines, stitch angles, start and end points, curved lines, etc. |
Add lettering
Now we can add the words 'Happy Birthday'.
- Select the blue color from the Design Palette and select the Lettering tool.

- Select a font from the droplist - native embroidery or TrueType - and key in the words 'Happy Birthday'.
- Select the Circle CW baseline and adjust Height as shown.
- Select the lettering object and drag it into position above the teddy's head.
- Adjust font size using the resize handles.
- Adjust the arc using the reshape nodes.
- Finally, use the arrow keys to nudge the lettering into position.
Add decorative border
Using the same color as the lettering, we can now add an attractive border to the birthday card using a 'stamp' from the Embroidery Gallery.
 | Use Advanced Digitize > Motif Stamp to add motifs singly. Rotate, scale, or mirror as you add. |
| Use Select > Select Object to select an object or group. Or drag a selection marquee to select multiple enclosed objects or groups. |
Add embroidery decoration
Embroidery stamps are pre-defined design elements, such as hearts, leaves or border patterns, and are used to create decorative effects in your designs.
- Go to the Advanced Digitize toolbox and click the Motif Stamp tool.
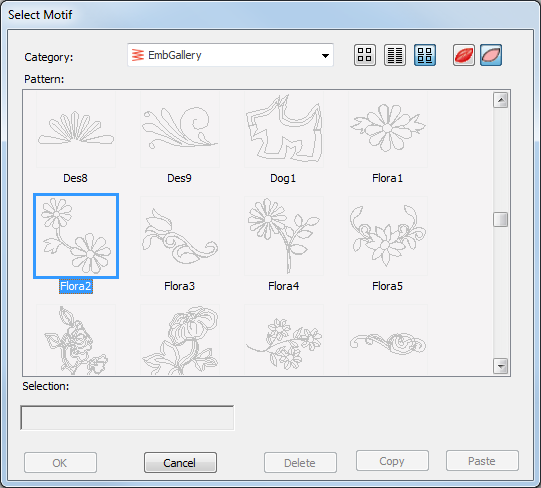
- Choose a suitable stamp for the border - e.g. 'Flora 2' - and click OK.
- Clicking two anchor points, place it at the top of the work area.
- Press <Esc> to escape and select the stamp using the Select tool.
- Click-&-drag into position and resize as preferred.
 | Use Layout > Mirror-Copy to Work Area Corners to copy selected object/s to each corner of the layout work area. |
Copy & mirror decoration
You can rotate, scale, or mirror embroidery stamps like any other object. Using the stamp we have already added, we can very simply clone, flip it to the other corners of the work area.
- Go to the Layout toolbox.
- Selecting the decoration with the Select tool, click the Mirror-Copy to Work Area Corners tool.
- Press <Enter> to confirm.

Fine-tune object details
We can now spend a bit of time improving the look of our embroidery objects by adjusting a few simple settings.
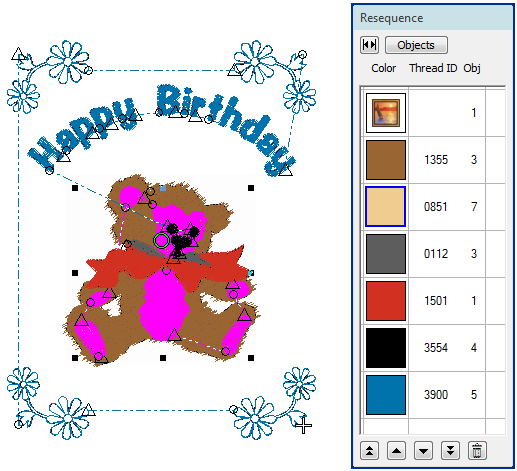
 | Use Edit Objects > Resequence Manually to show or hide Resequence docker. Use it to resequence objects and color blocks in a design. |
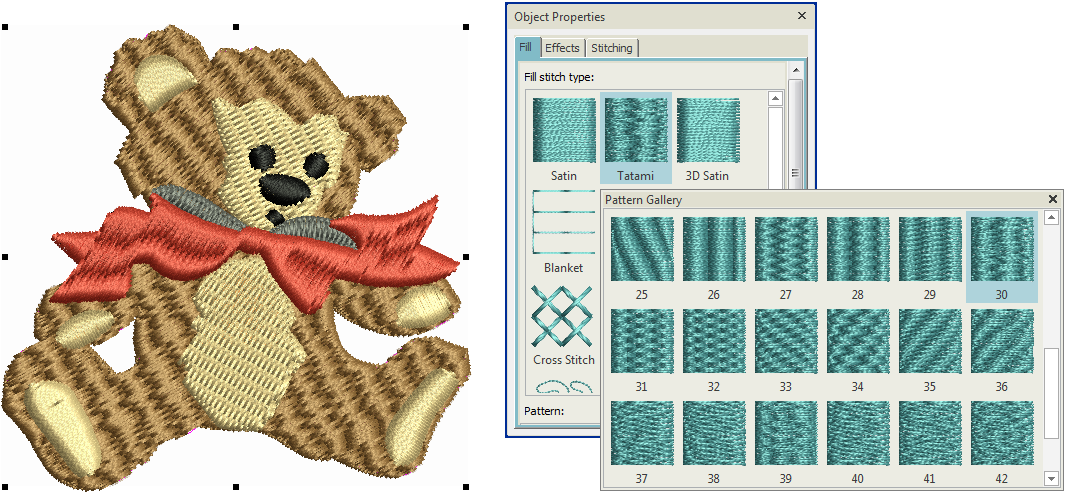
Apply pattern to body fur
First we'll adjust the stitch settings for the brown body parts to attempt to make the stitching a little more fur-like.
- Using the Resequence docker, select the head and body part.
- Open Object Properties and select a pattern from the Pattern Gallery.
.
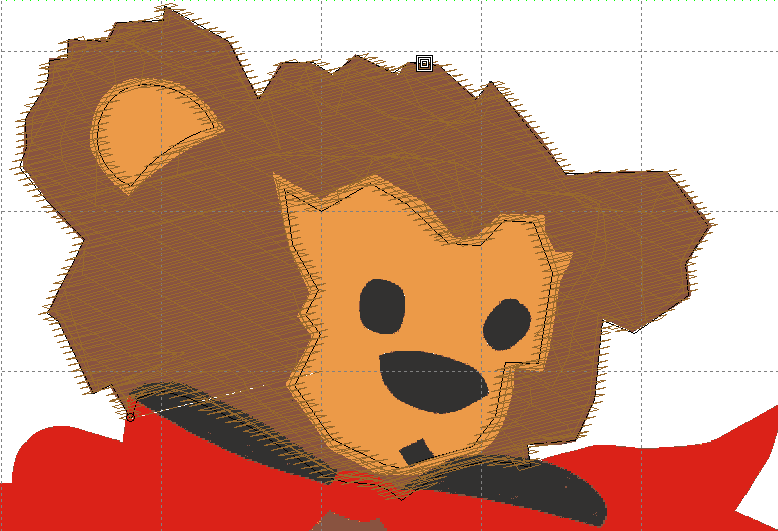
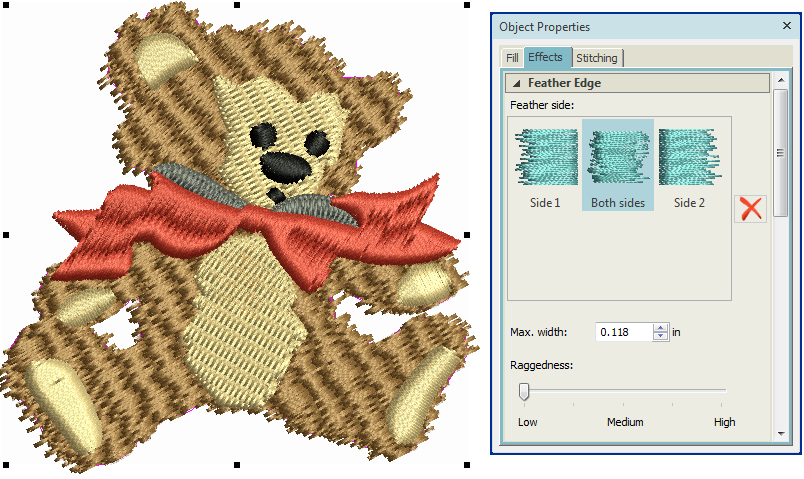
Apply texture to body fur
The Feather Edge setting creates rough edges to create shading effects or imitate fur or other fluffy textures.
- Again select both head and body parts and open select Object Properties.
- Select the Effects tab and choose Feather Edge as shown.
Finalize design
Before stitchout, there are a number of steps we should take to improve the stitching sequence and minimize jumps and travel runs. We'll also adjust stitch angles to help minimize the 'pull-push' effect.
.
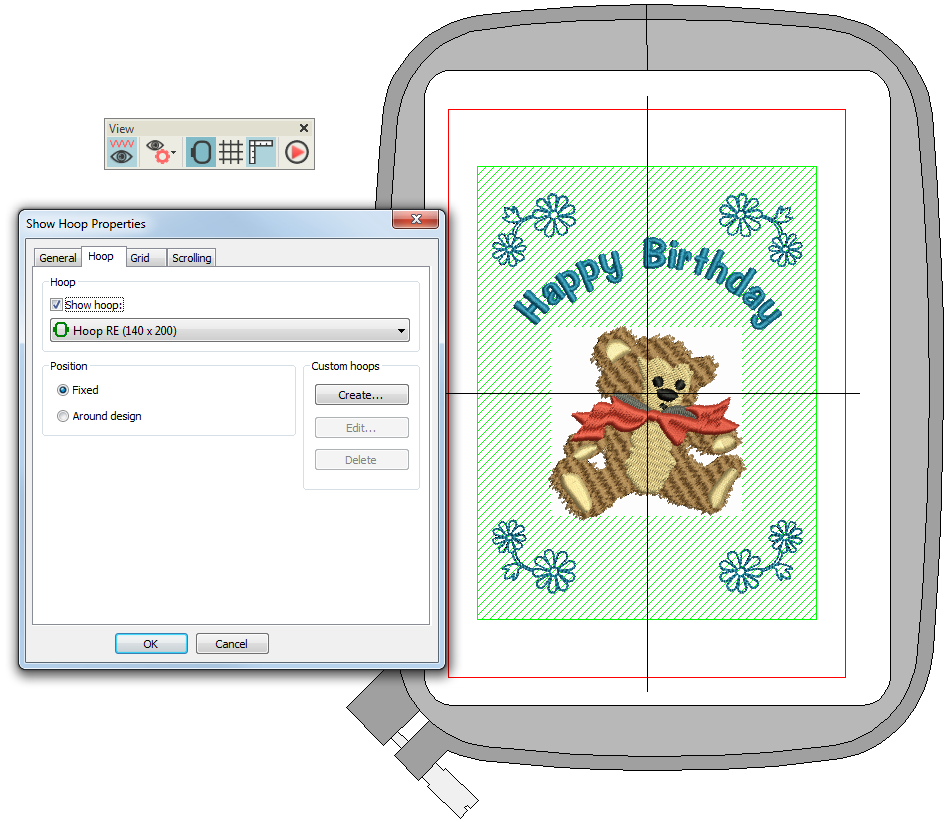
 | Click View > Show Hoop to show or hide hoop. Right-click for settings. |
Choose hoop
Hoops are needed to hold the fabric tight while stitching on your machine. We need to choose a hoop which can accommodate the entire work area we have defined for the design - 12cm x 16cm.
- Right-click Show Hoop.
- Choose a suitable hoop from the droplist in the dialog.
- Zoom out a little to see the entire hoop in the design window.
| Use Edit Objects > Resequence Manually to show or hide Resequence docker. Use it to resequence objects and color blocks in a design. |
| Use View > Show Design to show or hide design elements. Click to open droplist of view settings. |
 | Click View > TrueView to show or hide simulation of stitched embroidery. |
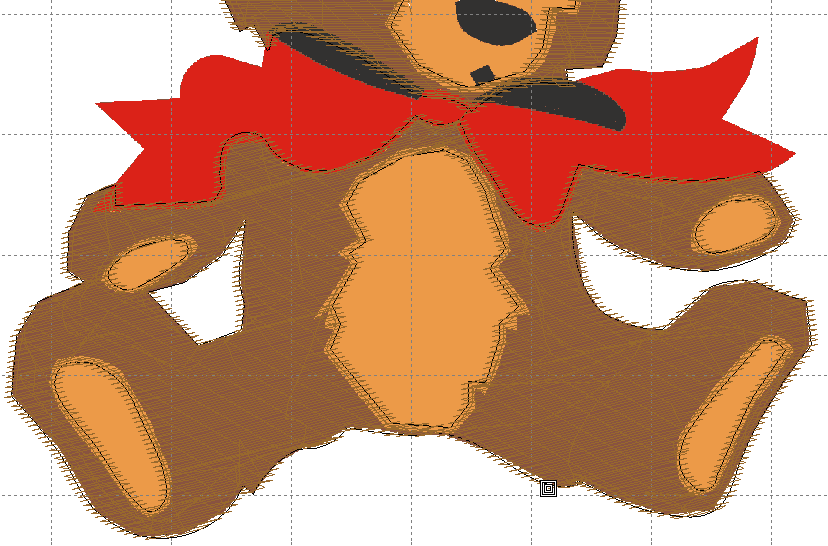
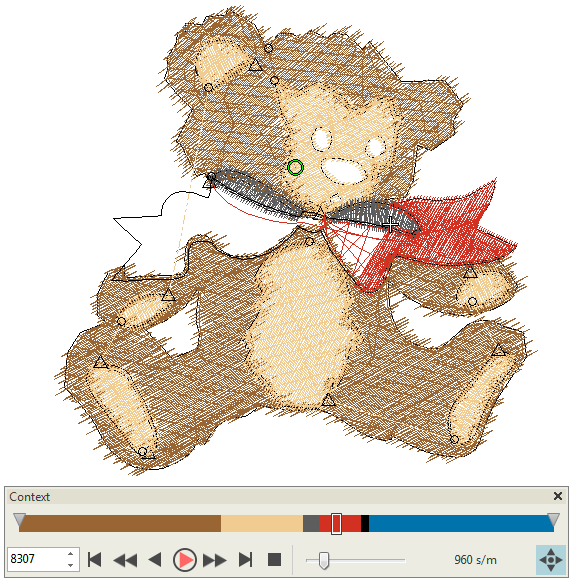
Check stitching sequence
When working with embroidery designs, you need to understand the stitching sequence, or order in which objects are stitched out. The stitching sequence is initially defined by the digitizing sequence - i.e. the order in which you created the objects. It's always a good idea to check this before stitching out. You can always fine-tune it in order to minimize color changes and travel runs.
- Turn off the artwork backdrop and turn off TrueView.
- Starting with the topmost object in the Resequence docker, select each one in turn to view its place in the stitching order. Like-colors should be stitched with like and objects placed consecutively in such a way as to minimize jumps and travel runs. Details and lettering should be stitched last.
- Drag-&-drop or cut-&-paste objects or use dialog buttons to change their position in the sequence. For instance, the blond objects will be stitched after the brown objects but before the red and black. Place them in a logical sequence to minimize the amount of movement on the machine.
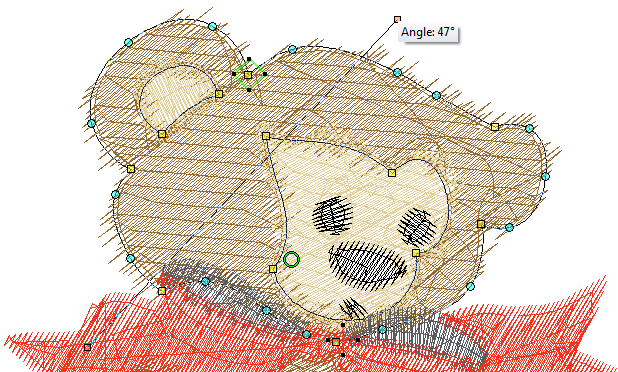
| Use Select > Reshape to adjust object outlines, stitch angles, start and end points, curved lines, etc. |
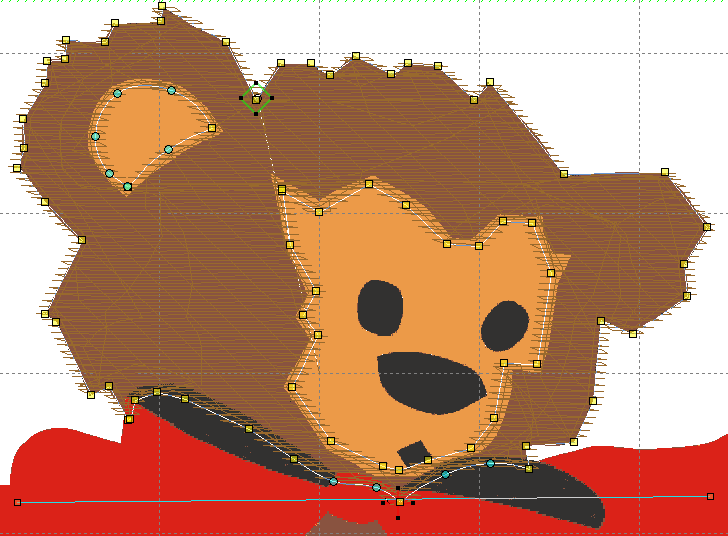
Adjust stitch angles
We'll now check the stitch angles of the teddy bear. Most fabric weave runs at 90° or 0°. As a rule of thumb, you need to set the embroidery stitching to sew in contrast to the weave.
- Again, select the first object in the stitching sequence and click Reshape.
- Press the <Tab> and <Shift + Tab> key combinations to cycle forwards and backwards through the stitching sequence.
- Note the stitch angle of each of the objects and adjust as required by click-&-dragging the angle line as shown.
- It is a good idea to set each object in slightly contrasting directions - e.g. 45°, 30°, and 60°.
 | Use Zoom > Zoom to draw a marquee around the area you want to view in detail. |
| Use Edit Objects > Resequence Manually to show or hide Resequence docker. Use it to resequence objects and color blocks in a design. |
| Use Select > Reshape to adjust object outlines, stitch angles, start and end points, curved lines, etc. |
 | Use View > Stitch Player to simulate embroidery design stitchout onscreen in either stitch or TrueView. |
Check entry & exit points
We should now check entry & exit points of individual objects.
- Zoom into the design.
- Select the first object - the head - and click Reshape.
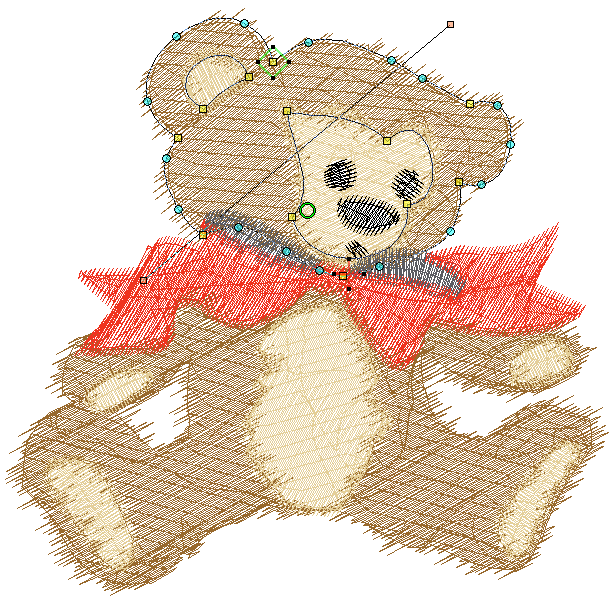
- Press the <Tab> and <Shift + Tab> key combinations to cycle forwards and backwards through the stitching sequence. The entry point is indicated by a diamond shape, the exit point by a cross. It will be clear to you if some need to be changed in order to minimize traveling distance.
- Drag-&-drop entry and exit points as necessary. Make sure each object ends as near as possible to where the next begins.
- Run Stitch Player for a final check.
 | Use Output Design / Standard > Print Preview to preview design worksheet. Print from preview window. |
Preview design printout
Finally, let's preview the design and check our threads and other details. The design worksheet contains a design preview and essential information, including design size, color sequence, threads, fabric and required stabilizer, as well as total thread required.
- Go to the Output Design toolbox and click Print Preview.
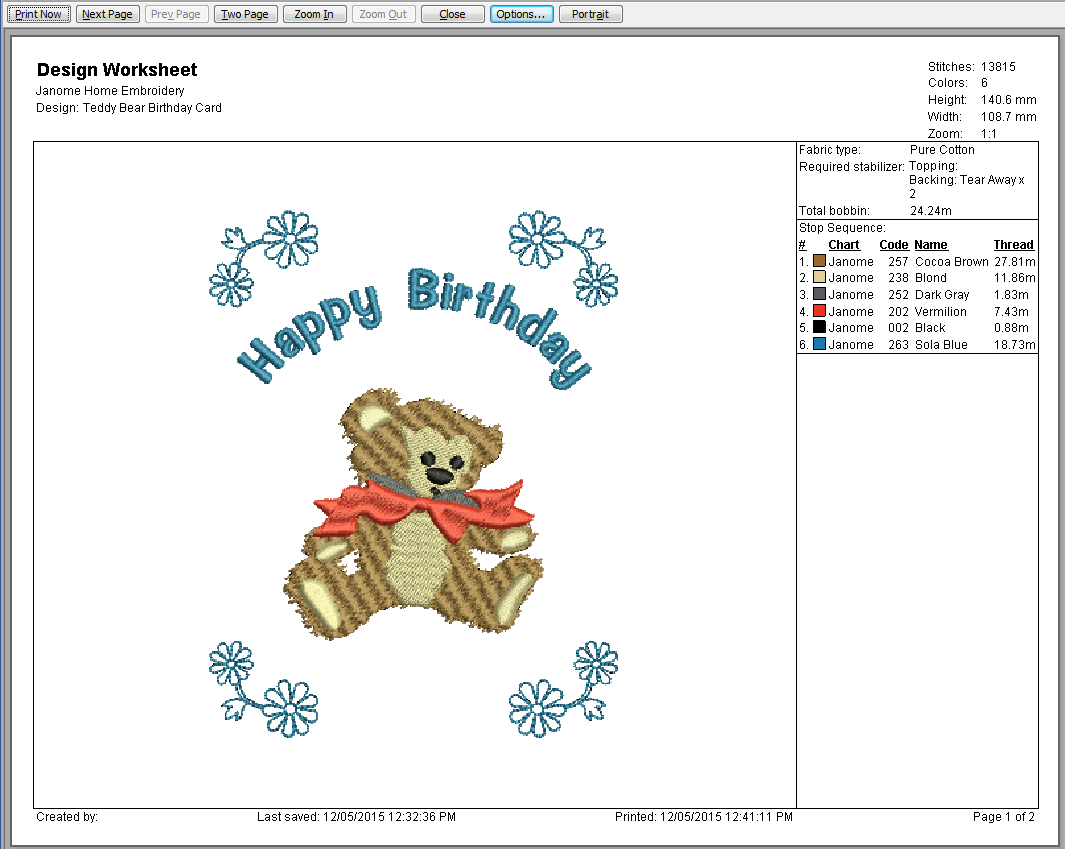
- Print it out as required. You are now ready for stitchout.
A final design is included in your My Embroidery > My Projects > Digitizing - Birthday Card folder. Check your solution against this design.