Digitize with Click-to-Stitch
The Click-to-Stitch tools provide everything necessary to digitize shapes in bitmap images automatically without using manual digitizing methods. These tools are useful for quickly creating embroidery objects from scanned images without having to manually digitize shapes.
It is easy with the Click-to-Stitch tools to double-click and inadvertently create double-layers of stitching. Check everything you do in the Resequence Docker and delete any unnecessary objects.
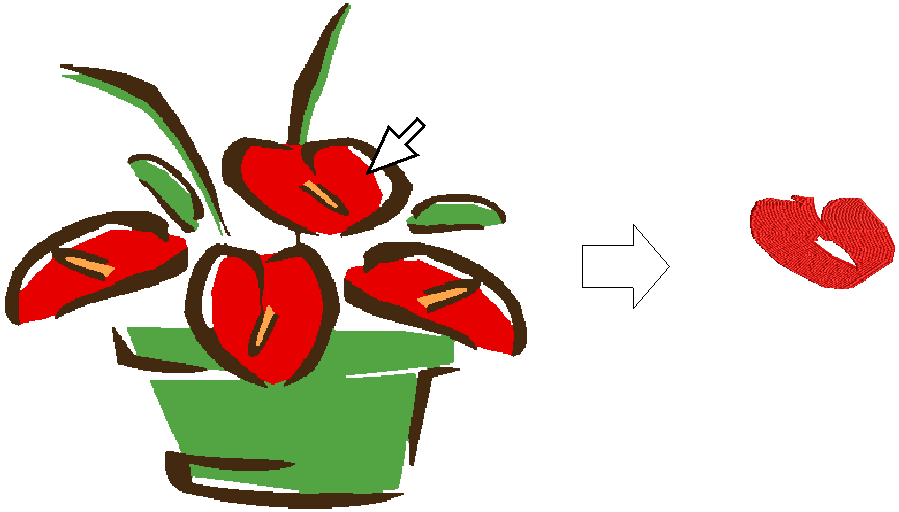
 | Use Auto-Digitize > Click-to-Fill to digitize large artwork shapes with tatami fill, preserving any holes within. |
 | Use Auto-Digitize > Click-to-Fill without Holes to digitize large artwork shapes with tatami fill, ignoring any holes within. |
 | Use Auto-Digitize > Click-to-Turning Fill to digitize narrow column artwork shapes with satin stitch. |
Digitize fills
Click-to-Stitch can be used to create ‘closed’ tatami fill objects, as well as objects with turning satin fills. Use Click-to-Fill to digitize large areas in your artwork with tatami fill stitching, preserving any holes within them. If you want holes ignored, use the Click-to-Fill without Holes tool. Use Click-to-Turning Fill to digitize narrow column shapes with turning satin stitching. Current properties are applied. You can modify these as required before or after using the tools. To digitize fills with Click-to-Stitch...
- Scan and process the artwork.
- Select a thread color from the Design Palette.
- Select the appropriate Click-to-Stitch input method.
- Click the shape you want to digitize.
- Digitize other filled shapes in the artwork in the same way changing thread color and input method as required. Click TrueView to check the result.
Stitches are generated according to current stitch settings. These can be modified. The currently selected color is used.

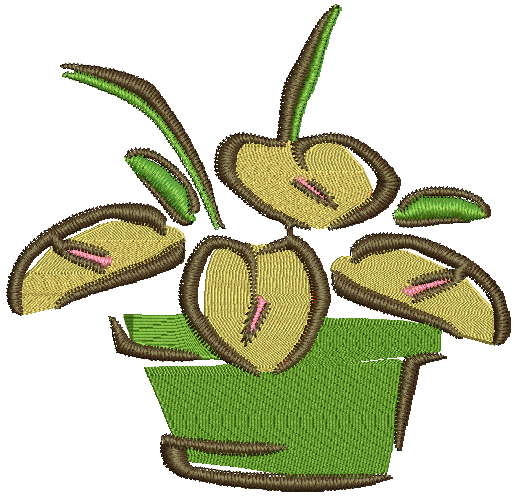
Matched to palette Digitized in current color
 | Use Auto-Digitize > Click-to-Outline to digitize boundaries of shapes with run stitching using current properties. |
 | Use Auto-Digitize > Click-to-Centerline to digitize centerlines in artwork with run line stitches. |
Digitize outlines
Use Click-to-Stitch to digitize boundaries and details with run stitching. Current properties are applied. You can modify the results as you wish. The method is the same as digitizing fills with Click-to-Fill. Generally you use Click-to-Centerline to trace existing outlines with run stitching. Click-to-Centerline will always find the center of the outline no matter how thick it is. Depending on its thickness, you may obtain double-lines with Click-to-Outline.

Click-to-Outline is generally more useful for detecting boundaries of shapes with no existing outlines.
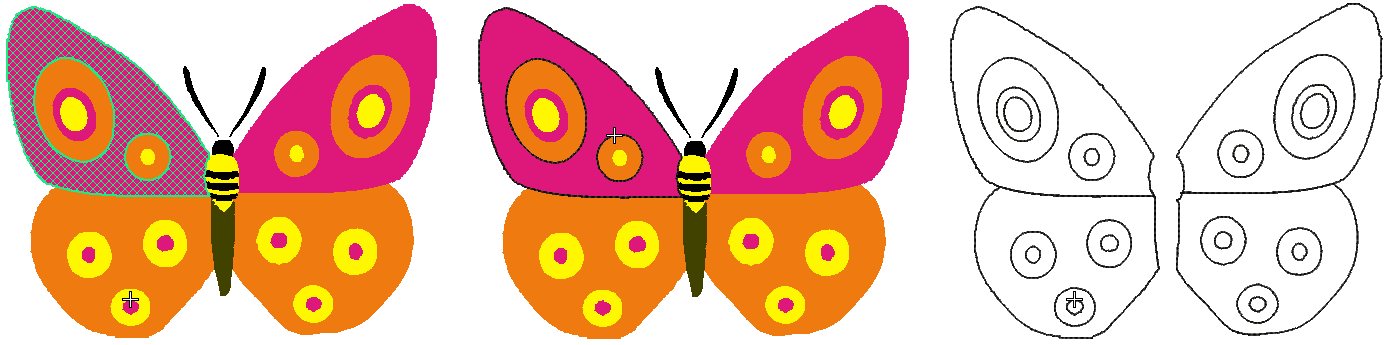
It is a good idea to turn off Match-to-Palette with the outlining tools. Generally you will want to select a dark color from the palette to emphasize outlines.