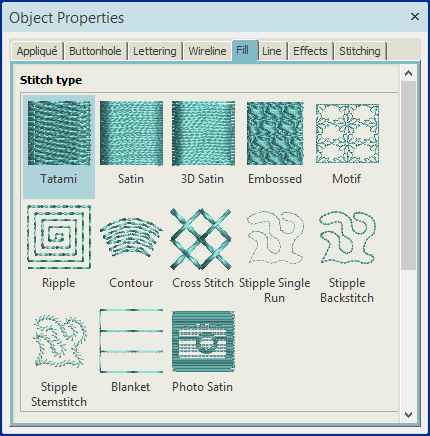
Object properties
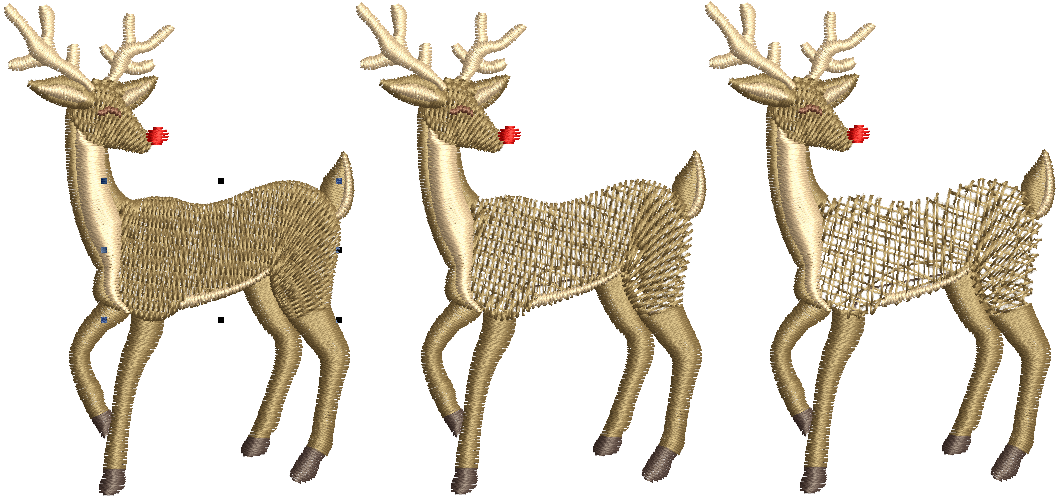
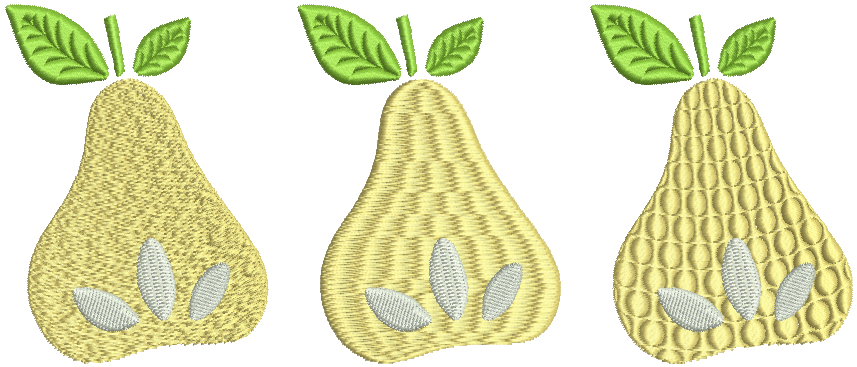
Designs are composed of ‘embroidery objects’. They are called ‘objects’ because they can be manipulated independently of each other. Like drawing objects, embroidery objects have defining characteristics or ‘properties’ such as color, size, position, and so on. They also have properties unique to embroidery such as stitch type and density. The most important property of an embroidery object is its stitch type. Other important properties include underlay type and pull compensation.
 | Use Edit Objects > Object Properties to preset properties or adjust them for selected objects. |
Access properties
When you start a new design, the software uses settings associated with the chosen fabric. Some properties can be modified on-screen – for example, you can change object size by scaling with selection handles. Others, such as stitch spacing or length, can be modified via the Object Properties docker. This docker is open by default.
- To change object properties, select the object/s to change.
If not already open, double-click to open the properties docker. If you select more than one object, only settings relevant to all are displayed.
- Select a tab and adjust settings.
- Click OK to apply changes.
Changing details of selected objects does not affect default settings, nor the properties of any objects not in the selection. Changes to object properties are preserved if an object is modified and regenerated.
 | Use Edit Objects > Copy Object Properties to make properties of a selected object current for the design. |
 | Use Edit Objects > Apply Object Properties to apply current settings to selected objects. |
Copy properties
You can make a selected object’s ‘actual’ properties ‘current’ for all new objects or apply them to other objects.
- To copy properties, select the object and click Copy Object Properties.
- Alternatively, right-click the object and use the popup menu command.
- Select the target object/s and click Apply Object Properties. The popup menu command is also available.

 | Use Customize Design / Edit Objects > Adjust Stitch Spacing to manually override stitch densities of selected objects or entire designs. |
Adjust stitch spacing
The software lets you change spacing of most stitch types across the whole or selected parts of a design. To override current properties, select the object, click the tool, and set a percentage adjustment - e.g. 150% to increase stitch spacing and thereby reduce overall density. Check the revised stitch count in the Status Bar. See also Fabrics & densities.