Connect directly to machine
 Many machines support direct connection via USB cable. To connect your PC and machine, make sure you use the USB cable provided with the machine. See also Machine connection.
Newer style sewing machines also support Wi-Fi connectivity. Wi-Fi is a local area wireless computer networking technology that allows electronic devices to a network using UHF and SHF ISM radio bands. Many devices can use Wi-Fi including personal computers, smartphones, digital cameras, and so on. Indoor connections can have a range of about 20 meters. Needless to say, the PC itself must support Wi-Fi as well as your sewing machine in order to make use of this connectivity.
To see if your machine supports Wi-Fi or USB cable connection, see Supported machine models.
.
Establish connection
If your machine supports both options, you need to let the software know which connection type you wish to use.
- Connect your PC and machine using the USB cable provided with the machine.
- The machine itself must be set to PC-Link Mode in order to receive designs via direct connection.
- Turn on your machine and select the current model in the Context toolbar. See also Machine selection.
- Go to the Machine menu and choose Connection Settings.
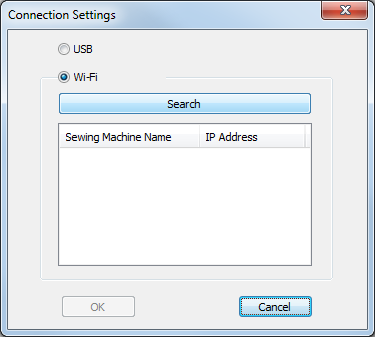
- Choose between USB cable connection or Wi-Fi. If you want the Wi-Fi connection, click Search.
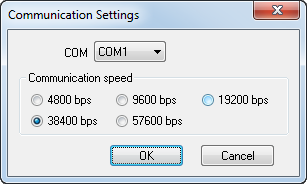
- Note that some older style machines use the serial port for direct connection. You will see this dialog. You will need to set the correct parameters which you will find in your machine manual.
- Insert the ATA PC card or USB stick into your machine if required. Both ATA PC card and USB stick can be attached at the same time.
 | Use Output Design / Context > Send a Design to send the current design to your machine for stitching. |
Send a single design to machine
- Open the design you want to send and select a suitable hoop. See also Supported hoops.
Click the Send a Design icon in the Output Design toolbox or Context toolbar. The software will check whether the selected hoop is supported by the destination machine and advise you.
- If the hoop is an MA Hoop, this may mean that the design must be split into more than one hoop position, and possibly more than one JEF file. See Output with multi-position hoops.
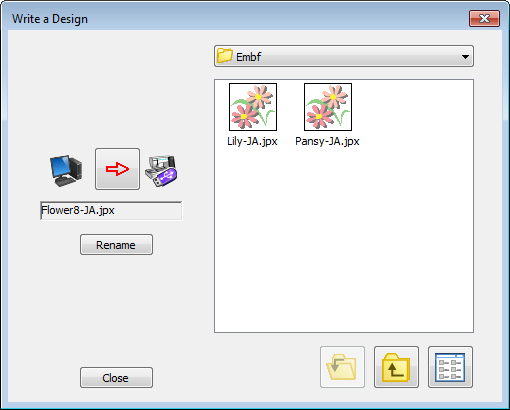
- If the hoop is supported and is not an MA Hoop, the transfer dialog will open. This will vary with your machine model.
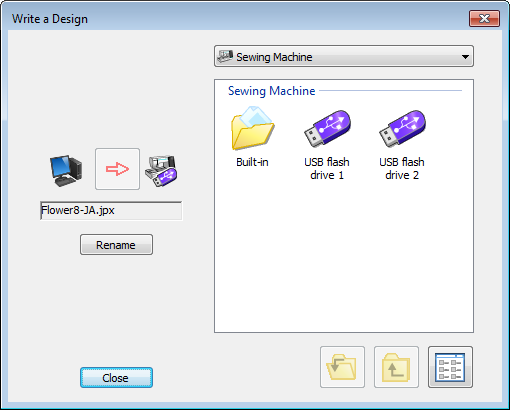
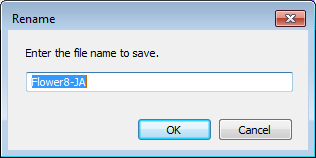
- You may have the option of renaming the export file as preferred.
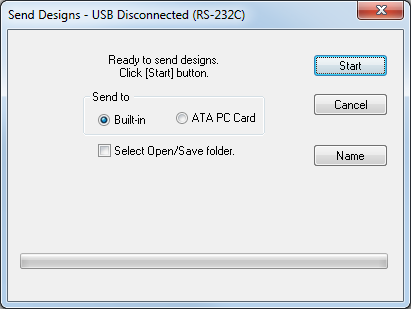
- Select a storage location on the sewing machine – machine memory (built-in folder), ATA PC card if available, or USB memory stick.
- With older style machines, you may only have a choice of machine memory (built-in folder) or ATA PC card.
- Click Start. File transfer begins. The selected design is converted to machine file format readable by your machine and copied to the specified location. In the unlikely event that a file exceeds the limits set, it will be split into two or more files.
.
Send or receive multiple designs
The software allows you to simultaneously send more than one design in a file format which can be read by your machine. You can also retrieve all designs from machine memory for editing and/or to store them on hard disk or other location. Alternatively, delete all designs from machine memory to free up space.
- First of all locate and, if necessary, convert the files you want to transfer. See also Convert designs .
- Select Machine > Send Designs, Receive and Delete. The transfer dialog opens. This will vary with your machine model. The dialog is divided in two sections – source (PC) and destination (sewing machine). The machine itself must be in PC-Link Mode in order to receive designs.
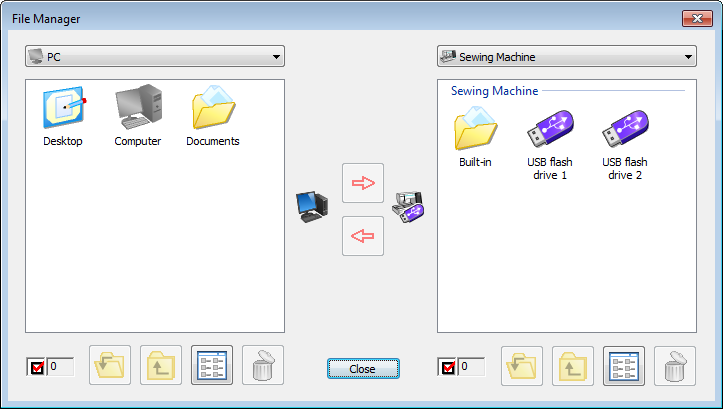
- Select a source folder from the PC list. Only files readable by your machine are displayed.
- Select the files you want to send in the viewing panel.
- Select a storage location on the sewing machine – machine memory (built-in folder), ATA PC card, or USB memory stick.
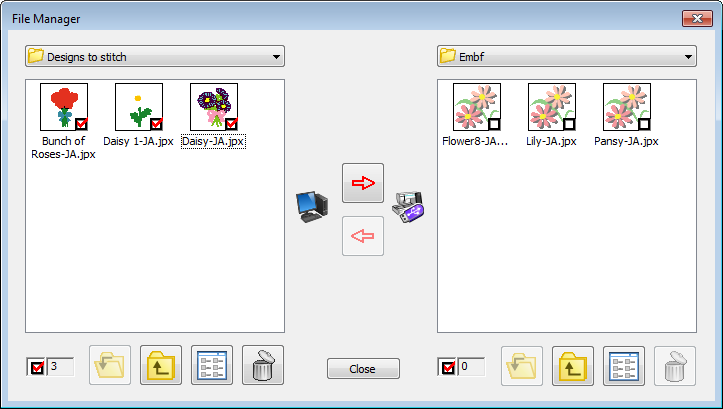
- Click Send. A confirmation box appears.
- Click Start. File transfer begins and selected designs are copied to the selected location. In the unlikely event that a file exceeds the limits set, it will be split into two or more files.
- Select any files you want to receive or delete from the destination folder.
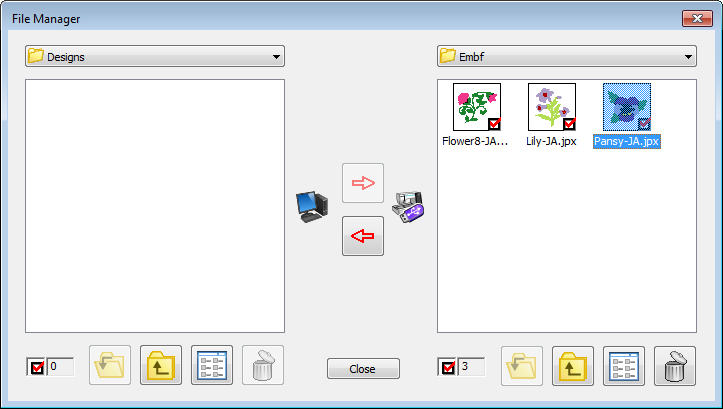
- Choose from the available options:
- Click Receive to copy files from the machine to the current location folder on your PC.
- Click Delete to remove selected files from your machine storage location.