Hoops are needed to hold the fabric tight while stitching on your machine. They are available in different sizes. A representation of the selected hoop is displayed in the design window. This provides a guideline for sizing and positioning designs. You can show or hide the hoop at any time.

Depending on the selected hoop type, the boundary of the working area within the hoop may be displayed as a thin red, blue, or dotted line. If any part of the design lies outside the stitching area, a warning appears when saving. This prevents you from accidentally stitching outside this area and damaging your machine by hitting the hoop with the needle. See also Supported hoops.
 | Click View > Show Hoop to show or hide hoop. Right-click for settings. |
Select hoops
Activate the Show Hoop button on the View menu to display the current hoop. The Hoop Type droplist on the Context toolbar shows which hoop is currently active in the design window. The list is automatically filtered according to the selected machine type. Only those hoops supported by that machine are available. Select the smallest hoop which fits the design.
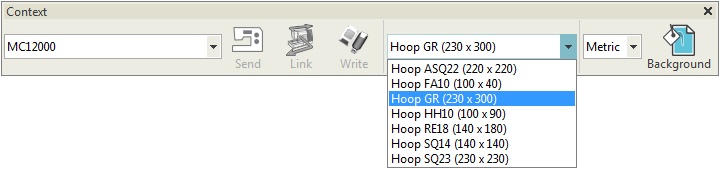
Alternatively, right-click the Show Hoop button and select a hoop from the droplist...

The selected hoop is saved with the design in native EMB file format. When the machine reads the stitch file, the stitching area is limited by the selected hoop type.
Center hoops
The centering or 'around design' function ensures that the center of the hoop (or offset center for older style hoops – i.e. Hoop No.1&3), is automatically positioned at the center of the current design, or at the (0, 0) point of the current design window while the design contains no stitches. If you choose the 'fixed' option, the hoop center – or offset center for old hoops – is fixed at the (0, 0) point of the current design window.

 | Use Customize Design / Context > Background and Display Colors to set colors, fabrics, or articles as design backgrounds. |
Background colors
Set the color inside the hoop to match the fabric you intend to stitch out on. You can also set a background color outside the hoop by way of contrast. See also Backgrounds.
- Select Customize Design > Design Background or right-click the design window and select from the popup menu.
To select a color inside the hoop, choose the Solid Color option. This allows you to set separate colors inside and outside the hoop. Select a color from the palette or mix your own.

Set the color inside the hoop to match the color of the fabric you intend to stitch out on.
Use Context > Rotate Hoop Left 90° to rotate selected hoop in 90° increments to the left. | |
 | Use Context > Rotate Hoop Right 90° to rotate selected hoop in 90° increments to the right. |
Rotate hoops
The Rotate Hoop tool allows you to rotate the hoop for ease of digitizing. The attachment mechanism is indicated, both on screen and printed worksheets. You can thereby tell the orientation of the design with respect to the hoop and decide how to position it. Rotate the current hoop by means of the icon or popup menu.

| Click View > Show Hoop to show or hide hoop. Right-click for settings. |
Custom hoops
If you are using the MB-4 machine or 'Others', you can define your own hoop and save it for later use. Right-click the Show Hoop icon to open the dialog. Notice the 'custom hoop' controls on the right.
Custom hoops are needed because new hoops become available for sewing machines more frequently than the software is updated. Also some machines include hoop adaptors for third-party hoops which need to be defined in the software. Click the Create button on the Hoops tab. Two main types of hoop can be defined or edited in the software – Rectangular and Oval.


The software records the embroidery area of custom hoops to stitch file which can then be read by multi-needle machines to determine the stitching area. On the other hand, the stitching area of single-needle machines is determined by the selected hoop type. If the file contains a ‘non-standard’ (custom) hoop code, the hoop size is automatically based on the design size which is used to limit the stitching area.
Comments