Branching
 Connectors link objects in a design. They can be run stitches or jumps. You can use automatic settings to generate connectors, trims and tie-offs, or add them manually. If you prefer to add tie-offs and trims as you digitize, you can turn off automatic connectors altogether.
The software also allows you to create ‘branched' objects. Selected objects are sequenced, connectors minimized, components grouped, and stitches regenerated. Underlay can be applied to all.
 | Use Digitize / Edit Objects > Branching to automatically sequence and group selected embroidery objects. |
Create branching
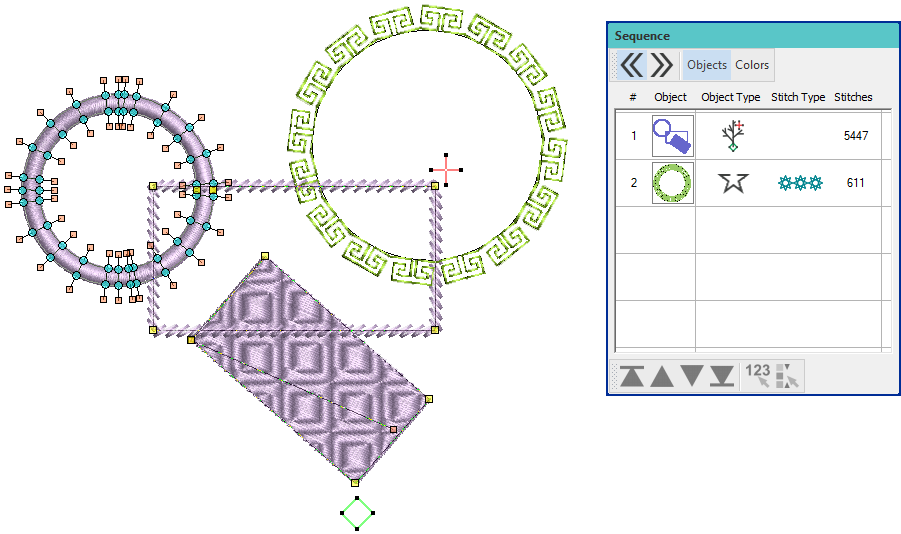
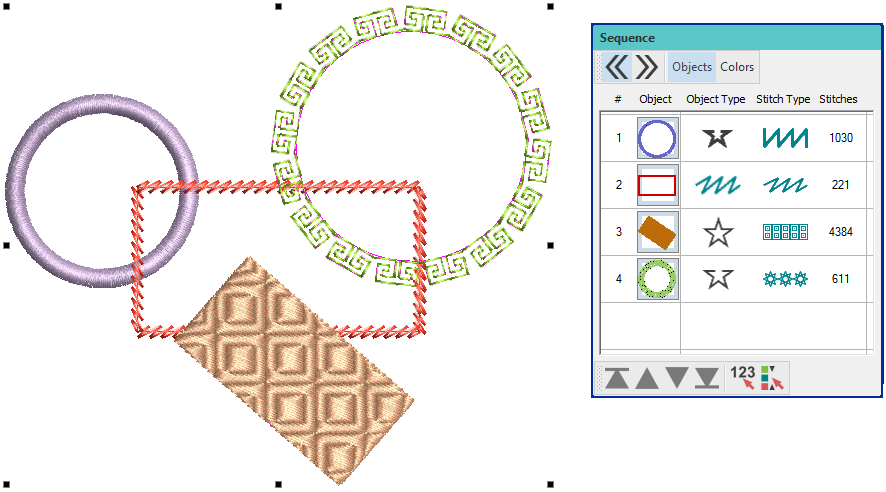
Branching is an advanced feature which lets you digitize similar, overlapping objects – e.g. the fingers of a hand, sections of a custom letter – without having to think about the most efficient stitching sequence and joins. Apply the command to join selected objects to form a single compound object. Components are sequenced, connectors minimized, and stitches regenerated. All component objects are grouped and selectable as one. To apply Branching...
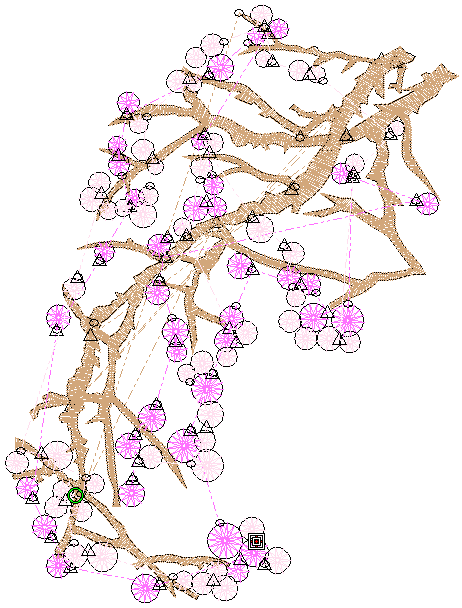
- Select the objects to sequence. Note any long connectors between objects.
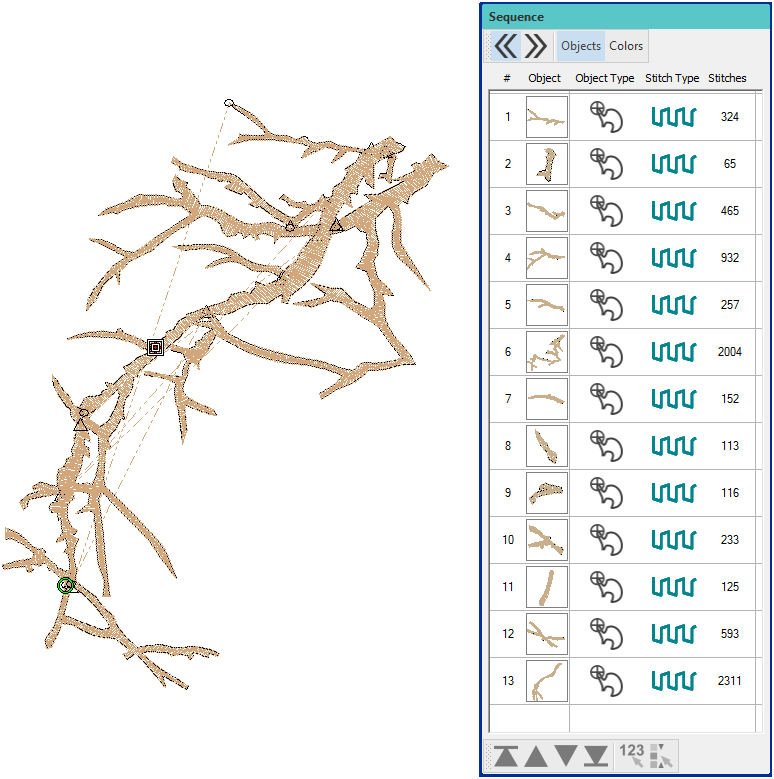
- Click Branching.
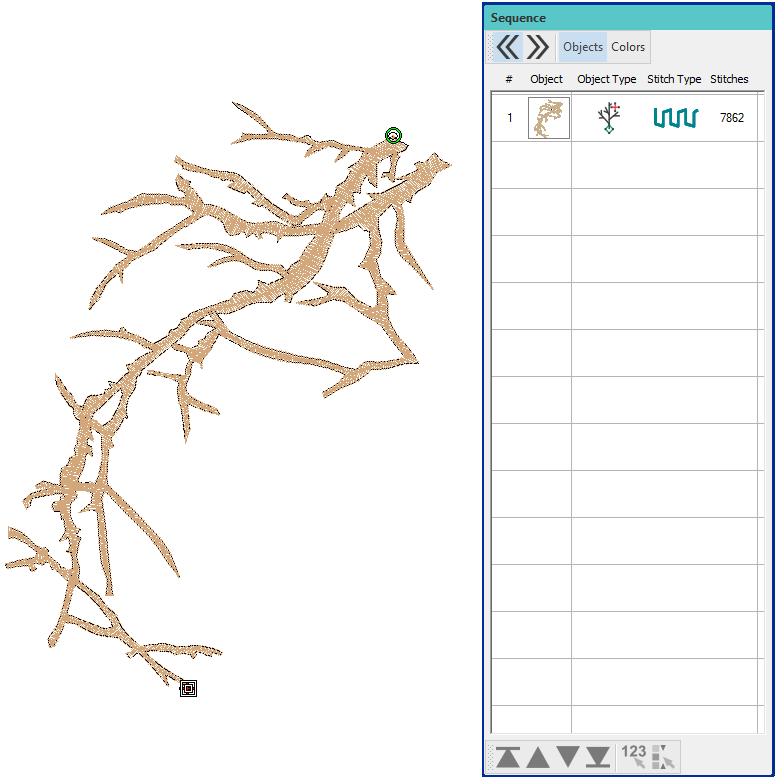
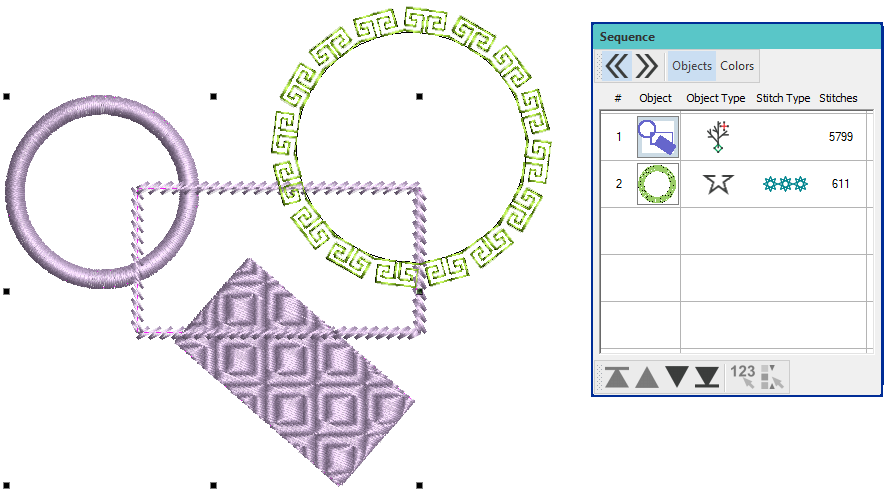
- Digitize entry and exit points or press <Enter> twice to accept the defaults. Component objects are grouped and share the color of the first.
- Travel through the object to check stitching. Note that objects are sequenced, connectors minimized, and stitches regenerated.
When the entry and exit point are the same, there are two layers of outline stitching. If they are different, the path between the entry and exit will have three layers. It is your choice whether to have the extra travel layer or a trim connection to the next object instead.
| Use Digitize / Edit Objects > Branching to automatically sequence and group selected embroidery objects. |
Included objects
Branching works with most objects.
Branched objects preserve their original settings while sharing the color of the first object in the sequence. Incompatible objects, such as motif runs and fills, are excluded from the sequence.
 | Use Select > Reshape to reshape an object shape, edit stitch angles, adjust entry and exit points, or customize envelopes. |
 | Use Edit Objects, Appliqué or Lettering / Monogramming > Break Apart to split composite objects – monograms, appliqués, lettering, etc – into components. Allows each to be edited individually. This tool is also available via Edit menu. |
Edit branched objects
Branched objects remain editable. They can be reshaped. There is one entry and one exit point, but all component objects have individual reshape points. The object properties of a branched object can be accessed and modified via Object Properties. If necessary, branched objects can be returned to their component objects using the Break Apart tool. See also Break apart objects.