
Create multi-hoop designs
The software provides a multi-hooping function which allows you to create multiple hoop positions. This means you can stitch out embroidery designs that are larger than can be accommodated within a single hoop. The aim is to add hoops and move them around until you get the least number of hoopings necessary to accommodate the entire design. These are then stitched out consecutively.
Knowing the design object sequence helps you place hoops in the best hooping sequence. A good technique is to use the Sequence docker in object mode. As you select objects from the list, they are highlighted in the design. Another useful tool for this purpose is Stitch Player. See also Travel through designs.
| Use Multi-Hooping > Select Hoop to show hoop properties. |
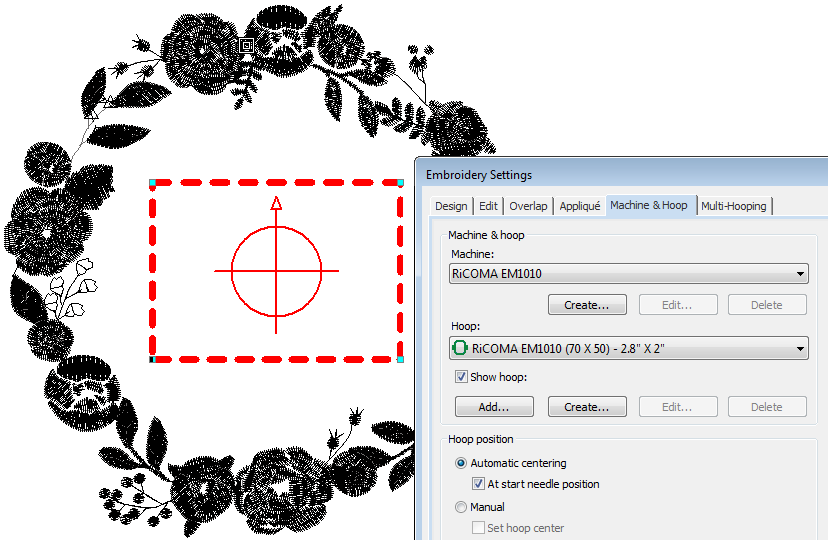
Select a hoop
First choose the hoop you want to use. Click the Select Hoop icon to access settings and choose a hoop. Since a given stitchout can use only one size of hoop, you need to choose a hoop that will cover the largest object in the design.
| Use Multi-Hooping > Automatically Add Hoops to add hoops automatically to cover the entire design. |
Create automatic hoopings
The easiest way to work out hoop positions is with the Automatically Add Hoops tool. Bear in mind that this method uses a purely rule-based software algorithm. It works best with simple designs.
- It's always a good idea to reduce the number of potential color changes in a design before creating automatic hoopings. You can activate color optimization via the Embroidery Settings > Multi-Hooping tab. See also Output multi-hooped designs.
- Use the Automatically Add Hoops tool to automatically generate hoop positions. These are calculated according to the object sequence.

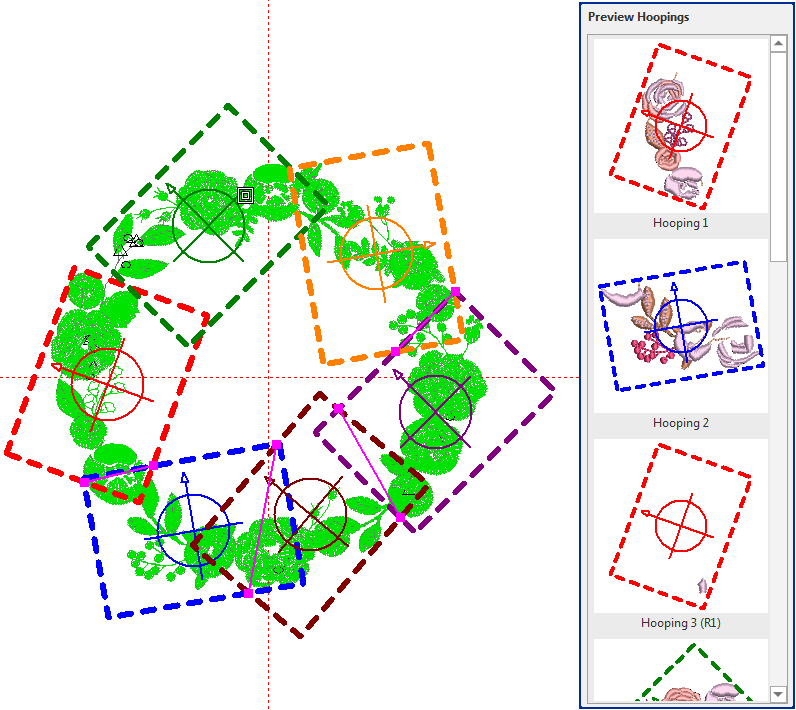
| Use Multi-Hooping > Preview Hoopings to calculate object distribution and registration marks for given hoop positions and display hooping thumbnails in a docker. Clicking on one of the hooping thumbnails in the docker will only show that hooping in the design window. |
Use the Preview Hoopings tool to preview hoop positions in the Hooping Sequence docker. Click and hold to isolate the hooping in the design workspace.
- The software always attempts to include whole objects within sequential hoopings. Where this is not possible, it will split objects between hoopings. Although split lines are only visible in Multi-Hooping, they are maintained when switching to other modes. They do not affect object integrity. See also Split objects between hoopings.
- The same hoop position may be repeated, depending on the object sequence. Moving a hoop slightly to cover an excluded object may reduce repeat hoopings. Alternatively, try adjusting the stitching sequence.
- Each hoop position contains objects that can be stitched out in a single hooping. These are stitched consecutively to form the whole design.
- You are now ready to save the design to one or more files or send it to machine. See also Output multi-hooped designs.
- Optionally, print a copy of the design showing the hoop positions to help you stitch it in the correct hooping order. See Print multi-hooped designs.
| Use Multi-Hooping > Select Hoop to show hoop properties. |
Create manual hoopings
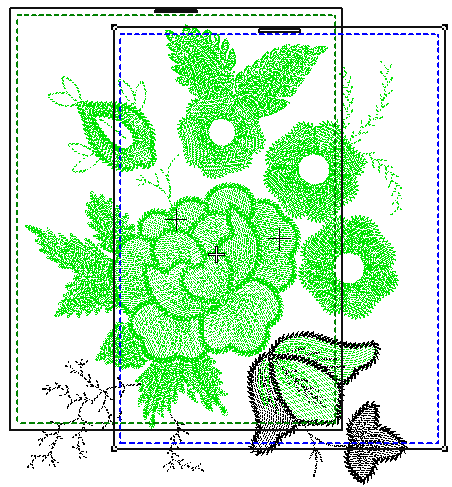
When you enter multi-hooping mode, covered objects – those that fit wholly within a hoop – display as green stitches. Uncovered objects – those that do not fit – display as black stitches. If you are planning to add hoops manually, select a hoop outline, and drag it till it covers the largest object in the design. Click to access rotation handles, and rotate into position as necessary.

It is important to reduce the number of potential color changes in a design. If you are adding hoops manually, it's a good idea to first run color optimization. See also Design colors.
 | Use Multi-Hooping > Add Hoop to add a new hoop to a multi-hooping layout. |
 | Use Multi-Hooping > Add Hoop Right to place a new hoop position to right of the selected hoop. Allow 10mm overlap between sewing fields. |
 | Use Multi-Hooping > Add Hoop Up to place a new hoop position above the selected hoop. Allows 10mm overlap between sewing fields. |
 | Use Multi-Hooping > Add 4 Hoops Around to place four hoops around a selected hoop's perimeter. Allows a 10mm overlap between sewing fields. |
 | Use Multi-Hooping > Add 8 Hoops Around to place eight hoops around a selected hoop's perimeter. Allows a 10mm overlap between sewing fields. |
Add more hoop positions
Use the Add Hoop tools to add more hoop positions. As soon as a hoop is moved or joined by others, automatic centering is deactivated, meaning that the hoop no longer centers itself automatically around objects in the design.
The Add Four Adjacent Hoops and Add Eight Hoops Around commands become available when a single hoop is selected in the design workspace. Clicking the associated icon causes four or eight hoopings to be added around hoop’s perimeter, starting from the top and continuing in a clockwise direction, with a 10mm overlap between sewing fields.
Use Context > Rotate Hoop Left 15° to rotate the first hoop, or the currently selected hoops in multi-hooping mode, in 15° increments to the Left. | |
 | Use Context > Rotate Hoop Right 15° to rotate the first hoop, or the currently selected hoops in multi-hooping mode, in 15° increments to the Right. |
| Use Context > Rotate Hoop to rotate by a specified amount - positive or negative - in degrees. |
 | Use Multi-Hooping > Delete Hoop to remove a selected hoop from multi-hoop layout. |
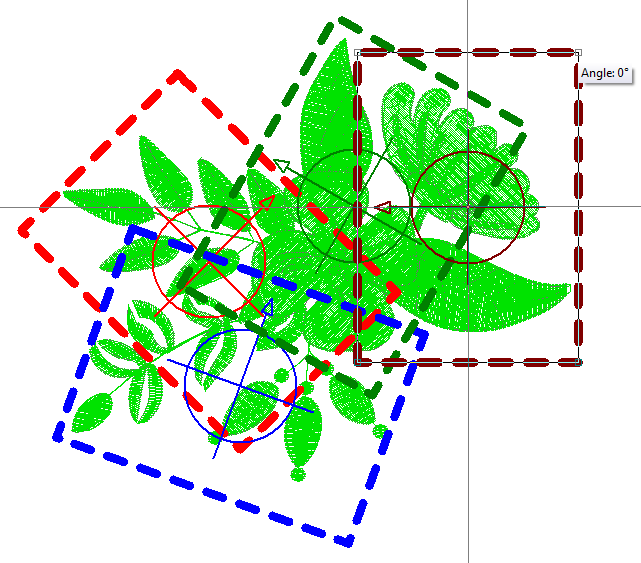
Adjust hoop positions
Re-position additional hoops and, if necessary, rotate them so that they completely cover all objects in the design. Nudge selected hoops into position using the arrow keys. Use the Rotate Hoop buttons on the Context toolbar to rotate hoops in 15° increments or by a specified amount. Alternatively, click twice to activate rotation handles and drag to rotate. Use the Delete Hoop button to remove any unwanted hoopings.
While a design may be entirely covered by separate hoop positions, some objects may remain uncovered, as indicated by black stitching. The Splitting Guide tool allows you to split objects that would not otherwise fit within a hooping. See also Splitting objects between hoopings.
 | Use Multi-Hooping > Calculate Hoopings to calculate hoopings that will result from current layout. |
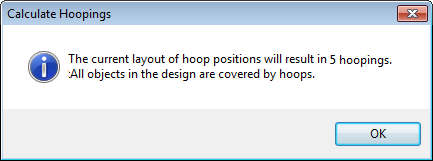
Calculate hoopings
Finally, click the Calculate Hoopings icon to evaluate the hoopings that will result from the current hoop layout. Bear in mind that a calculated 'hooping' is not necessarily the same as a 'hoop position'.
The software always preserves the original stitching sequence. However, hoop placements which follow the object sequence will reduce the number of calculated hoopings. The time taken to calculate hoopings depends more on number of objects and hoop positions than actual stitch count. Designs converted from EXP, PES, HUS, etc, will in general result in a larger number of objects than a native embroidery designs. Hence, these designs will take longer to calculate. However, even with pure EMB files, if the design is complex, large, and contains many hoop positions, calculation can take time.
The file is split into at least as many files as there are hoopings, depending on whether you have split some objects between hoopings. You are now ready to save the design to one or more files or send it to machine. See also Output multi-hooped designs.
Print a copy of the design showing the hoop positions to help you stitch it in the correct hooping order. See also Output multi-hooped designs.
