
Output with multi-position hoops
The embroidery software supports both MA and Giga hoops. These are two-position hoops which expands the available sewing area of the machine for which it is supplied.
 | Use Output Design > Export Design to export the current design to a machine file for stitching. |
 Stitch with an MA Hoop
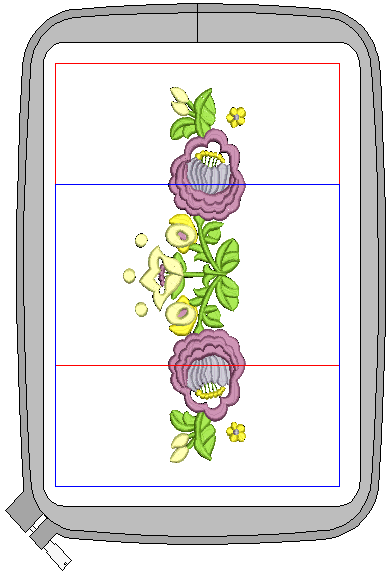
The software supports the MA Hoop. This is a two-position hoop which expands the available sewing area of the machine for which it is supplied. In the list of available hoops, the MA Hoop is identified as ‘Hoop MA (200 x 280)’. The two sewing fields are shown in red and blue. When digitizing, each embroidery object must fit entirely into one or other hoop position.
The behavior of the MA Hoop during loading and editing of embroidery designs is exactly the same as for a normal rectangular hoop of size 200 x 280. The fact that there are two sewing fields has no effect until you export the design. In most cases the software will only create one file as the two hoop positions are saved in a single machine (JEF) file. However, if a return to hoop position 1 is required, the software will create two (or on rare occasions, more) files.
To stitch out a design with an MA Hoop...
- Open the design to export to machine file.
The two sewing fields are shown in red and blue. When digitizing, each embroidery object must fit entirely into one or other hoop position. Sizes are shown in mm for a 1:1 display. At other display scales, values are scaled proportionally. - To export to a format recognized by your selected machine, click the Export Design icon. The software determines whether there are any objects that do not lie wholly within one of the hoop’s two positions:
- If there are, they are selected in the design workspace and you are prompted to edit or delete them. Otherwise the software determines how many hoopings are needed.
- If only one is needed, or two with the upper position first, the software creates a single JEF file containing these hoopings.
- Otherwise it calculates the number of hooping position changes and prompts you to proceed. If you agree, it creates multiple JEF files.
- Click OK.
The JEF file names are numbered with a hyphen – ‘My Flower- 1.JEF’ and ‘My Flower- 2.JEF’.
When the machine loads the first of the multiple JEF files, it stitches the upper-position first, then prompts you to move the hoop to the lower position. Always have the hoop in the upper position when the machine starts stitching a new JEF file unless you are explicitly prompted to shift frame. This may be necessary in cases where a hooping pair must be split because it has too many stitches or too many color changes.
| Use Output Design > Export Design to export the current design to a machine file for stitching. |
 Stitch with a Giga Hoop
Your embroidery software supports the Giga Hoop. This is a two-position hoop which expands the available sewing area of the machine for which it is supplied. Use of the Giga Hoop is similar to the MA Hoop. See also Stitching designs with an MA Hoop.
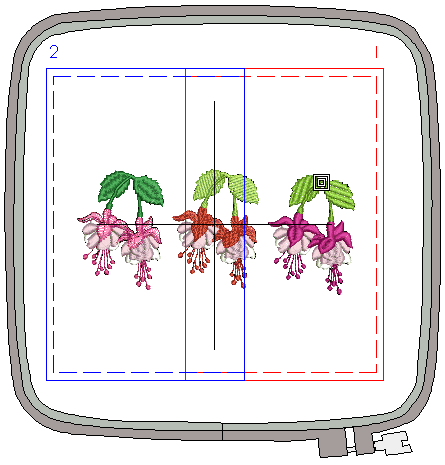
In the list of available hoops, the Giga Hoop appears as ‘Hoop D (220 x 190) (Giga)’. The two sewing fields are shown in red and blue. The red area is normally stitched first. Then, after rotating the hoop, the blue area is stitched.
The physical embroidery area of the Giga Hoop is 230 x 200 mm. This is represented by the solid line. However, any rotation of the hoop may cause a small positioning gap. To avoid this, a margin of 5mm is allowed on both sides, which makes the actual embroidery area 220 x 190 mm. This is represented by the dashed line. We recommend you stay within the dashed area.
When digitizing, embroidery objects must fit entirely within one or other hoop position. That is, you cannot save designs which include objects that straddle both hoop positions.
Also, if objects in the blue area are sequenced before the red, you cannot save as a Giga Hoop design. That is, you cannot create a Giga Hoop JEF file which has its start in the second hoop position as this would require more than a single JEF file which is not allowed.
To stitch out a design with a Giga Hoop...
- Open the design to export to machine file.
The two sewing fields are shown in red and blue. When digitizing, each embroidery object must fit entirely into one or other hoop position. - To export to a format recognized by your selected machine, click the Export Design icon. The software determines whether there are any objects that do not lie wholly within one of the hoop’s two positions:
- If the design can be stitched in the Giga hoop, the Send a Design (on-line) dialog opens.
- If the design will not stitch as a single Giga hoop design – i.e. it would require more than one rotation of the Giga hoop to preserve the stitching sequence – the following message is displayed:
- Click OK and use Combine mode to create two Hoop B hoopings as instructed.
- Select the design name and click the Send button.
The design will be sent to the machine as two individual JEF files – Hoop position A and Hoop position B. However, the machine display will show the design as a single design unless the file cannot be stitched in two files due to the object stitching sequence.
