
Print designs
You can output embroidery designs in a variety of ways – by printing as worksheets, as appliqué patterns, color sequence, or as thread charts. Even print thread charts as a shopping reference when purchasing threads.
A 'PDF' is an Adobe document file type designed for onscreen viewing, printing, and electronic distribution. In Hatch Embroidery, you can use the 'Print Design' function to save to PDF. However, you need to have the capability already installed on your computer. It may be included with your version of Windows. Or you may have a PDF writer already installed via Adobe, MS Office or a third-party program. There are free PDF writers available online. See also How to save to PDF in Hatch Embroidery.
 | Use Output Design / Standard > Print Preview to preview design worksheet. Print from preview window. |
Print preview
Use Print Preview to view stitching information and to check the sewing sequence. Your design displays as it will be printed. If you are using a color printer, you can print in TrueView. Large designs may be displayed over a number of pages if printed at actual size. Use the Options buttons at the top of the screen to configure the appearance of the printout.
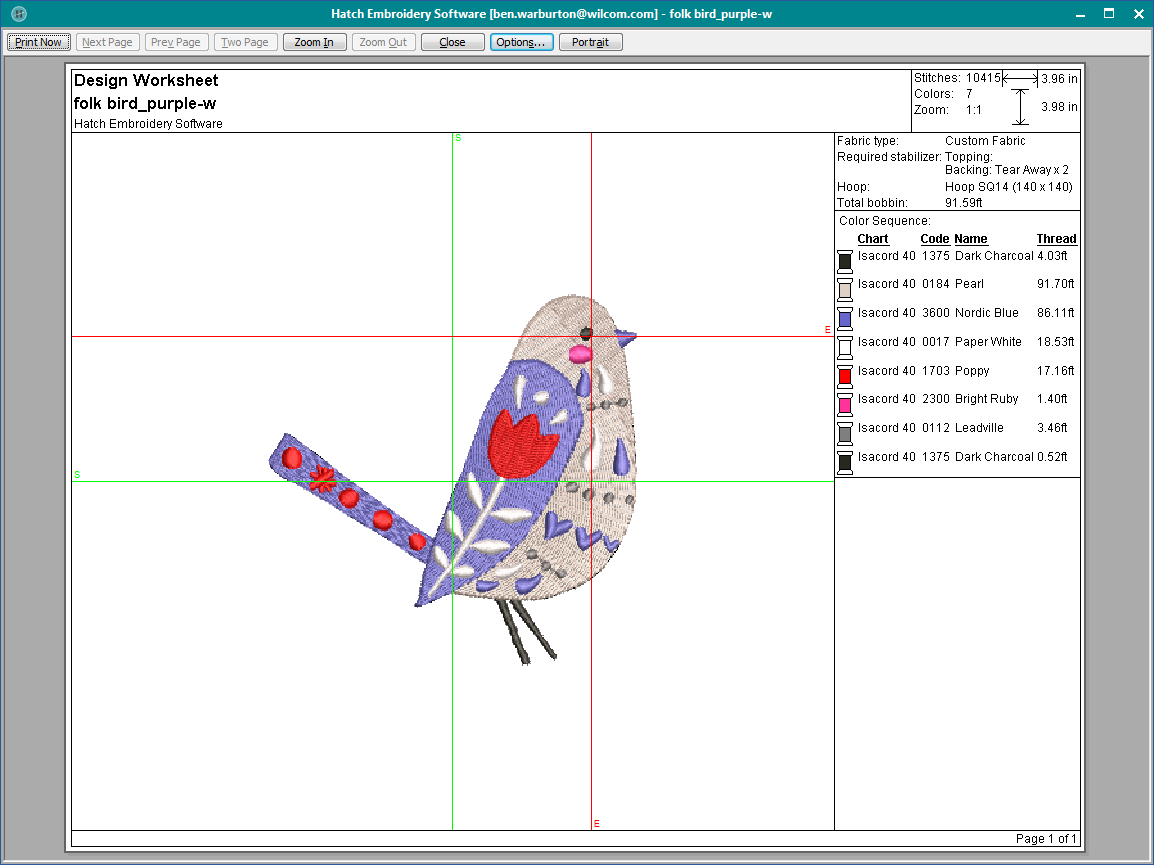
Design information includes design size, color sequence, and stitch count, together with an image of the design. It also includes author, estimated length of upper thread per color and total bobbin usage.
 | Use Output Design / Standard > Print Design to print the current design. |
| Use Output Design / Standard > Print Preview to preview design worksheet. Print from preview window. |
Print options
Print options give you precise control over your design printout. Different worksheet configurations are available for different purposes - design worksheet, color sequence, appliqué pattern, as well as hooping sequence. Each configuration can be further customized.
- Click Print Preview or Print Design.
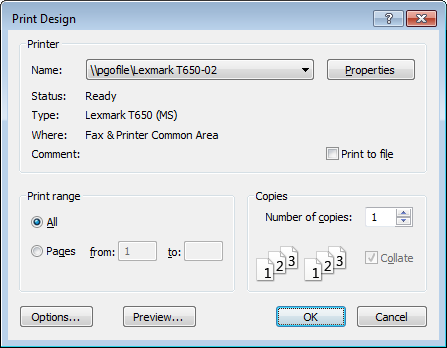
- Choose your preferred printer if not already set up. Many PDF programs are set up as a PDF printer. In this case, you may 'print to PDF' which actually saves the file to PDF format.
In the dialog, click Options to further configure print options. The default worksheet type is the 'design worksheet'.
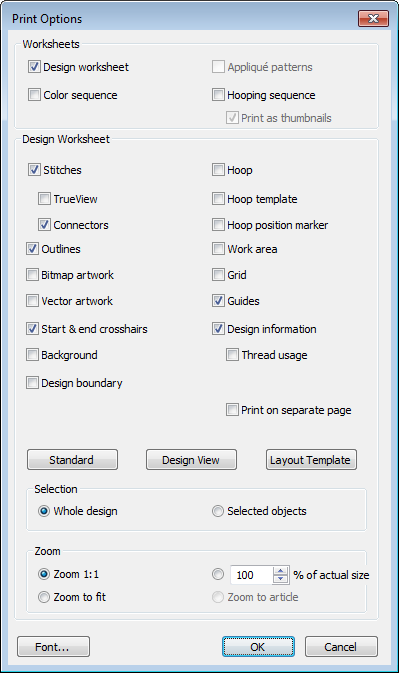
Set a worksheet type.
Type Purpose Design worksheet
This provides all production-related information, such as bobbin length, design size, garment fabric, etc, is provided.
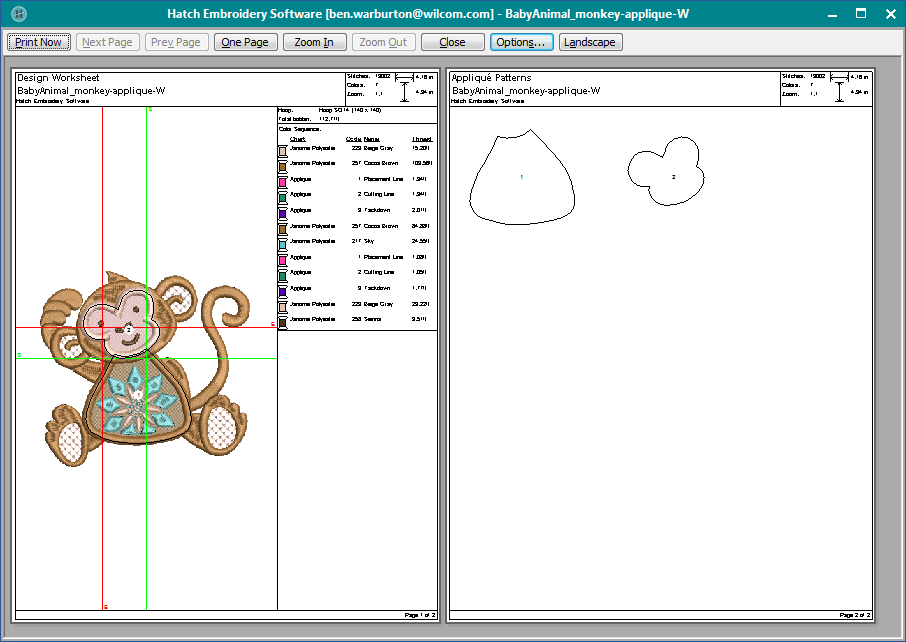
Appliqué patterns This shows appliqué patterns – cutter information – isolated from the design. These can be used as a guide to cutting out fabric pieces. Color sequence Provides a list of colors in the design, together with color and stitch information for each color layer. Hooping sequence If there is more than one hooping in the design, this option displays hoopings in their correct color sequence.
If you have selected ‘design worksheet’, three presets are available:
Preset Purpose Standard Resets worksheet options to default values. Design view Shows the design as it appears in the design window. Template mode Shows the design outlines with no stitches. - Further configure design worksheet options as preferred. See below for details.
- Optionally, print the whole design or selected objects only. If the latter, select the objects before accessing the Print Options dialog.
Select a sizing option from the Zoom panel. When selecting Template Mode, the Actual Size option is automatically selected. If the Zoom 1:1 option is selected, both an assembled appliqué layout and individual patterns in the actual size are created on separate pages. If the Zoom to fit or % of Actual options are selected, the assembled appliqué layout is created in the selected size, but individual patterns are still printed in the actual size on separate pages.
While the cloth setting marking is supported in JEF and SEW files, outlines are not. Since JEF and SEW are stitch file formats, they only contain stitch data, no outlines. The workaround is to display JEF and SEW files with stitches and cloth setter marking turned on.
| Use Output Design / Standard > Print Design to print the current design. |
Report options
The Print Options dialog gives you three preset configurations:
| Preset | Purpose |
|---|---|
| Standard | Resets worksheet options to default values. |
| Design view | Shows the design as it appears in the design window. |
| Template mode | Shows the design outlines with no stitches. |
You can further customize these print options by including or excluding the following:
| Option | Purpose |
|---|---|
Stitches | Display design as stitches with or without Artistic View. In stitch view, connectors may also be shown. Use them as a guide when you save to multiple files for multi-hooped positioning. |
Outlines | In stitch view, outlines helps delineate shapes. Alternatively, turn off stitches and print outlines alone. |
Artwork | Include any bitmap or vector artwork in the printout. |
Start & end crosshairs | The start/end needle position is included in the printout. See also Setting automatic start & end points. |
Background | Include design background if set – for instance, to indicate fabric appearance or position on garment. See also Setting backgrounds. |
Design boundary | Display design bounding rectangle and reference marks similar to the machine display. This means start and end point positions can be easily identified. When designs are located on a large work piece, like a table cloth, design extents and geometric center become important for positioning. |
Hoop | It may be important to include the hoop in the printout for positioning purposes. Alternatively, use the hoop position marker to align the needle and orientate the hoop. |
Hoop template | Printing the hoop template allows you to cut out the printed design and align it within the hoop. Use the template markings to align it to physical hoop template. |
Hoop position marker | This indicates the hoop center and orientation for more accurate hoopings. |
Work area | This lets you arrange multi-hoopings on an item or fabric to be sewn. It should be printed together with hoop position markers. See also Creating design layouts. |
Grid / guides | These may be used to help align the hoop template lines. See also Setting grid options. |
Optionally, tick 'Design Information' to include production information in the printout:
Information | Purpose |
|---|---|
Thread usage | Helps you determine length of threads required and assemble prior to production. Thread usage appears below the color sequence list. |
Print on separate page | Print all design information on a separate page for easy reference. For instance, a multi-hooped design may include many color changes, requiring a dedicated page to display. |
.
Appliqué patterns
Print a copy of the appliqué pattern to cut out fabric pieces. Each appliqué pattern piece is numbered according to the stitching sequence.
.
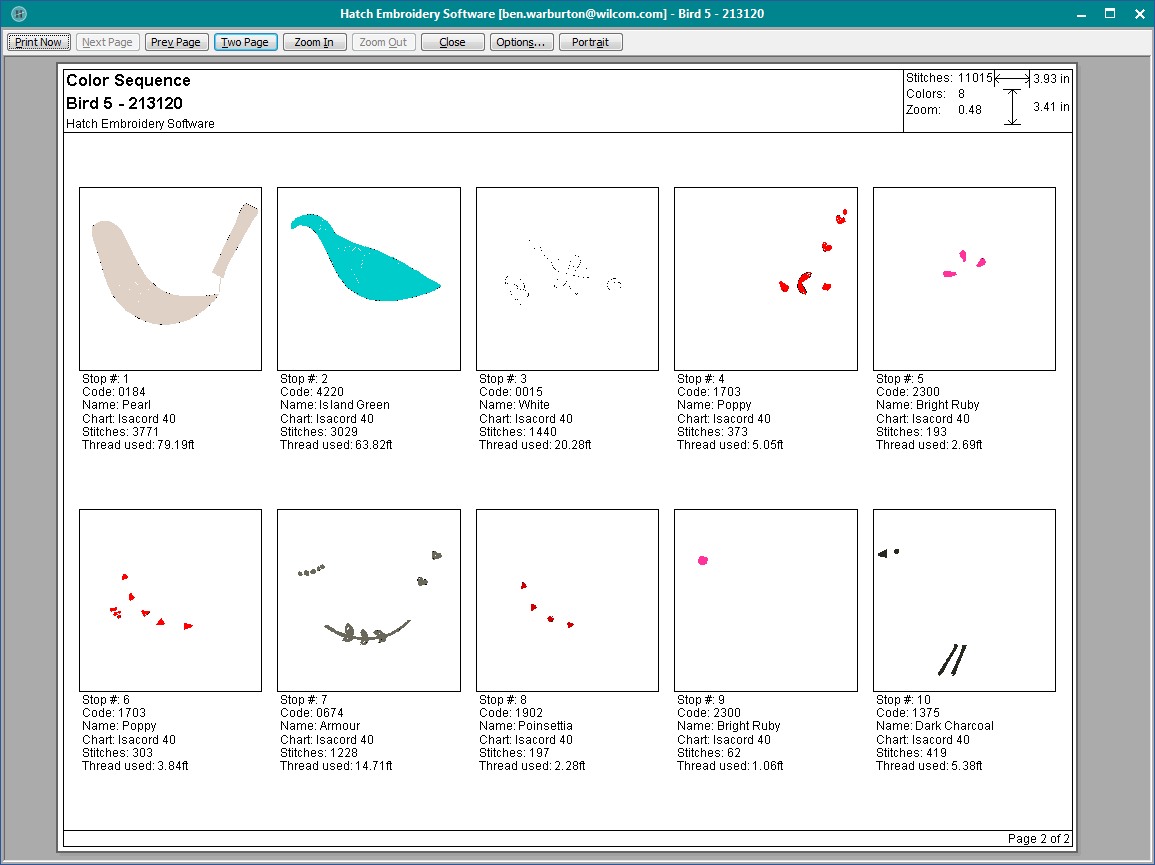
Color sequence
The Color Sequence option lets you include a list of color layers in the current design, together with color and stitch information for each layer.
.
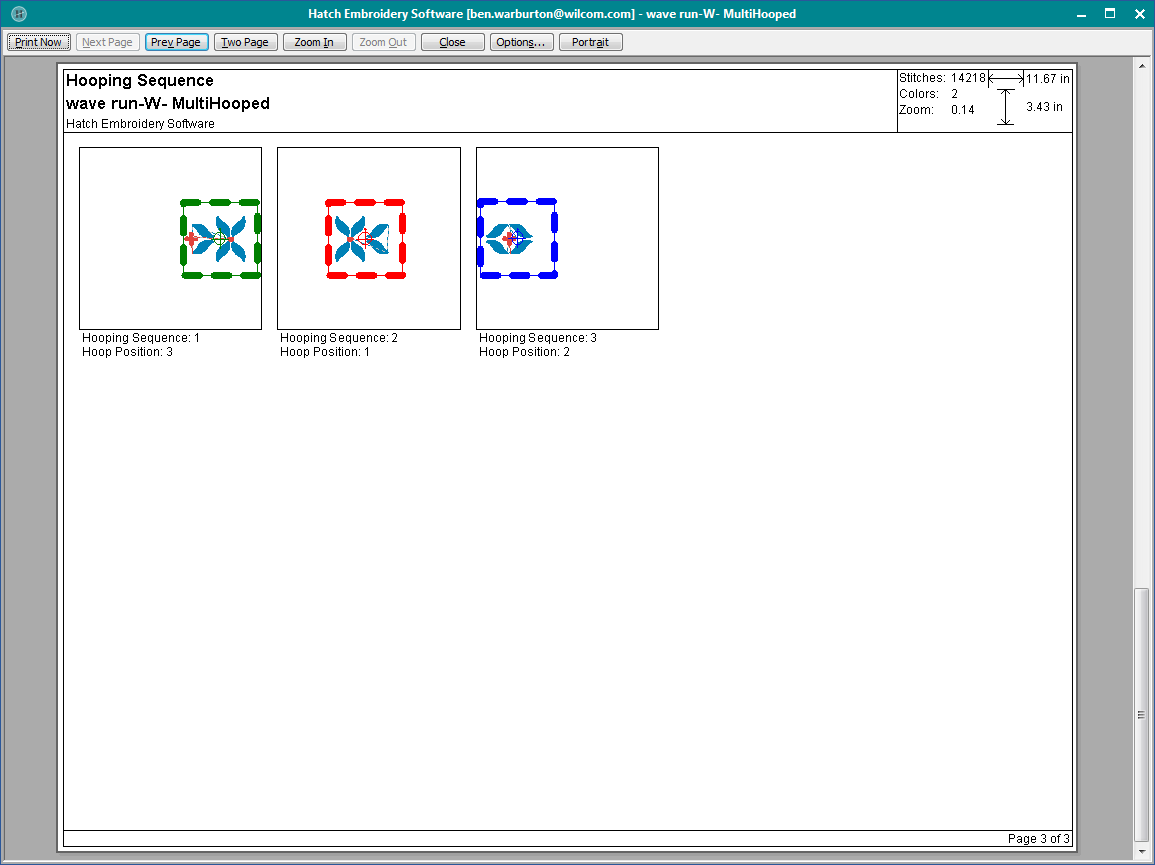
Hooping sequence
If there is more than one hooping in the design, you have the option of printing hoops in multi-hooping view in their correct color sequence. The Hooping Sequence option allows you to print a color film type printout showing the objects in each hooping.
| Use Output Design / Standard > Print Preview to preview design worksheet. Print from preview window. |
Design layouts
You can sew embroidery out by sending the design directly to a sewing machine or saving it to removable media and stitching out using a layout template and the cloth setter. The device has a transparent plastic bar with marked cross. See Print layouts.
