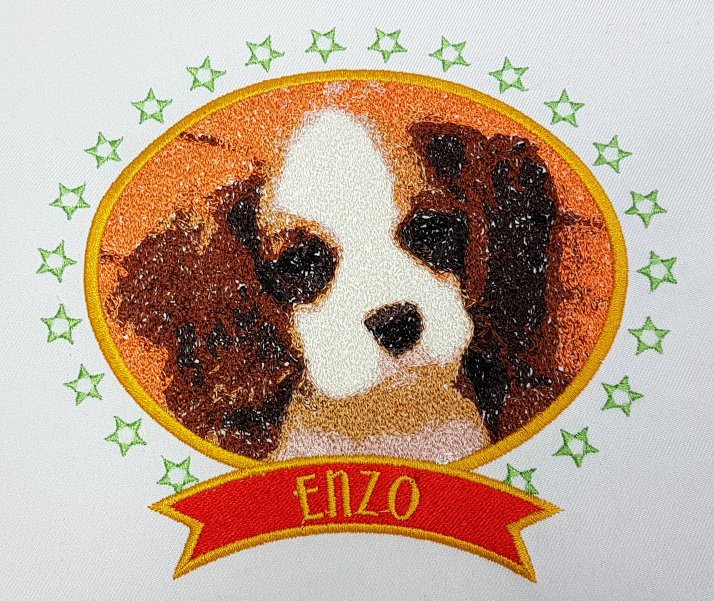
Color PhotoStitch keepsake
In this project, you'll see how to take a personal photo and turn it into an embroidered keepsake. We use the Color PhotoStitch feature to transform the photo into stitching. We then use satin line and a motif run to create an attractive border. And then we add a predefined ribbon and some lettering.
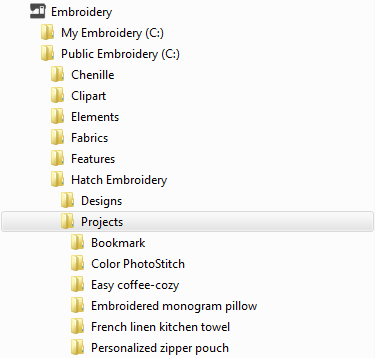
Project files and a final design are included in your 'Embroidery > Public Embroidery > Hatch Embroidery > Projects' folder as shown. This can be accessed through Design Library (Manage Designs).
Alternatively, download a PDF and copy of the project files from the webpage. Check your solution against the included design. It's always good to analyze designs to see how they were created, and keep adding to your arsenal of embroidery digitizing techniques.
Skill: | Advanced |
Time: | 1 hour design time, 90 minutes sewing time, 1 hour mounting time |
Required: | Hatch Embroidery Composer or Digitizer |
Features: | Color PhotoStitch, cropping, lettering, outlines & offsets, reshape, cut object, standard shapes |
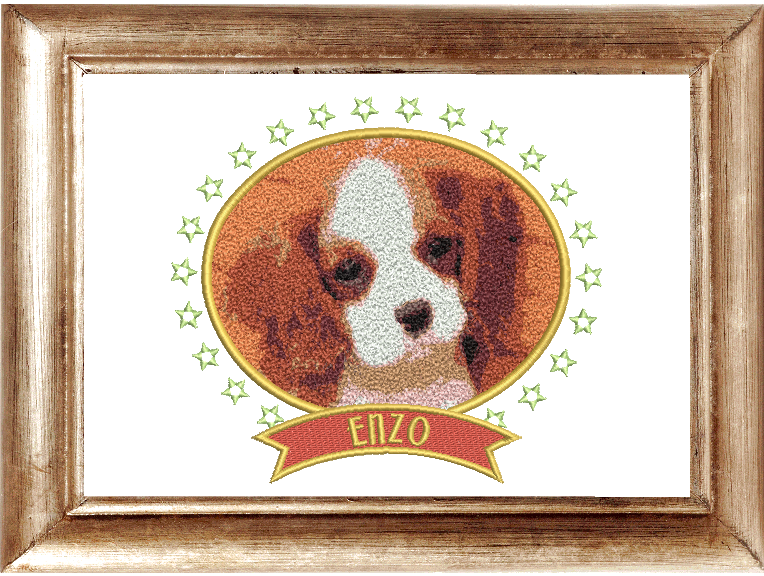
Finished size: | 15cm x 13cm |
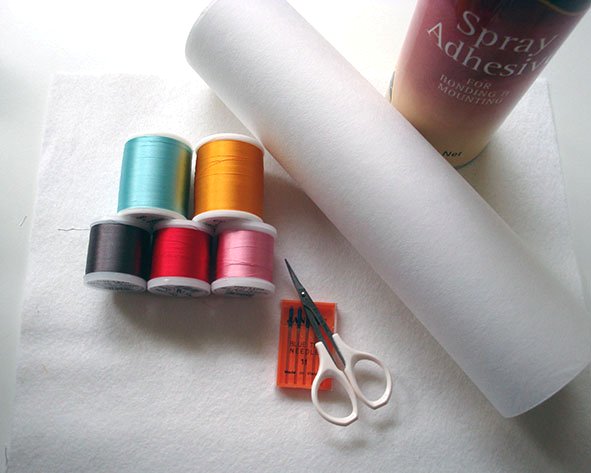
| You’ll need...
|
The screen illustrations in this publication are intended as representations, not exact duplicates of screen layouts generated by the software. The samples used to illustrate software features and capabilities may not be exactly duplicable, depending on your product level.
Let’s get started
 | Use Customize Design > Auto Fabric to change the properties of the design for stitching on a different fabric. |
Choose fabric type
For this project, we'll start with a blank canvas...
- Open your Hatch embroidery software.
Go to the Customize Design toolbox and select Auto Fabric.
Choose a suitable fabric type. This will optimize stitch density, pull compensation and underlay settings for that fabric.
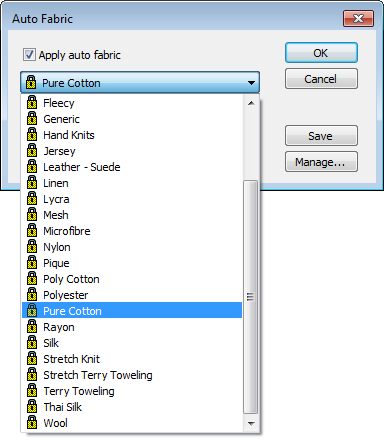
Consider that Color PhotoStitch designs generally have a high stitch count. A stable fabric is recommended. You also may need to double your stabilizer layers for best stitchout. In all cases make sure you use a cut-away stabilizer, not a tear-away.
.
Choose your machine
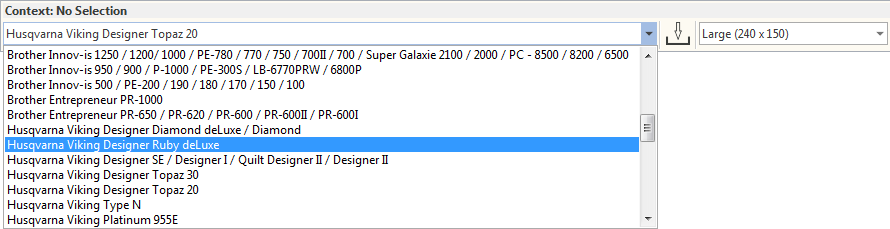
The software supports various sets of machine model. Choose your preferred machine model. See also Machine selection.
In this project we leave it to the end to make our hoop selection. It is also appropriate to choose your hoop at the start. By selecting it now, you know that you are always working within the allotted sewing field. If you can't find a hoop in the software to match the one you intend to use, you can always define your own. See also Hoop selection.
Prepare photo
First up, let's insert the photo, size it, and crop to fit...
 | Use Manage Designs > New From Selected to create new design(s) based on the selected design(s) and/or bitmap(s) from a chosen template. |
Insert photo
Click the 'Manage Designs' toolbox to open the Design Library.
Navigate to the 'Projects > Color PhotoStitch' folder as shown below.
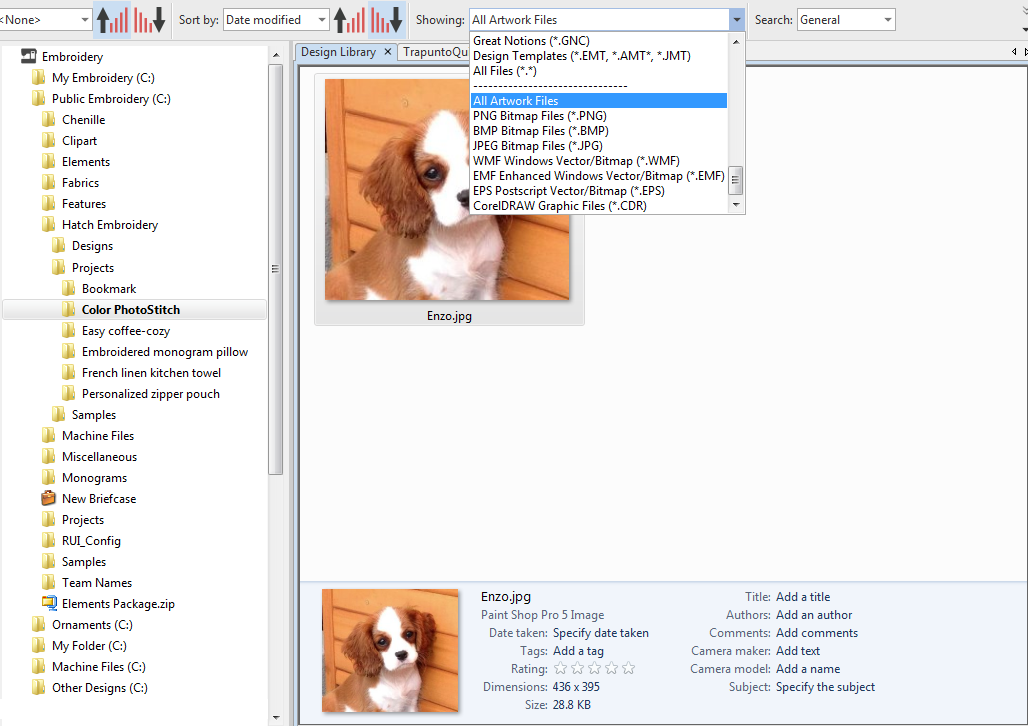
- Select 'All Artwork Files' from the droplist as shown above.
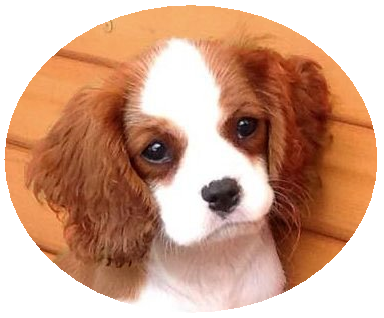
- Select the ‘Enzo jpg’ photo and click 'New from Selected'. The photo will open in its own design tab.
The software has width and height limits for Color PhotoStitch processing. If width or height are greater than 210 mm, the larger dimension will be reduced to around 150 mm. A 200 mm x 200 mm image will not be reduced but a 220 mm x 220 mm image will be reduced to approximately 150mm x 150mm. Best results are generally obtained with images smaller than 150 mm.
 | Use Context > Oval to crop bitmap artwork using the Oval crop tool. |
 | Use Select > Reshape to reshape an object shape, edit stitch angles, adjust entry and exit points, or customize envelopes. |
Crop photo
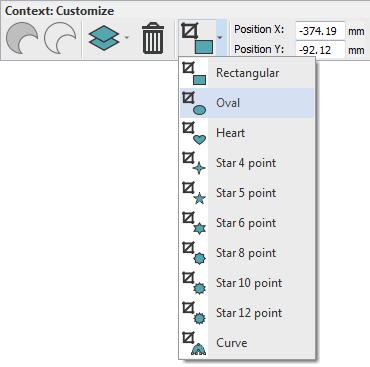
- Select the image and click one of the crop options. You will find the Crop droplist on the Context toolbar. In this case, we use the Oval tool.
- Drag the cropping marquee around the shape to be cropped. Start at the top left and drag down towards the bottom right.
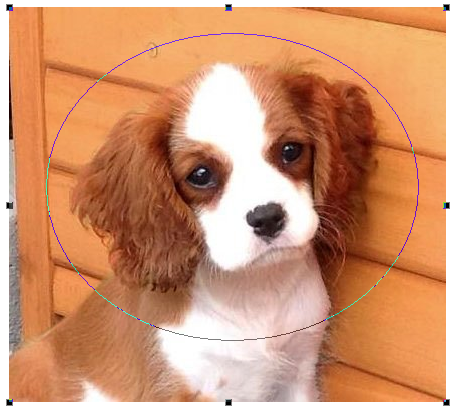
- With the Reshape tool, adjust the position of the marquee by dragging the pink diamond control point.

- To adjust the marquee size, use the triangular sizing handles. In this case, we've set it to around 125mm x 100mm. You'll see width and height dimensions in the popup tooltip as shown.

- Press <Esc> to finish.
Convert photo to embroidery
Now we can convert our cropped photo to photostitch embroidery...
| Use Auto-Digitize > Color PhotoStitch to automatically turn grayscale or color photographs into embroidery. |

Adjust bitmap
- With the image selected, click Color PhotoStitch.
Click Adjust for further options. In this case, we've set Lightness to 0.9 and Contrast to 20.

- Click OK to confirm.
.
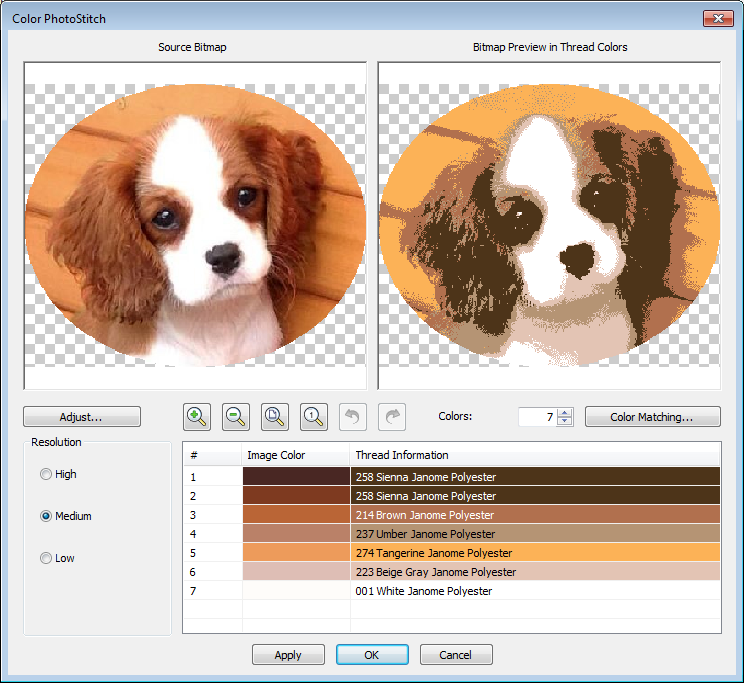
Set number of thread colors
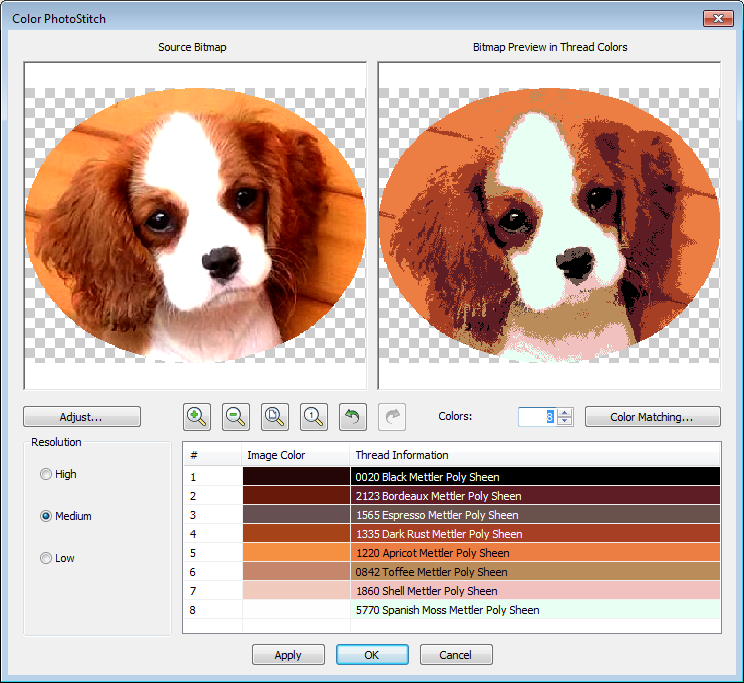
- Set the number of thread colors. There will be a point of diminishing returns where more colors do not always result in greater design clarity or stitchability. In this case, we've set the design to 8 colors.
.
Match thread colors
Use Color Matching to assign image colors to the color palette for manual thread matching.
- Click the Color Matching button in the Color PhotoStitch dialog.
- Choose Add thread chart colors to palette and click 'Select Thread Charts'.
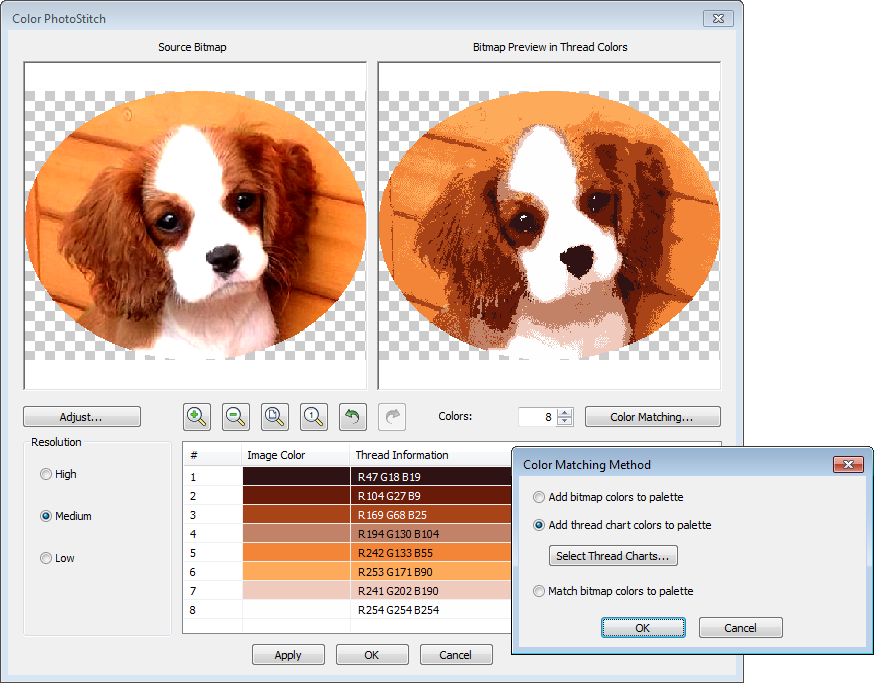
- Choose the thread chart you own. In this case, we are using 'Mettler Poly Sheen'.
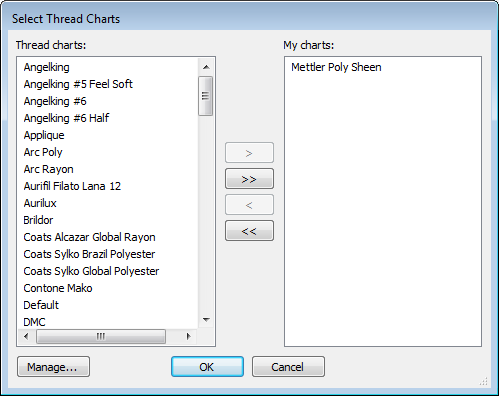
- Click OK to confirm and return to the Color PhotoStitch dialog.
- Use Apply button to preview the result in the design window.
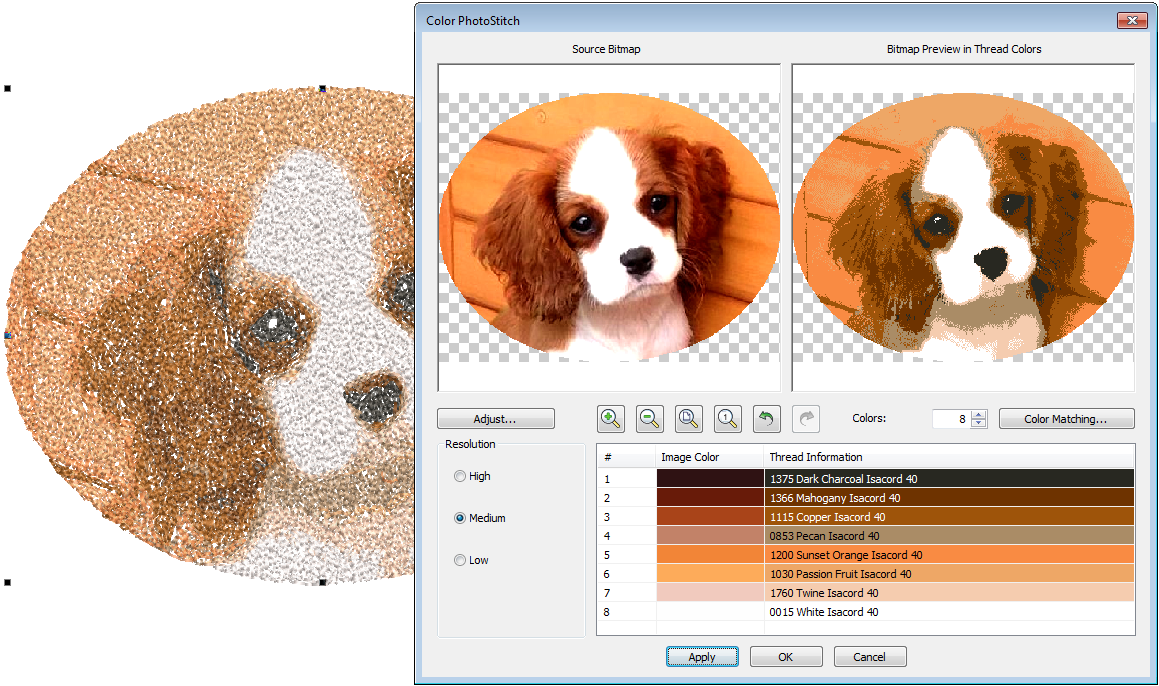
- Click OK to process the image.
Add border
Let's add an attractive border around our photostitch design to frame it...
 | Use Create Layouts > Create Outlines & Offsets to create outlines and offsets for selected closed embroidery object(s). |
Add outlines
- Select all the color blocks in the design and group them.
- Go to the 'Create Layouts' toolbox and select 'Create Outlines and Offsets'. Tick both checkboxes and set as shown.
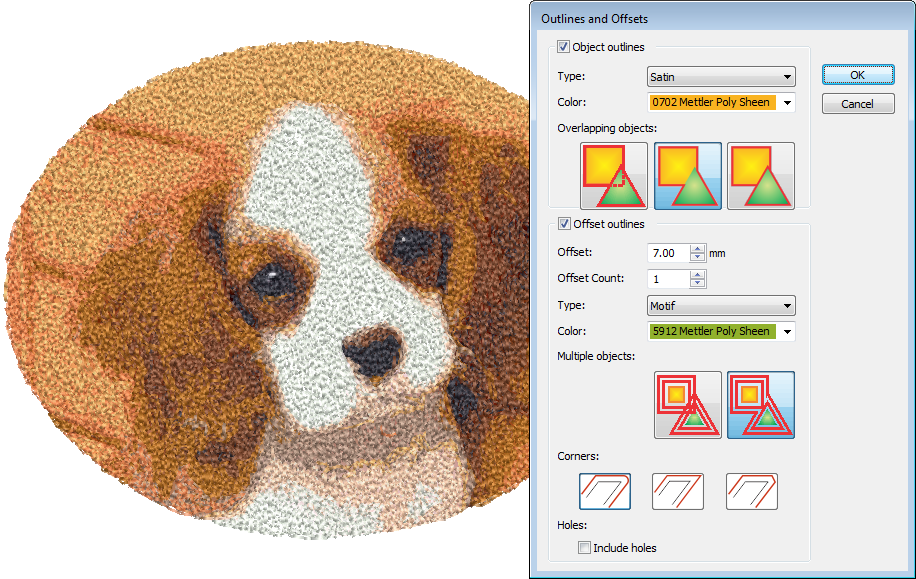
- Click OK to generate the borders.
 | Use Auto-Digitize / Edit Objects > Smooth Shapes to remove excess reshape-nodes from selected embroidery objects. |
Select the satin outline object, go to the 'Edit Objects' toolbox, and select 'Smooth Shapes'.
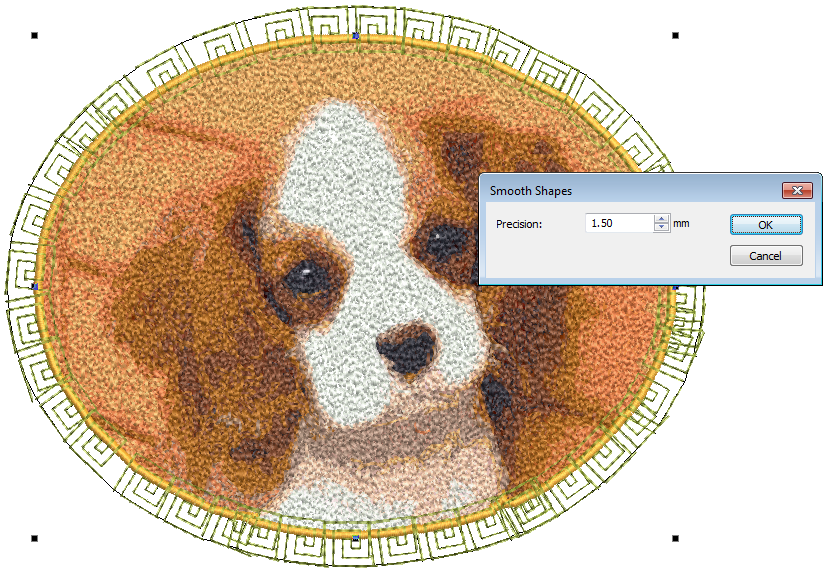
- Enter the smoothing precision value in millimeters. This value controls how closely the smoothed outline follows the original. The larger the precision value, the fewer the reshape nodes. In this case, we've set to 1.5 mm. Do the same to the motif run object.
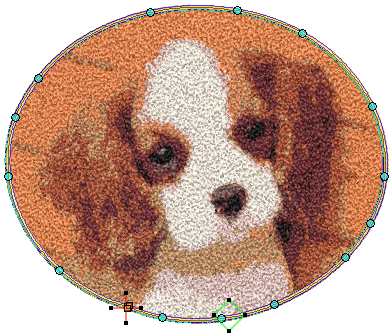
|
|
| Before Smooth Shapes applied | After Smooth Shapes applied |

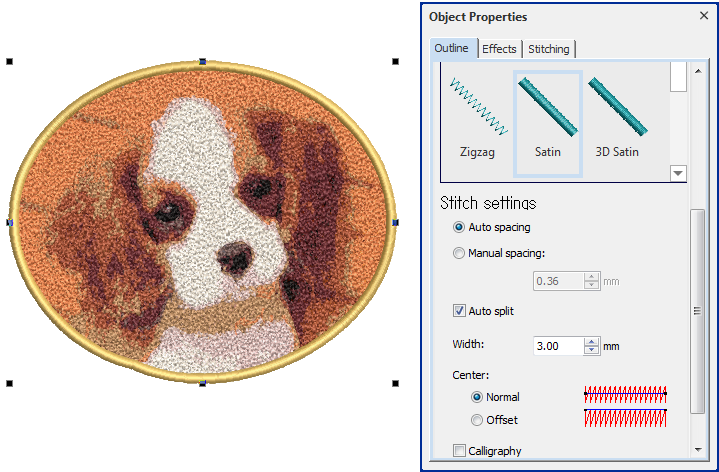
- Select the satin outline object and change the width to 3 mm in the Object Properties docker.
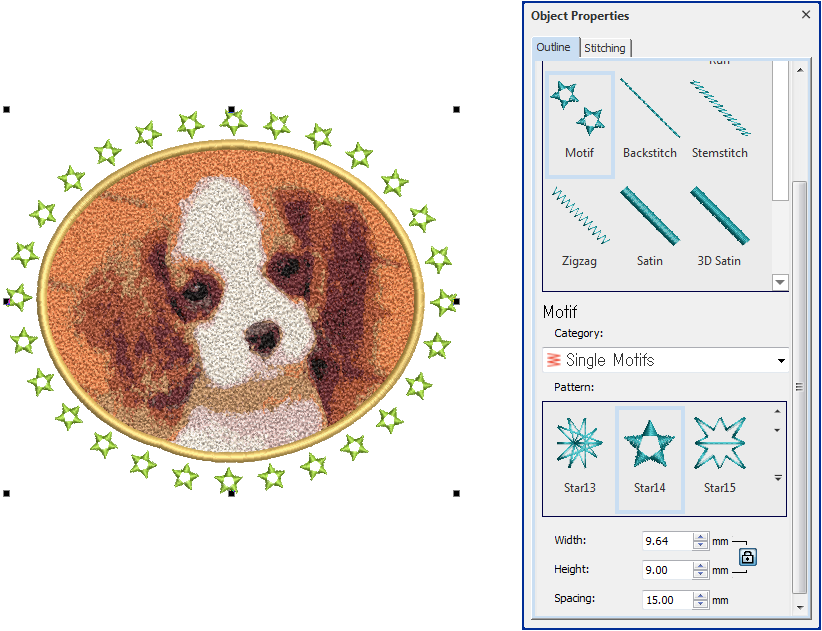
- Select the motif run object and change the motif – e.g. Star 14 – and adjust the spacing – e.g. 15 mm.
Add name tag
Now we can add the name tag...
| Use Digitize > Standard Shapes to digitize standard shapes. Press <Ctrl> to keep the proportions of the shape. Press <Shift> to center at the first point entered. |
 | Use Context > Size + 10% to increase the size of selected objects in 10% increments. |
 | Use Context > Size - 10% to decrease the size of selected objects in 10% increments. |
Add ribbon
- Go to the Digitize toolbox and click the Standard Shapes button.
- Choose the pattern 00 under Borders category in the 'Select Shape' dialog.
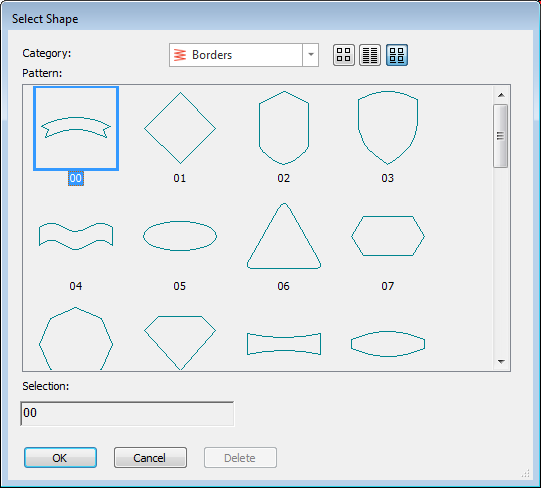
- Click OK.
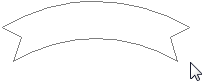
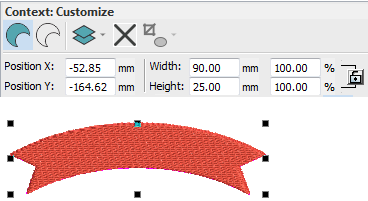
- Draw the wireline to a preferred size.
- Choose the Fill icon on the Context toolbar.
- Adjust the size in the Context toolbar – e.g. 90 mm x 25 mm – with proportional scaling unlocked.
| Use Create Layouts > Create Outlines & Offsets to create outlines and offsets for selected closed embroidery object(s). |
Add border
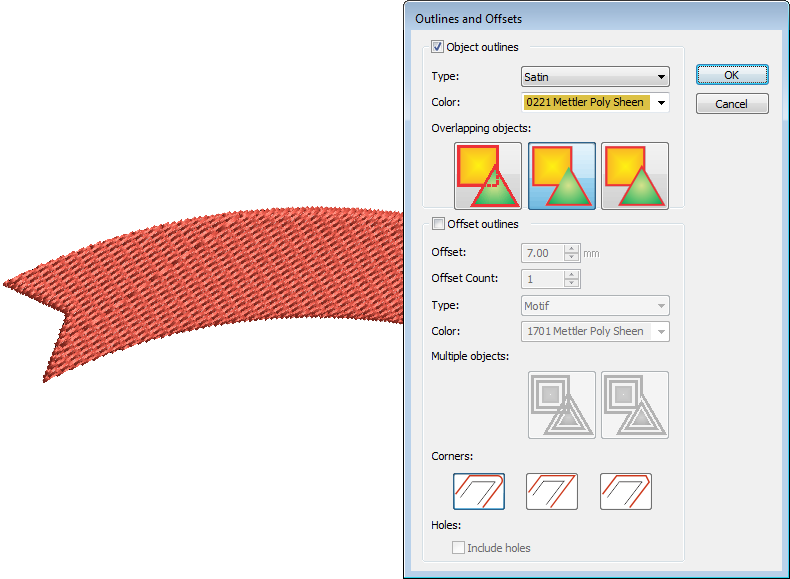
- With the ribbon still selected, again click 'Create Outlines and Offsets' in the 'Create Layouts' toolbox.
- Tick 'Object outlines', set as shown, and click OK.
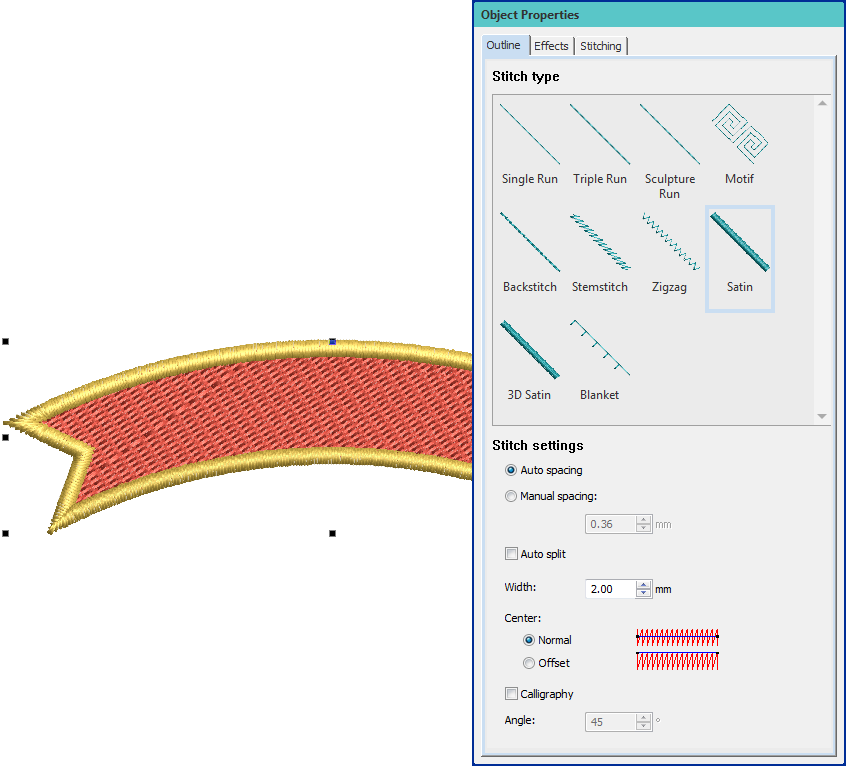
- Double-click the satin outline you just created and set the width to 2 mm.
 | Use Lettering / Monogramming > Lettering to create embroidery lettering using embroidery fonts or TrueType fonts, or edit selected lettering. |
 | Use Context > Align Centers Vertically to Vertically align the centers of selected objects. |
Add name
- Go to the 'Lettering/Monogramming' toolbox and select 'Lettering'.
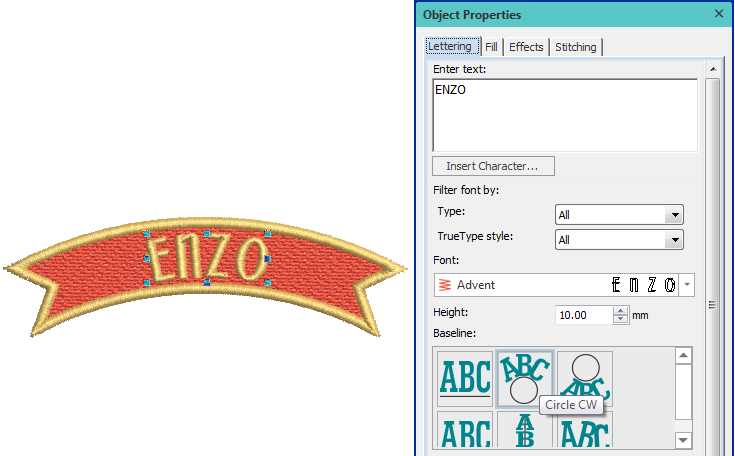
- Enter a name – in this case, 'Enzo'.
- Choose a font – e.g. 'Advent'.
- Choose a baseline – e.g. 'Circle CW'.
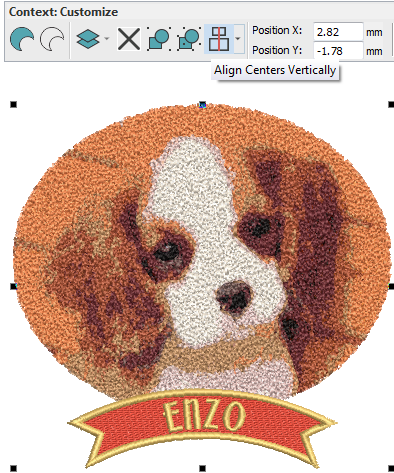
- Select the ribbon, border, and lettering objects and click 'Align Centers Vertically' in the Context toolbar.
- Group the aligned objects.
Combine design elements
Now we can align our design elements and remove any unwanted stitching...
| Use Context > Align Centers Vertically to Vertically align the centers of selected objects. |
Align photostitch and name tag
- Select the grouped photostitch, name tag objects and border objects.
- Click the 'Align Centers Vertically' tool on the Context toolbar and adjust the position as shown.
Use Lettering / Monogramming or Edit Objects > Knife to cut objects along a digitized line, preserving stitch settings and colors. |
Remove overlaps
- Select the satin outline object, go to 'Edit Objects' and click the 'Knife' tool.
- Cut the overlapped area as shown. Do the same to the other side.
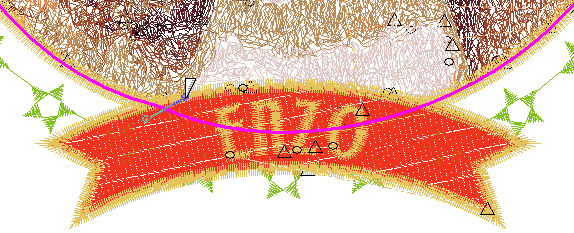
- Delete the cut-out overlapped object.
- Do the same for the motif run object.
Finalize the design
Now let's finalize the design and preview of the finished result!
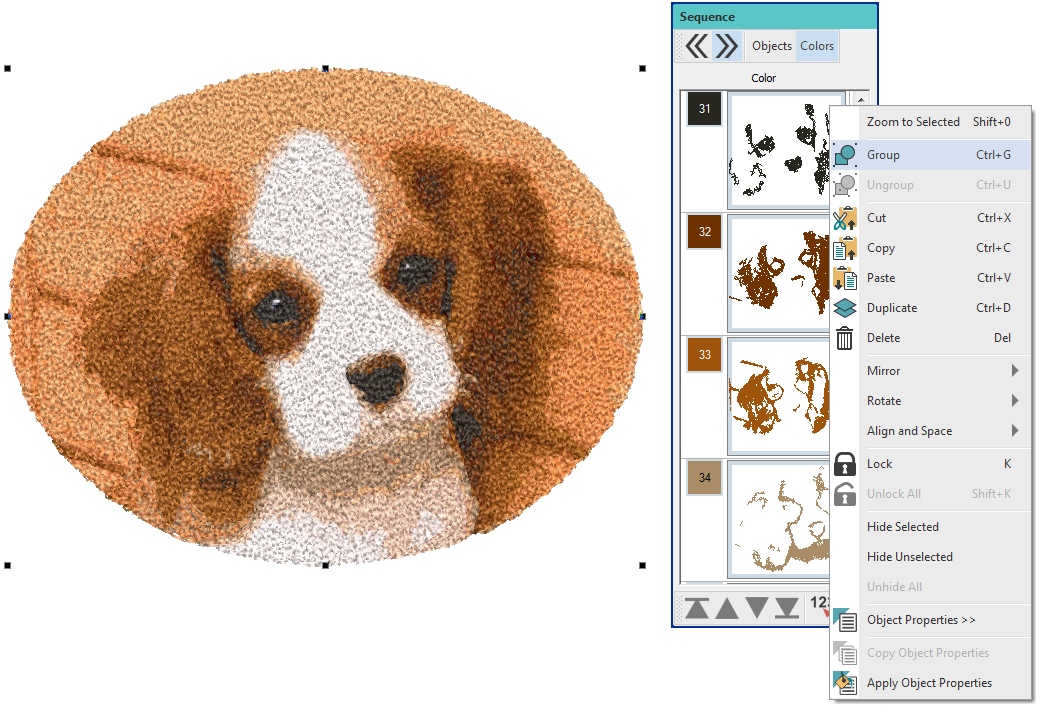
 | Use Edit Objects > Sequence >> to open the Sequence docker. Click again to close. Also available via Windows > Dockers menu. |
| Use Sequence > Move Up to move the selection up one object or color block, depending on display mode. |
| Use Sequence > Move Down to move the selection down one object or color block, depending on display mode. |
 | Use Edit Objects > Apply Closest Join to join selected objects at the closest point. Re-apply closest join after editing. |
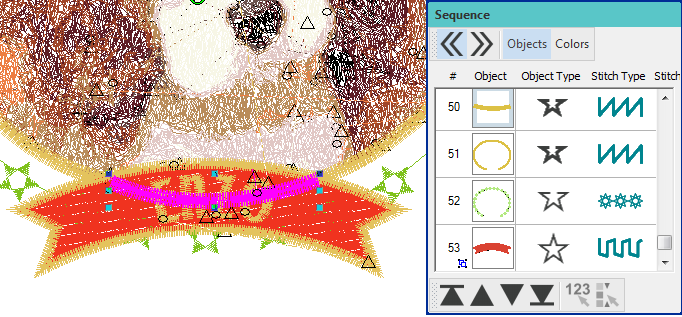
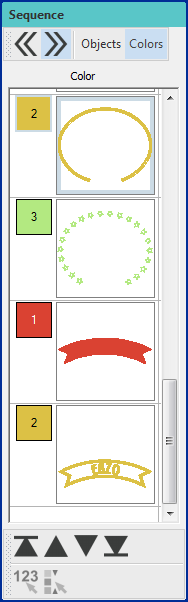
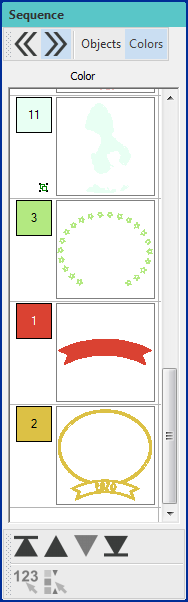
Sequence designs
- Ungroup the name tag objects.
- Switch to Color List view in the Sequence docker.
- Use the buttons on the toolbar or drag-and-drop color blocks to reposition. Merge the yellowish color blocks and sequence as shown.
| → |
|
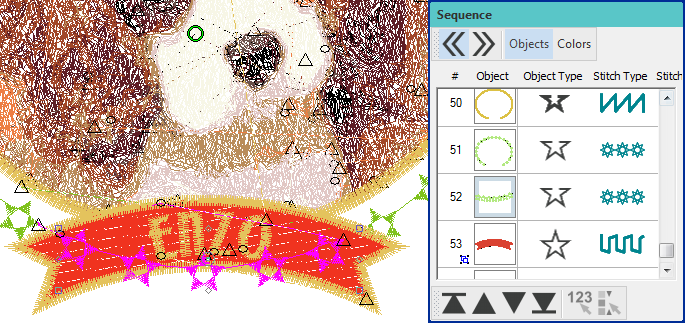
- Select all the yellowish objects and click 'Apply Closest Join' to minimize connecting stitches.
Because you will use the Closest Join command frequently, it is quicker to apply closest join to selected objects via the <J> shortcut key. For a complete list of shortcuts, see Keyboard shortcuts.
 | Use Design Colors > Hide Unused Colors to show or hide all unused colors in the design palette. |
 | Use Design Colors > Discard Unused Colors to remove all unused colors from the design palette. |
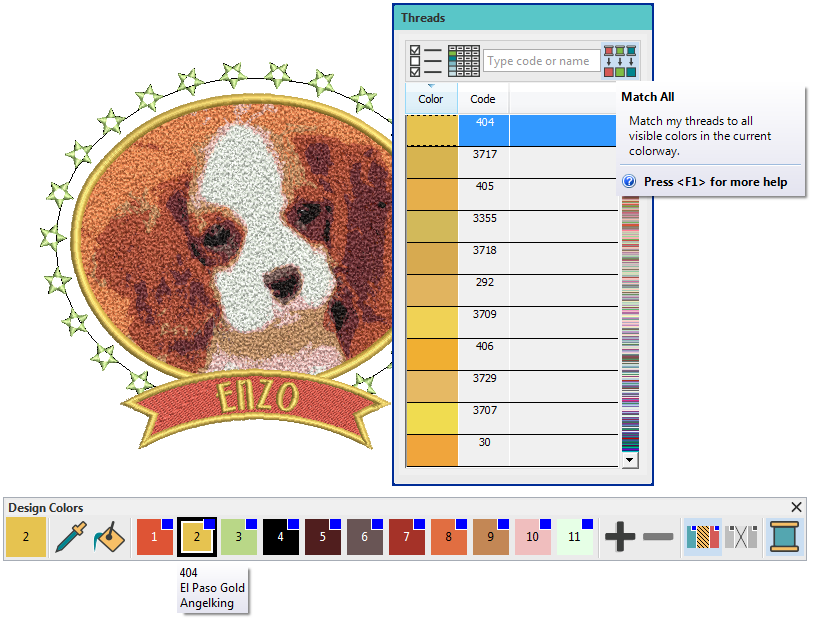
 | Use Design Colors > Threads >> to toggle Threads docker display. Use it to find threads from different charts and change design colors. |
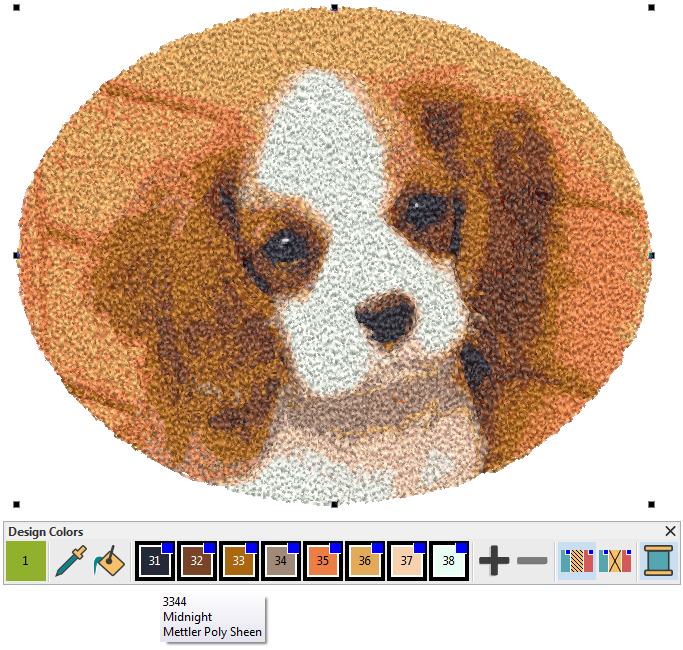
Set thread colors
We have been using Mettler Poly Sheen thread chart colors in this example. You may have a different brand and want to know what colors you need. Or you may want to change colors to match threads you already own.
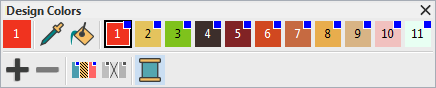
- For a better view of the design palette, click the 'Remove Unused Colors'.
- Open the Threads docker and click 'Select Thread Charts'.
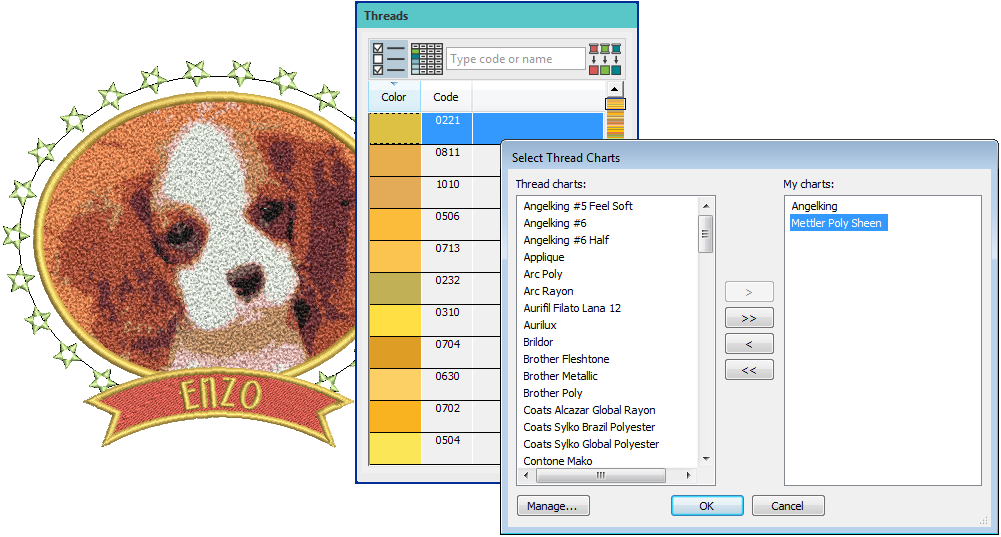
- If you want to use a different thread chart – e.g. 'Angelking' – locate it in the list and double-click to transfer it to the 'My charts' list. To remove the current chart – in this case ‘Mettler Poly Sheen’ – double-click to transfer it back to the 'Thread charts' list.
| Use Threads / Customize Design > Match All Design Colors to automatically match and assign threads in the thread list to all colors in the Design Color toolbar. |
- The quickest was to substitute the current design colors with the newly selected thread chart colors, is to click 'Match All'. You may notice a slight color shift in the design as the new colors take effect. No two thread charts are exactly the same.
Alternatively, if you want to hand-select colors, select the first color in the design palette to make it 'current'. Then scroll through the thread list to find a preferred color. Alternatively, if you already know the color you want to use, use the Search field to search by color code – e.g. ‘1701’.
- Click to transfer the selected color to the current color slot of the Design Colors toolbar.
- Do the same for the remaining colors.
 | Use View > Stitch Player to simulate embroidery design stitchout onscreen in either stitch or TrueView. |
Simulate stitchout
Preview the stitchout by running the Stitch Player and watching the simulation.
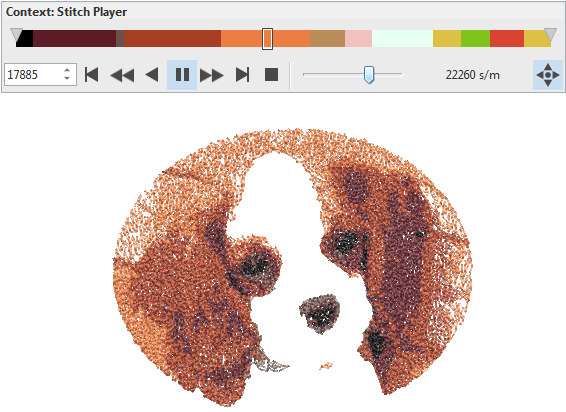
At this point, you may want to further edit the design to minimize trims and tie-offs. Color PhotoStitch designs can result in a large number of trims. Some designers turn off trims when stitching out so that the back is not covered in knots. Some prefer to travel through the auto-digitized design and manually add connecting runs where possible. Follow the path of covering threads so that connections will be hidden. See also Travel through designs.
 | Click View > Show Hoop to show or hide hoop. Right-click for settings. |
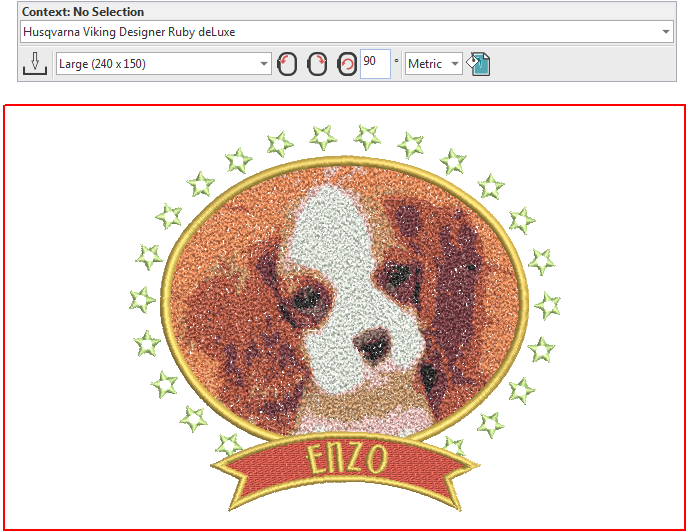
Use Context > Rotate Hoop Left 15° to rotate the first hoop, or the currently selected hoops in multi-hooping mode, in 15° increments to the Left. | |
 | Use Context > Rotate Hoop Right 15° to rotate the first hoop, or the currently selected hoops in multi-hooping mode, in 15° increments to the Right. |
| Use Context > Rotate Hoop to rotate by a specified amount - positive or negative - in degrees. |
Select hoop
First we need to select the hoop that the embroidery machine will use to ensure the design fits within the stitching area.
- Before we choose the hoop, let’s find out how big the design is. You’ll notice the dimensions are shown in the status bar at the bottom of the screen. They are also shown in the Context toolbar if you select the design.
- Click the 'Show Hoop' icon In the View toolbar. This toggles the hoop display on or off.
- To choose your preferred hoop, right-click the Show Hoop icon.
In the Machine & Hoop tab, you’ll see a droplist of available hoops. Select a hoop that will fit the dimensions of the design.
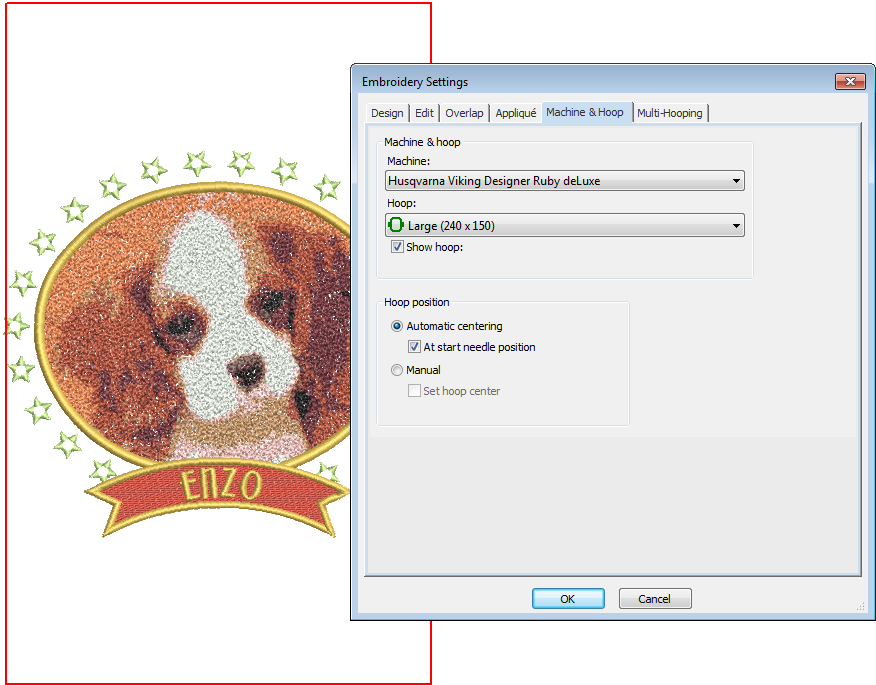
- You might need to rotate the hoop so the design fits within the hoop boundary.
Output design
Now we’re ready to send our design to the embroidery machine...
 | Use Output Design > Save Design As to save current EMB design with a different name or location. |
Save design
- Go to the 'Output Design' toolbox and choose 'Save Design As'.
- Choose a preferred folder and save with a new name and in EMB format to ensure you retain all the information stored in the file.
 | Use Output Design > Export Design to export the current design to a machine file for stitching. |
Export design to machine files
The software saves designs to 'all-in-one' EMB files which contain objects, colors and stitch information. This makes it easy to edit later and retain quality. However, embroidery machines only require a machine file. Different machines require different formats.
- In the Output Design toolbox, select the 'Export Design' option. Select the format your machine reads from the droplist. If you’re not sure, check the instructions provided with your machine.
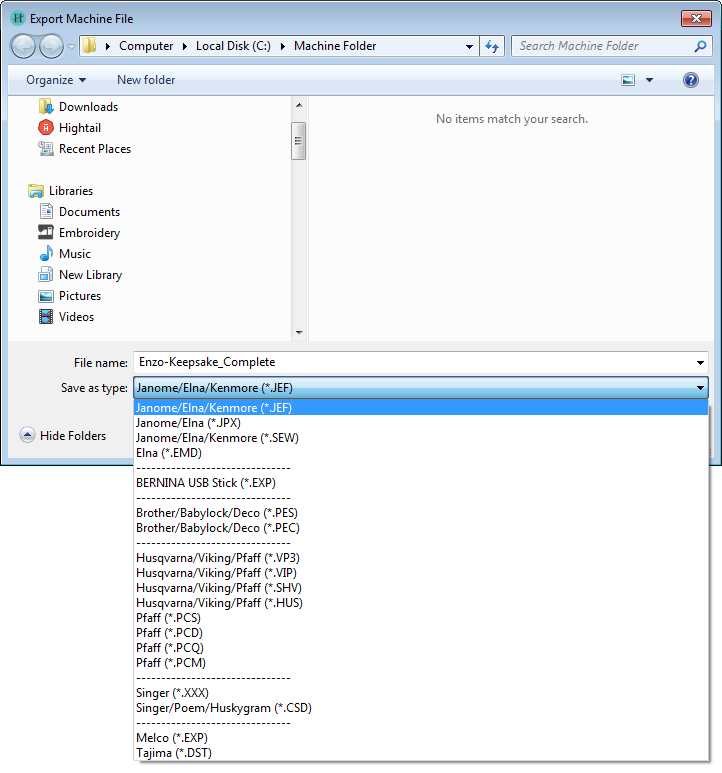
- The machine file will be saved in a folder called 'My Machine Files' for easy reference.
- You can now transfer this file to your machine. This would typically be via USB stick or through a connection application provided with your machine. See also Machine selection.
Stitch out design
Let’s get stitching!
.
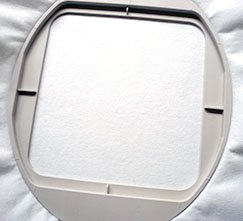
Hoop design
- Cut your fabric larger than the hoop on all sides.
- Cut your cut-away stabilizer to the same size.
- Take your hoop and separate the base and top pieces.
- Place both fabric and stabilizer on the base piece. Then lay the top piece over it.
- Push the two pieces together, slowing working from the top or opposite end to the tension screws.
.
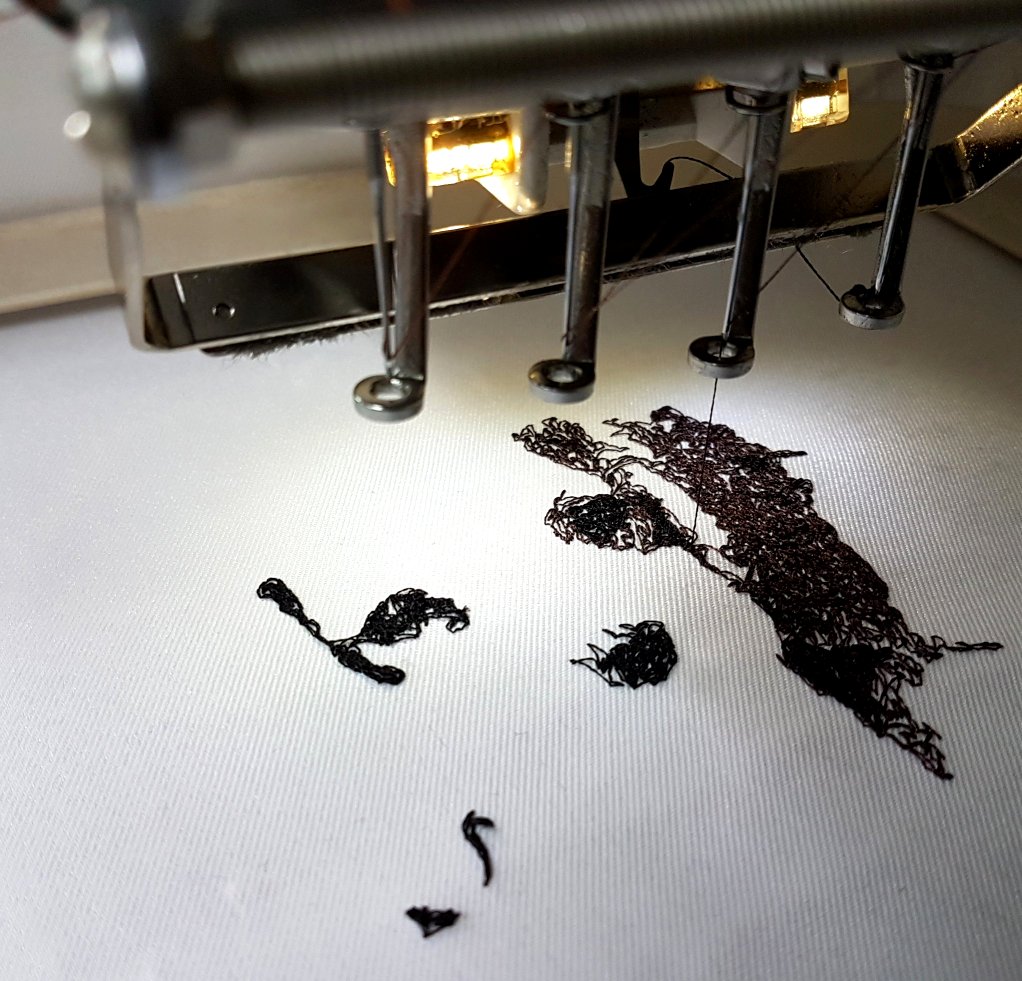
Stitch design
- Thread up your machine.
- Use the needle to set to the mark on your fabric.
You’ll need to continually monitor the design stitchout to check for thread breaks.
.
Finalize project
Oh, one more step… why not take a photo and share your creation!