
Personalized zipper pouch
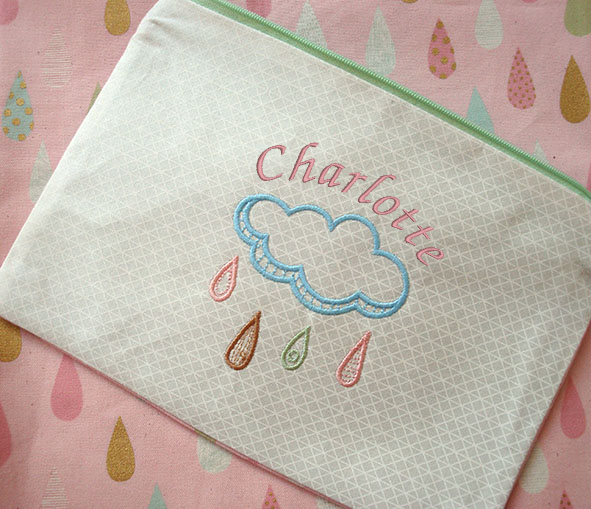
Zipper pouches have a million and one uses. Make one like this for a little someone you know and give it that personal touch.
Skill: | Beginner |
Time: | 10 min software time, 20 minutes sewing time |
Required: | Hatch Embroidery Personalizer, Composer, Digitizer |
Features: | Font selection, Size, Baselines, changing thread colors |
Theme: | Children |
| Finished size: | 9-1/2″ long x 6-1/2″ tall |
 You’ll need...
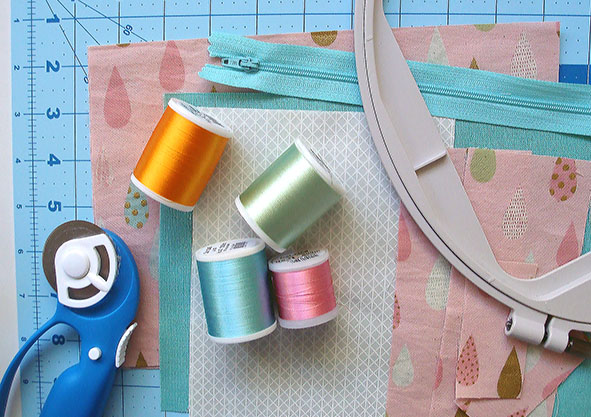
- A 75/11 sharp sewing needle (general purpose)
- 9” zipper
- 1 Fat Quarter quilting cotton fabric for Pouch lining (cut two pieces 7”x10”)
- 1 Fat Quarter quilting cotton fabric for Pouch outer (don’t cut until after embroidered)
- Lightweight no-show mesh cutaway stabilizer
- Temporary adhesive spray
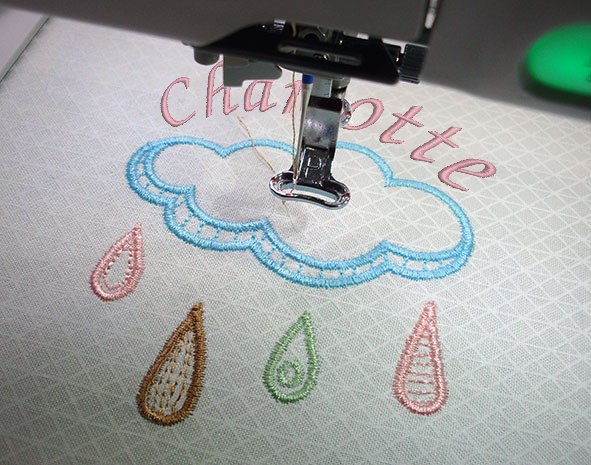
- Embroidery thread (we’ve used Madeira Rayon Pink 1108, Mint green 1100, Turquoise 1045, Yellow gold 1159)
- Scissors
The screen illustrations in this publication are intended as representations, not exact duplicates of screen layouts generated by the software. The samples used to illustrate software features and capabilities may not be exactly duplicable, depending on your product level.
Let’s get started
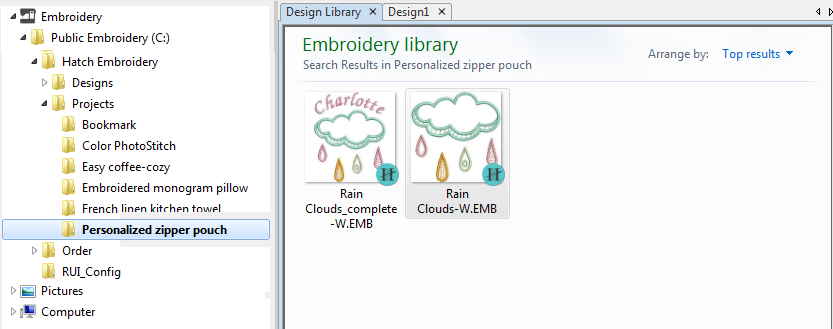
 | Use Manage Designs > Open Selected to open the design(s) selected in the Design Library window. |
Open a design
- Go to the Windows Start menu or desktop and click the link to start your embroidery software.
- Go to the Toolboxes on the left and select ‘Manage Designs’.
- Open the folder named 'Projects’ and choose 'Personalized Zipper Pouch'.
- Select 'rain clouds-W' and click Open Selected.
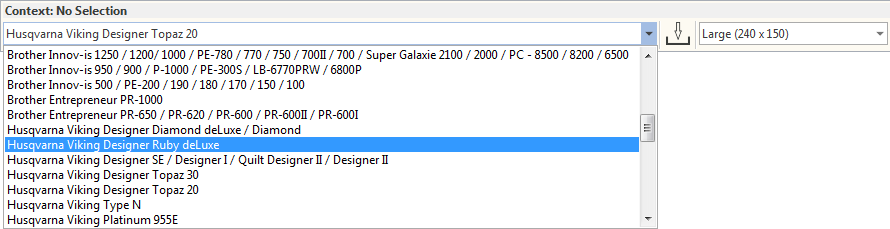
Choose your machine
The software supports various sets of machine model. Some machines can be connected by cable directly to your PC via the USB port. If you have a newer machine model, you will have also received machine software. This needs to be installed independently of your embroidery software. Some machines read USB memory sticks. Choose your preferred machine model. This in turn will determine your hoop selection. See also Machine selection.
Customize the design
 | Use Lettering / Monogramming > Lettering to create embroidery lettering using embroidery fonts or TrueType fonts, or edit selected lettering. |
Add lettering
- Select the pink color from the Design Colors.
- Select the Lettering tool. Double-click to open the Object Properties docker.

- Select a playful style font from the Font list - e.g. 'Chancery' - and key in your name - e.g. 'Charlotte' - into the text field. Alternatively, click anywhere in the design window and start typing.
- Adjust font size via the Height field - e.g. 12mm.
- Choose Circle Clockwise for the Baseline.
Adjust the baseline radius - e.g. 60cm. Scroll to the bottom of the Advanced section in the docker.
Use the arrow keys to nudge it into position.
Click outside the design area to make sure design and lettering are not selected before proceeding.
 | Use Customize Design > Threads >> to toggle Threads docker display. Use it to find threads from different charts and change design colors. |
 | Use Edit Objects > Sequence >> to open the Sequence docker. Click again to close. Also available via Windows > Dockers menu. |
Change design color
We have used the Madeira thread chart colors in this example. You may have a different brands and want to know what colors you need. Or you may want to change colors to match with the threads you already own.
- Go to the Customize Design toolbox and select Change Design Color.
- Click My Thread Charts in the Threads docker.
- Choose your preferred brand - e.g. 'Isacord 40'.
Add to the My Charts panel on the right-hand side and click OK. 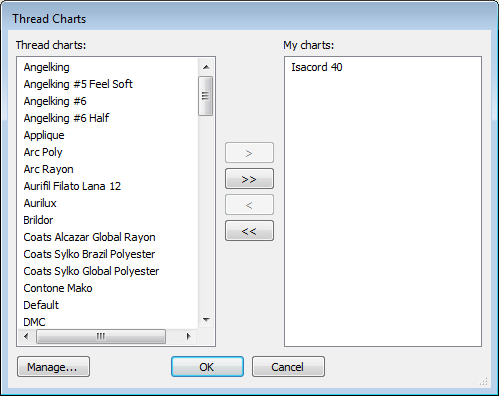
- Select the Sequence docker to view thread colors used in the design in the order they will be stitched.
- In the Sequence docker, select the first design component.
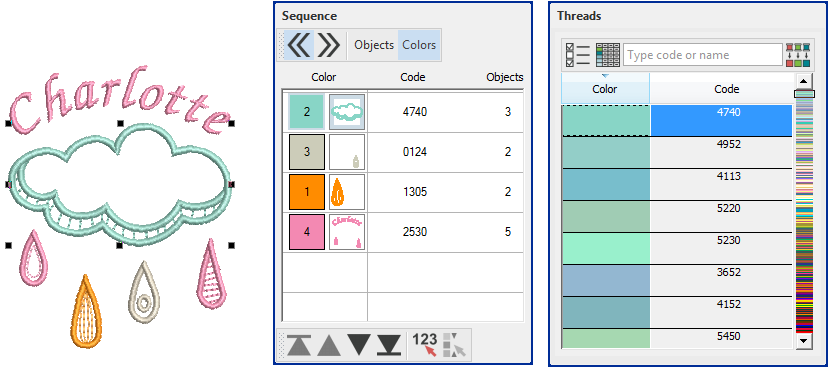
- In Threads, browse through and select a preferred color. Double-click to transfer to the Design Colors.
- Do the same with the rest of the components.
Output the design
Now we’re ready to send our design to embroidery machine...
 | Click View > Show Hoop to show or hide hoop. Right-click for settings. |
Select your hoop
First we need to select the hoop that the embroidery machine will use and ensure the design fits within the stitching area.
- Before we choose the hoop, let’s find out how big the design is. You’ll notice the dimensions are shown in the status bar at the bottom of the screen. They are also shown in the Context toolbar if you select the design.
- Click the Hoop icon In the View toolbar. This toggles the Hoop display on or off.
- To choose your preferred hoop, right-click the Hoop icon.
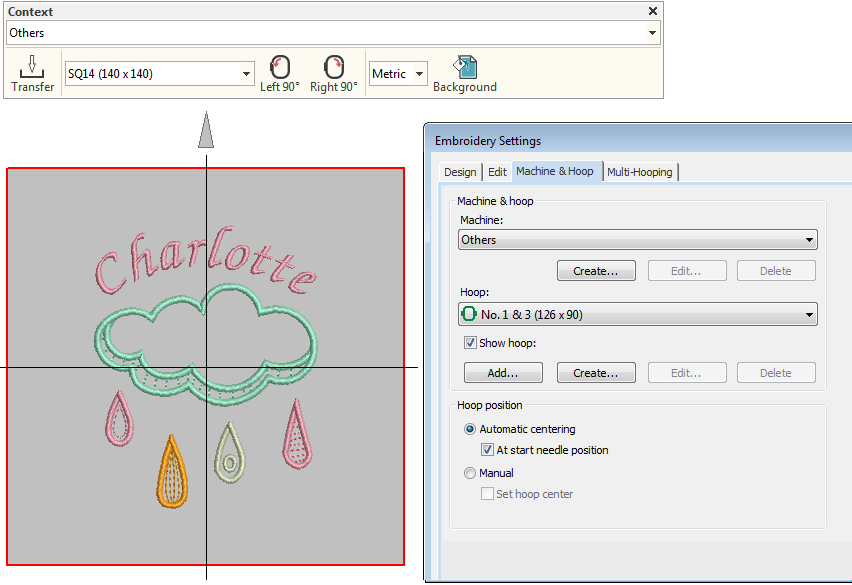
In the Hoop tab, you’ll see a droplist of available hoops. Find and select a hoop that will fit the dimensions of the design.
 | Use Output Design > Save Design As to save current EMB design with a different name or location. |
Save your design
The software creates designs in a rich EMB file, containing objects, colors and stitch information. This makes it easy to edit later and retain quality. Because you’ve changed the original design, you’ll want to save it with a different file name.
- Go to the Output Design toolbox.
- Select Save Design As.
- Save it with a new name and in EMB format to ensure you retain all the information stored in the file.
 | Use Output Design > Export Design to export the current design to a machine file for stitching. |
Transfer design to machine
Embroidery machines only require a stitch file. Machines vary in the types of file format they require.
- In the Output Design toolbox, select the Export Design option. You can then find the format your machine reads. If you’re not sure, check the instructions provided with your machine. The stitch file will be saved in a folder called My Machine files for easy reference later on.
- You may also be able to transfer this file to your machine. This would typically be via USB stick or through a connection application provided with your machine.
Stitch the design
Let’s get stitching...
.
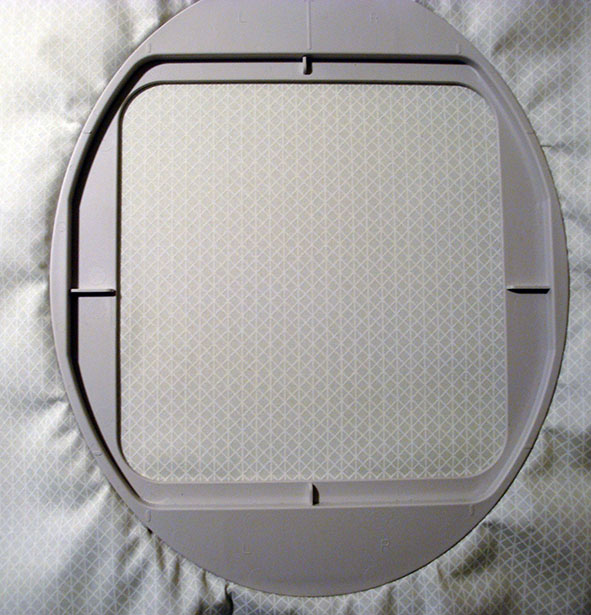
Hoop your fabric
- Select the fabric for the front of the zipper pouch. Your front panel will need to be 7” x 10”. However, you will need to keep it large enough to fit in your hoop - about 2” larger than the hoop on all sides.
- Cut your lightweight cutaway stabilizer to the same size as the fabric.
- Spray it with temporary adhesive spray and smooth the fabric on top. It’s important to adhere the stabilizer to the fabric so that both layers are nice and tight. Quilter’s cotton can tend to pucker and wrinkle if it’s not hooped well.
.
Set up your thread and needle
For quilting cotton we recommend a general embroidery needle or a 75/11 needle. Thread the first thread color on your machine and ... start stitching!
Construct the zipper pouch
.
Cut out pieces
- Lightly mark the center of the design.
- Remove the fabric from the hoop, and place on a cutting mat.
- From the center point, measure the fabric 5” on either side to make up the 10” panel width.
- Measure 3.5” on each vertical side to make up the 7” panel height. This ensures the design is centered on the front of the zipper pouch.
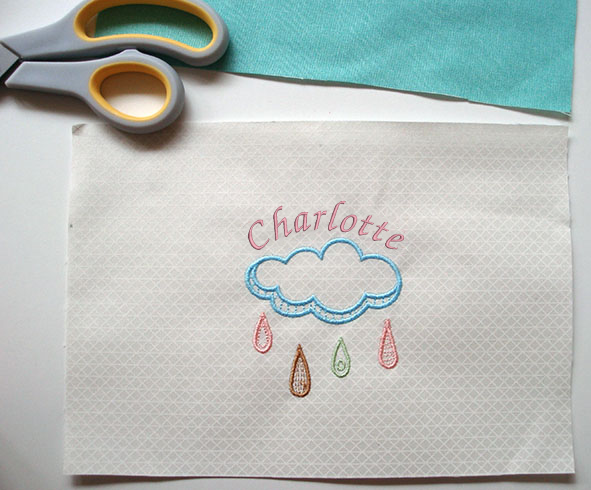
You can print the design with start & end crosshairs to help locate the exact middle of the design. See for Print designs details.
.
Sew together
We’ve used the easy lined Zipper Pouch pattern by Craftbuds.com so head over there for instructions on how to complete the sewing part of the project.

Congratulations! A personalized zipper pouch for pencils, toys, or other treasures.
