Ambience quilting
The software provides tools and techniques for expanding flat embroidery surfaces into raised or ‘sculpted’ surfaces.
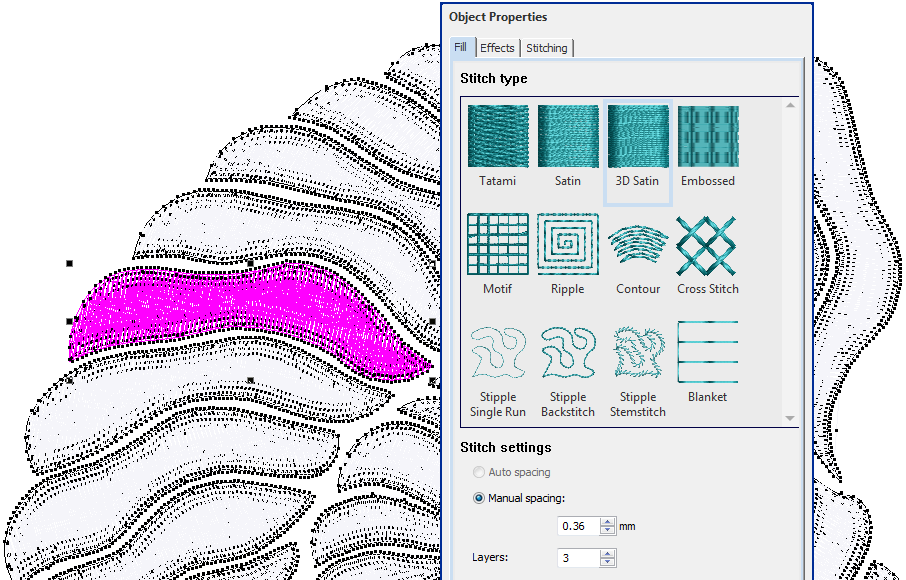
Quilting creates dimension by stuffing or filling areas to produce a raised surface. The quilting feature consists of two components: 3D Satin to create ‘puffy embroidery’, and Trapunto Outlines to turn puffy embroidery designs into trapunto designs.
The Outlines & Offsets tool is sometimes used to create ‘echo’ quilting designs. However, there are limitations with this method. The Ambience Quilting feature provides a better alternative.
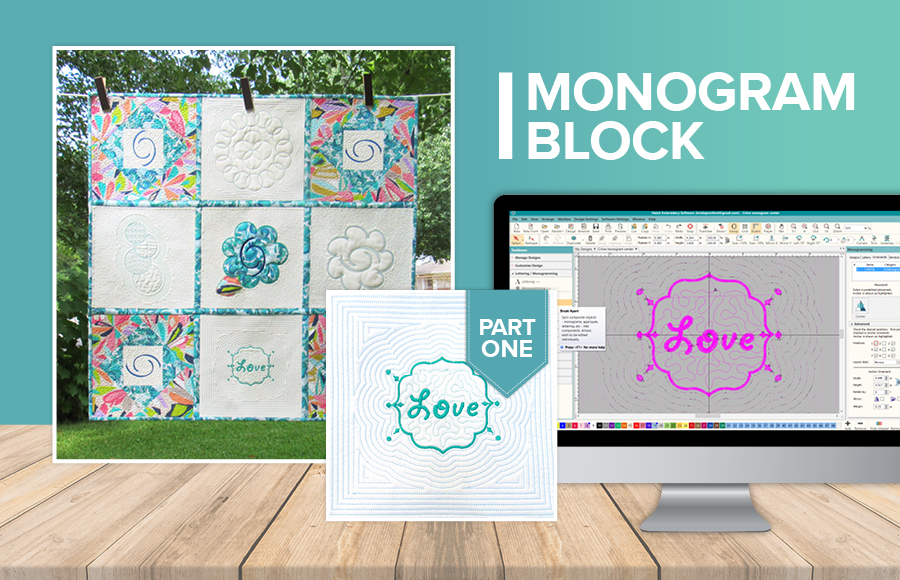
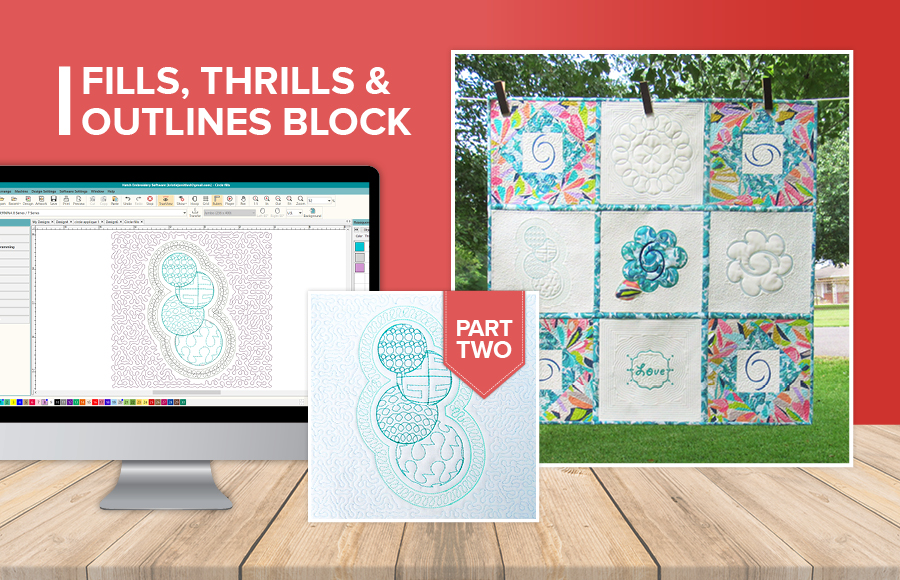
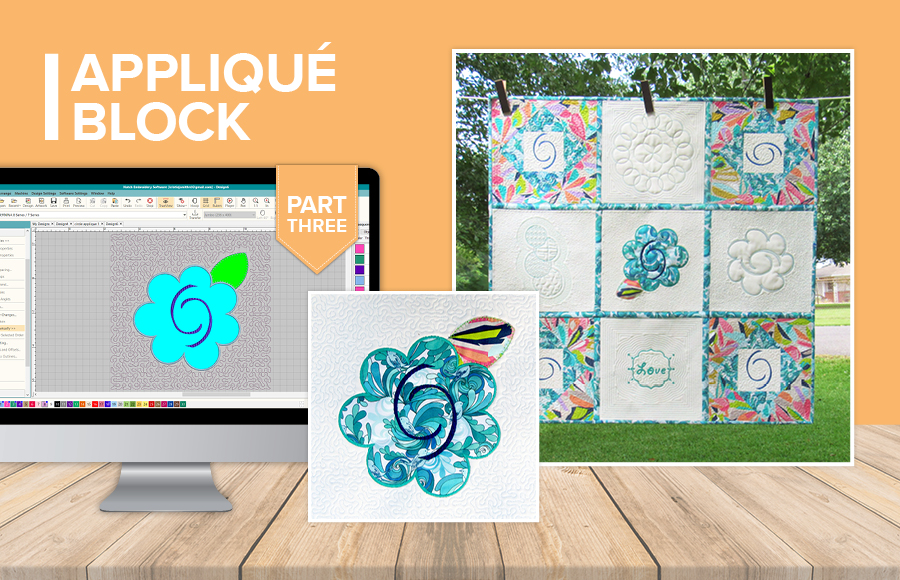
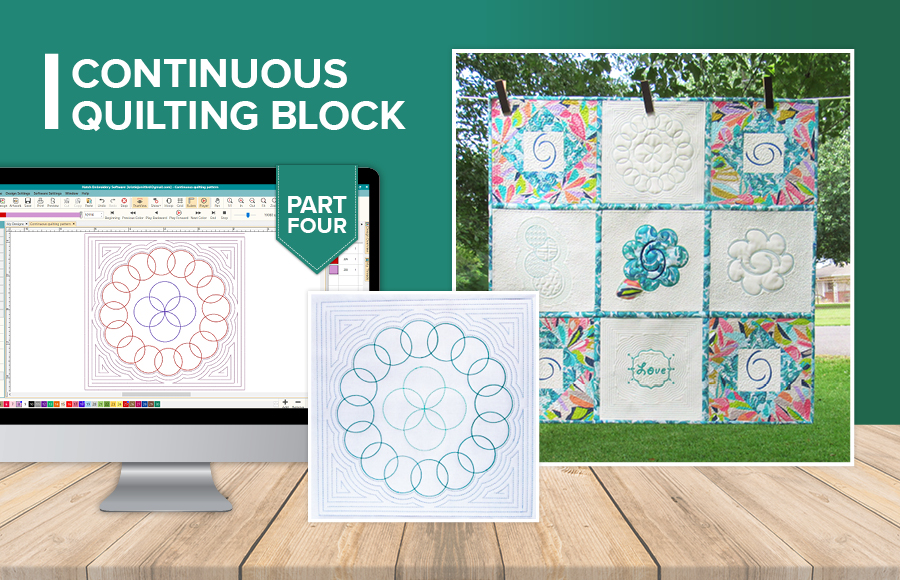
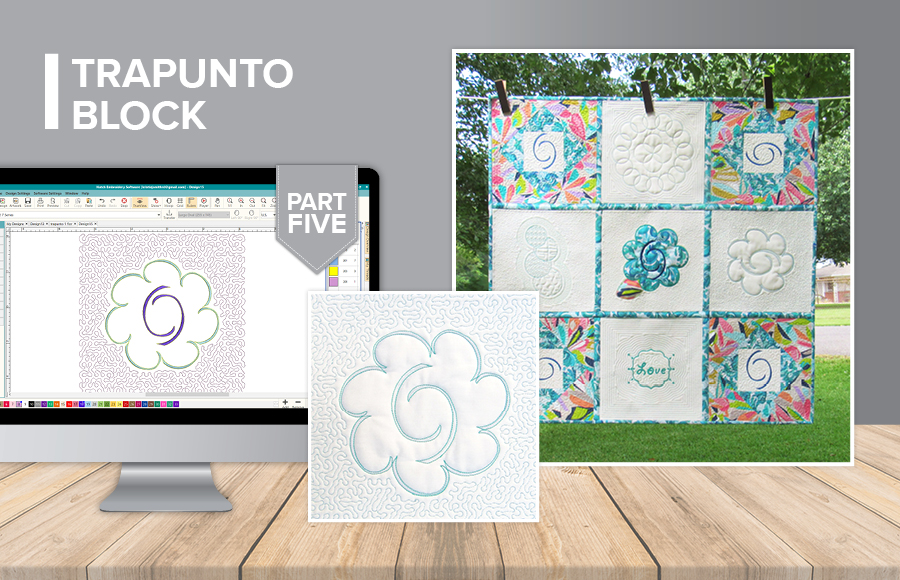
| We asked the lovely Kristie J Smith for a fun quilting project suitable for beginners. Each fortnight we will post Kristie's instructions on how to create the individual blocks for your quilt. The final part will then explain how to assemble them altogether. Click the thumbnails to read more... | ||||
|
|
|
|
|
Use Object Properties > Outline > 3D Satin to create raised satin borders – can be used with trapunto for quilting effects. | |
Use Object Properties > Fill > 3D Satin to create raised surfaces – can be applied to lettering or used with trapunto for quilting effects. |
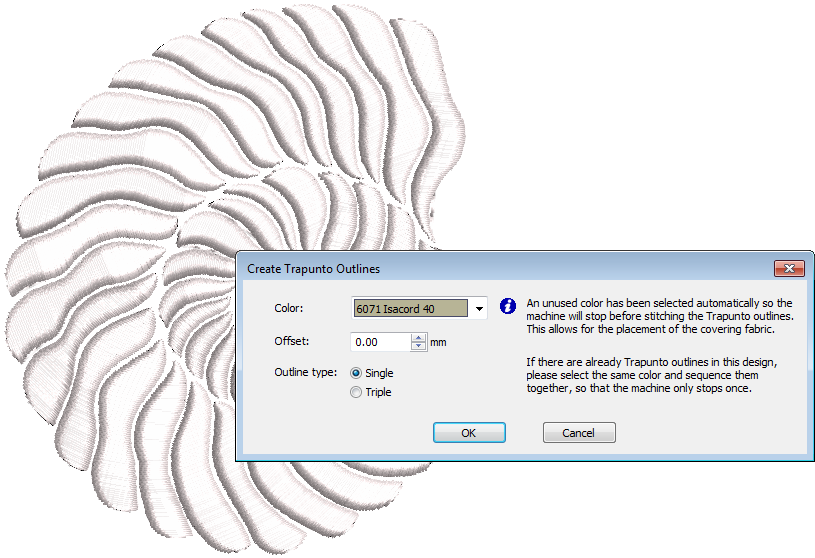
 | Use Create Layouts > Create Trapunto Outlines to use in conjunction with 3D Satin to create stitching for a raised 'quilted' look. |
Trapunto embroidery
 Quilted embroidery creates dimension by stuffing or filling areas to produce a raised surface. It employs a technique known as ‘trapunto’, also referred to as ‘stuffed embroidery’. There are a number of techniques for creating trapunto designs.
Trapunto techniques
Traditional hand trapunto involves sewing two layers of fabric together with a motif outline. The underside is then slit and stuffed with yarn or cotton. Another technique – sometimes called machine trapunto or cut-away trapunto – is to mark the design pattern on top of the quilt fabric with a water soluble marker. A layer of batting is then pinned to the underside of the fabric and two layers are stitched together. The batting is trimmed close to the stitching to create the embossed design. The quilt is then constructed by sewing the quilt top to the quilt back with another layer of batting in between.
Raised satin
Yet another technique is to use layers of thread instead of stuffing or batting to create dimension. The embroidery design consisting of multiple layers of satin stitching is first stitched onto Aqua Mesh water-soluble stabilizer. Then a top and bottom layer of fabric are added before the final outline is stitched around the design. Recommended settings for best loft are 0.36mm manual for satin spacing with 3 layers.
Quilting design work relies on two main tools:
- Raised Satin: This allows you to create ‘puffy embroidery’. Outlines can be used for lettering and special calligraphy effects.
- Trapunto Outlines: This allows you to turn puffy embroidery designs into trapunto quilting designs.
The puffy embroidery component allows you to create raised embroidery consisting of multiple layers of satin stitches. This is as an alternative to stuffing with yarn or batting. The trapunto component allows you to stitch layers of fabric over the raised satin. The Trapunto Outlines feature is used exclusively with Raised Satin to create a ‘quilted’ look. When activated, this feature always defaults to the next unused color so as to force the machine to stop before trapunto outlines are stitched. This allows you to place the covering fabric.
Study the quilting design included in the designs folder. Try stitching it out to practice the techniques involved. Check your machine documentation.
To make sure your design is being displayed correctly in 3D, particularly with Raised Satin, calibrate your monitor. See Monitor calibration.
 | Use Context > Measurement Units to change measurement units within software without changing operating system settings. |
 | Use Create Layouts > Ambience Quilting to use to create 'echo' quilting designs. |
Ambience quilting
- Open the design you want to include within a quilting block. The Ambience Quilting feature is activated when the design window contains one or more embroidery objects.
- Specify your preferred measurement system - metric or US. You can, if you prefer, specify measurements on the fly by typing the value and unit of measure - e.g. 'mm' - directly into the field.
- Click Ambience Quilting. The Ambience Quilting dialog is grouped into four functional areas: Block Size, Design Size, Stitching, and Block Center.
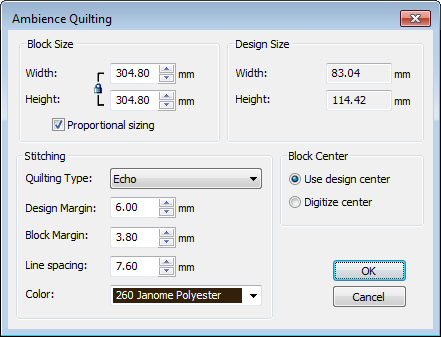
Set your quilt block size in the Block Size panel.
Height and Width fields define the boundary used to generate the echo pattern. Lock proportions with the Proportional Sizing checkbox. The Design Size panel displays height and width of the embroidery design as a reference when defining the block size.
Use the Stitching panel to determine stitching characteristics:
Parameter Description Quilting type Choose from a variety of quilt patterns: Echo, Scroll, etc. Design margin Set gap between echo quilting and the design. Block margin Set gap between echo quilting and the block boundary. Line spacing Set distance between each quilting line or loop spacing for the stipple fill. Color Choose a color for generated quilting stitches. The default is the last color used in the design. Use the Block Center panel to center the design within the quilting block:
Parameter Description Use design center Place the design at the center of block outline and generate the quilt pattern around it. Digitize center Digitize the quilting block center. Choosing this option attaches an outline of the block size with cross hairs to the cursor. Left-click to place the block center where you choose on the design, and generate the quilt pattern around it.
- Click OK to generate stitching.
 | Use View > Show Design to show or hide design elements. Click to open droplist of view settings. |
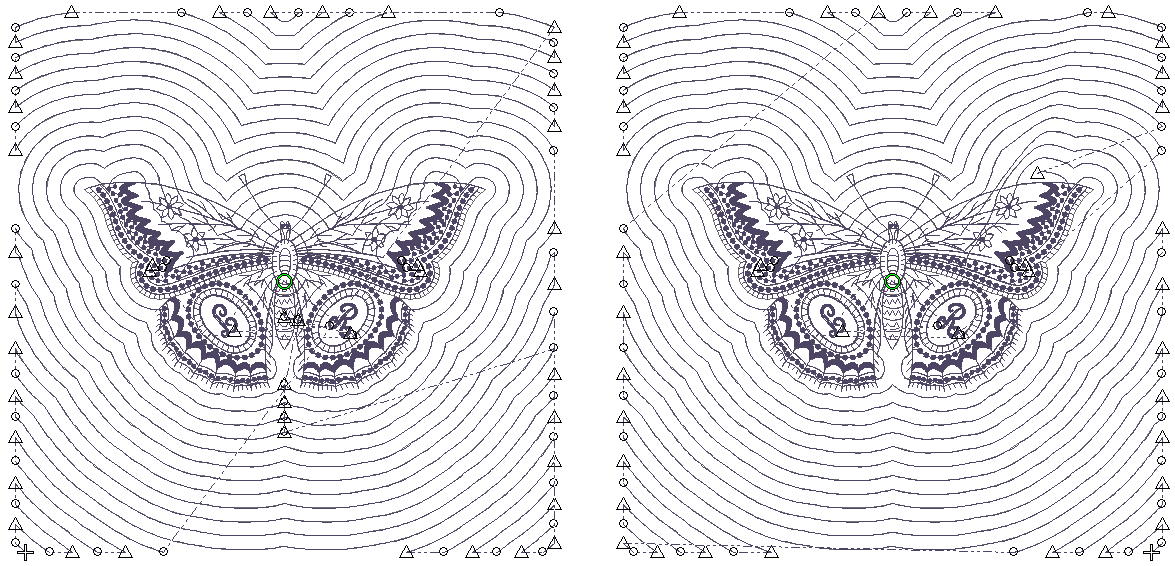
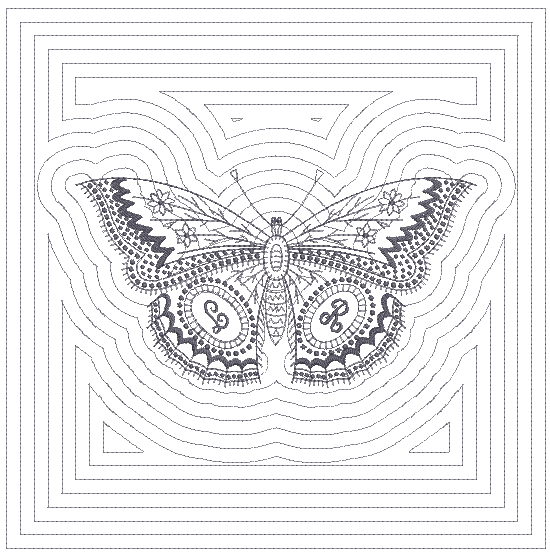
Quilting types
There are three basic types of quilting stitch - Echo, Scroll, and Stipple.
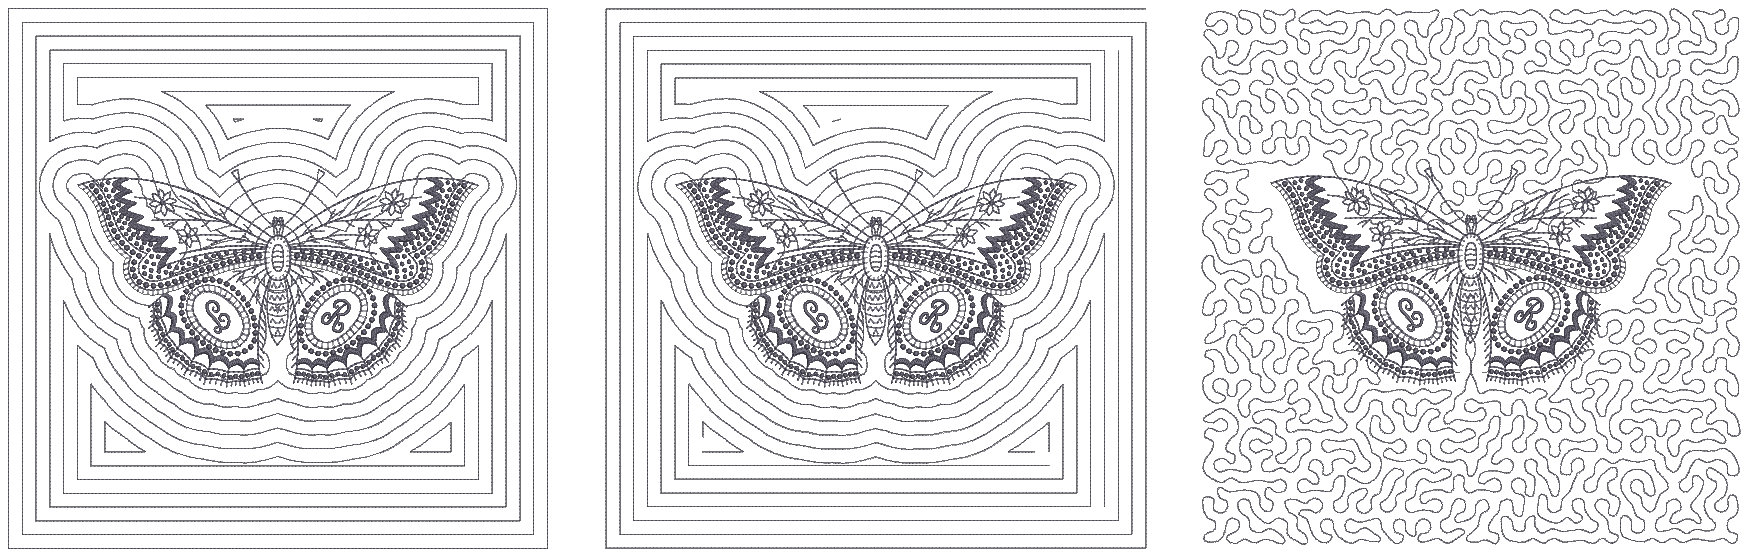
In all cases, generated stitching starts with the shape of the center design and radiates out to the boundary defined by the block size - usually somewhere between 8" and 12". On the face of it, Echo and Scroll produce similar results. Turn on connectors to see the difference...
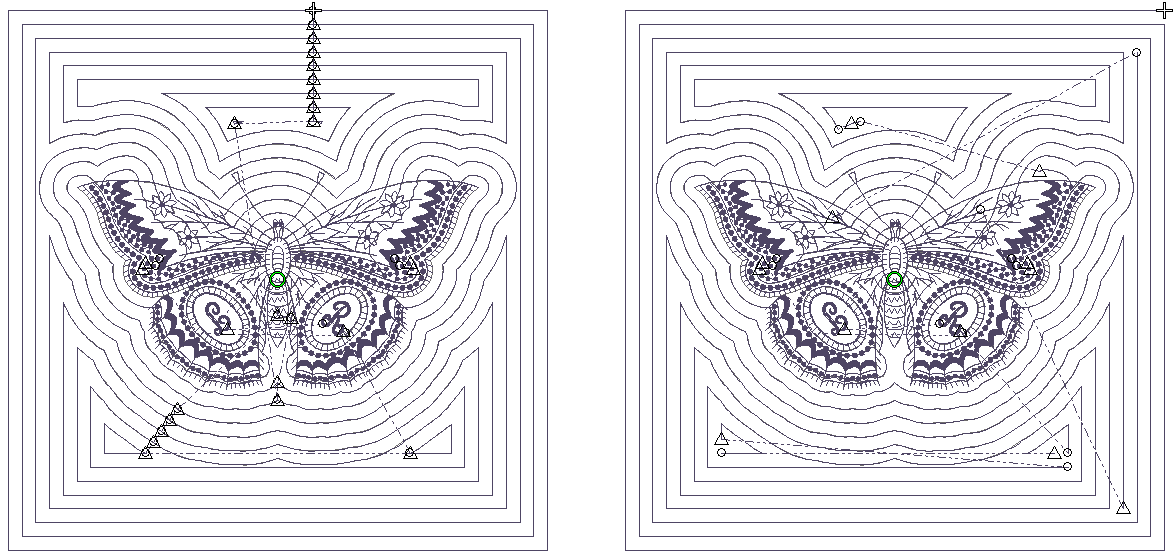
Echo stitching generates separate lines around the design. Each line is tied off and trimmed. Scroll, on the other hand, produces one continuous stitching line with jumps between separate quadrants of the design. Generally, Scroll produces a more efficient stitchout.
With Echo or Scroll clipping, the outer edges of the radiating stitching are clipped at the outside boundary of the block. Both methods produce a similar number of tie-offs and trims.