
Image quality
Before applying automatic digitizing, you frequently need to improve or ‘clean up’ artwork. To work effectively, both Auto-Digitize and Click-to-Fill require solid color images as input. You can improve artwork both with bitmap editing tools in graphics packages and/or the image processing tools provided in the design software. In fact, the software will not let you apply automatic digitizing until the image has been suitably processed.
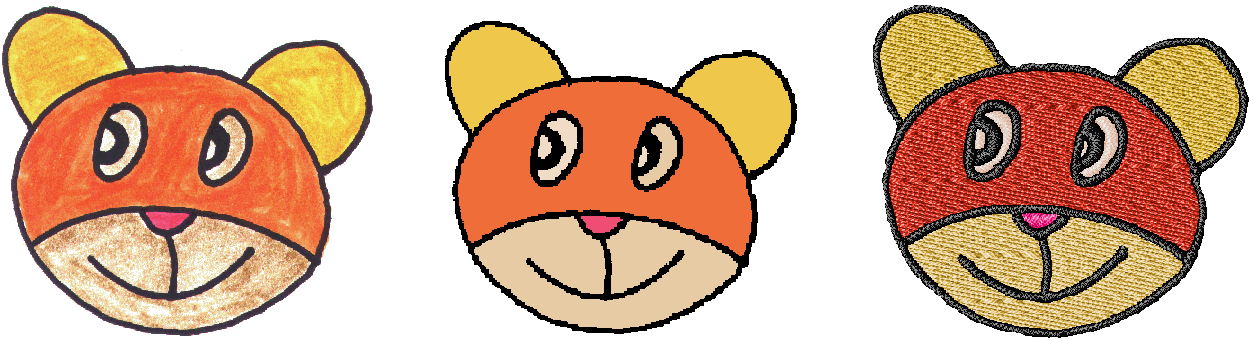
Image cleanup
In practice, cleaning up scanned images may involve any one or a combination of the following techniques:
- Reducing the number of colors
- Adding or emphasizing outlines
- Removing noise, dithering or anti-aliasing
- Eliminating unnecessary detail
- Cropping sections
- Eliminating backgrounds.
You can allow the design software to reduce the color count automatically or specify a precise number. The latter is useful if you want to match design colors to an exact number of thread colors. See also Choose artwork.
Outlined vs non-outlined images
Before preparing your image you need to know what type you are using. For the purposes of automatic digitizing, there are two categories – outlined and non-outlined. Outlined images ideally have a solid black outline around each colored area. Non-outlined images ideally consist of solid areas of color. Outlined and non-outlined images require different methods of preparation.
 |  |
| Image without outlines | Image with outlines |
Color reduction
Sometimes an image looks clean but extra colors have been introduced during scanning or in a graphics package. Color reduction means reducing the actual number of image colors in order to eliminate unnecessary detail and reduce each block to a single color. Color reduction also cleans the image, removing noise and anti-aliasing if present. This in turn helps minimize the number of trims and color changes required in the resulting embroidery design.
If you are scanning images, make sure you scan them at the optimal color depth. See also Scan artwork.
Outline sharpening
Outline sharpening means more clearly defining the outlines bordering distinct color blocks or shapes in the image. These may have been indistinct in the original or made so by the scanning process. Outline sharpening is important for automatic digitizing because it makes it easier for the software to identify the distinct areas which become embroidery objects in the resulting design. Outline sharpening only works on images with black or dark outlines.
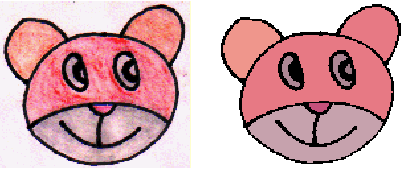
Some images have solid outlines but they may be indistinct or incomplete. These need to be rectified with the image preparation tools or a graphics package. See also Edit artwork.
Noise filtering
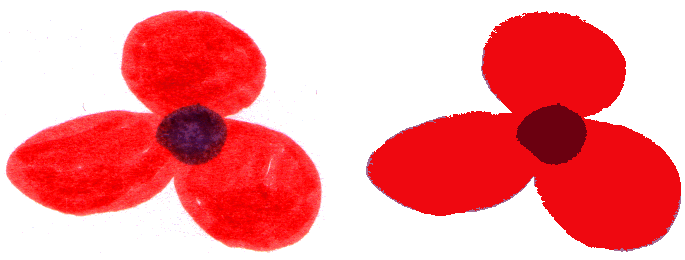
Noise filtering means restoring the solid color blocks of the original image in scanned images. This is achieved by merging different shades into one solid color. Noise filtering is important for automatic digitizing because it makes it easier for the software to identify solid color blocks which become embroidery objects in the resulting design. It also cleans up blurred or mottled areas of color.
 |  |
| Image before noise filtering, mottled color | Image after noise filtering, single colors |
Image preparation summary
Even if your artwork looks ready to stitch when inserted into the software, it will need to be image-processed before conversion. The software will not let you apply automatic digitizing techniques without preliminary image-processing.
| Action | Outlined image | Non-outlined image | Photo |
|---|---|---|---|
| Scan images |
|
| Scans in RGB mode |
| Scan line drawing | Scan in two-color mode | - | - |
| Touch up in graphics package |
|
|
|
| Use Prepare Artwork tool | Adjust outline contrast. Automatically:
| Reduce colors to a specified number. Automatically:
| - |
| Digitize |
|
| Auto-Digitize PhotoStitch |
Guidelines
Bear in mind the following key points when selecting artwork for auto-digitizing:
- Use 300 DPI high-resolution images, NOT low-res 96 DPI.
- Do not use anti-aliasing.
- Do use PNG format, not JPG.
- Do use transparent backgrounds.
- If the image does not conform to these settings, go back to the original vector artwork and generate a bitmap that includes them.
