
Process images
The auto-digitizing tools provide everything necessary to automatically digitize shapes in electronic artwork without manual input methods. Even if your artwork looks ready to stitch when inserted into the software, however, it will need to be image-processed before conversion. Processing makes it easier for the software to recognize distinct areas in the artwork. These areas then become the embroidery objects of the finished design.
The image preparation process does the following:
- Reduces colors to a specified number
- Reduces each block to a single color
- Removes anti-aliasing, noise and dithering
- Sharpens outlines.
Depending on the quality of the scanned image, you may need to touch it up manually before processing in your software You would normally do this in order to eliminate backgrounds, flood-fill solid areas with color, or add outlines, close gaps, or reinforce outlines. See also Edit artwork.
| Use Artwork > Prepare Artwork for Embroidery to prepare selected bitmap artwork for automatic digitizing. |

Prepare artwork for auto-digitizing
Use the Prepare Artwork for Embroidery tool to prepare images for automatic digitizing. This function automatically flattens colors, sharpens outlines, and reduces noise. Areas enclosed by a black outline are reduced to a single color. To prepare images...
- Scan or import the image to use. See also Supported artwork.
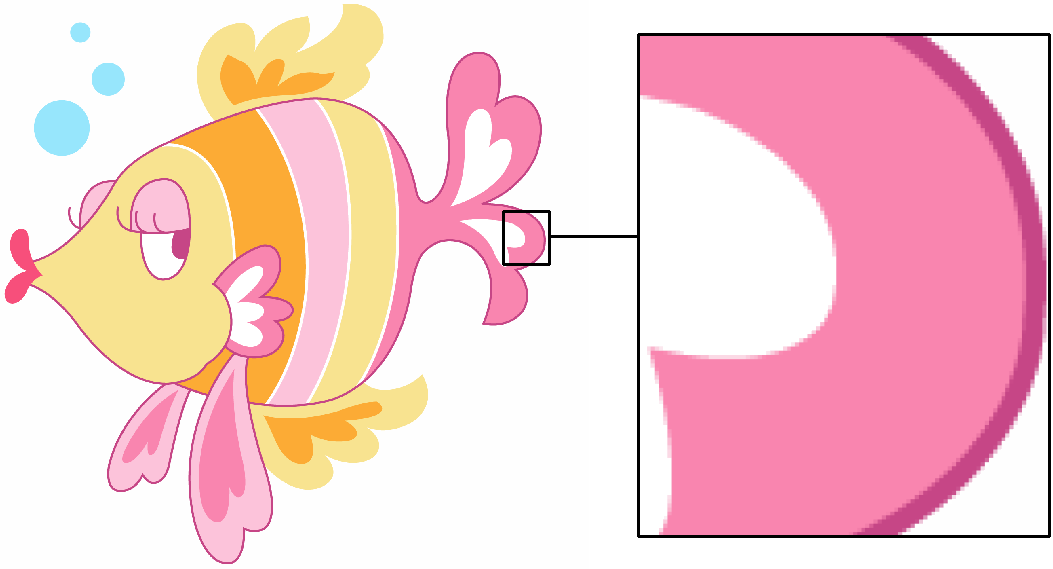
- Depending on the source, you may find dithering, anti-aliasing, or other sources of 'noise' in the image. If the image contains outlines, these will generally be 'blurred' by anti-aliasing.
- Select the image and click the Prepare Artwork for Embroidery icon. The image appears in both ‘before’ and ‘after’ preview panels.
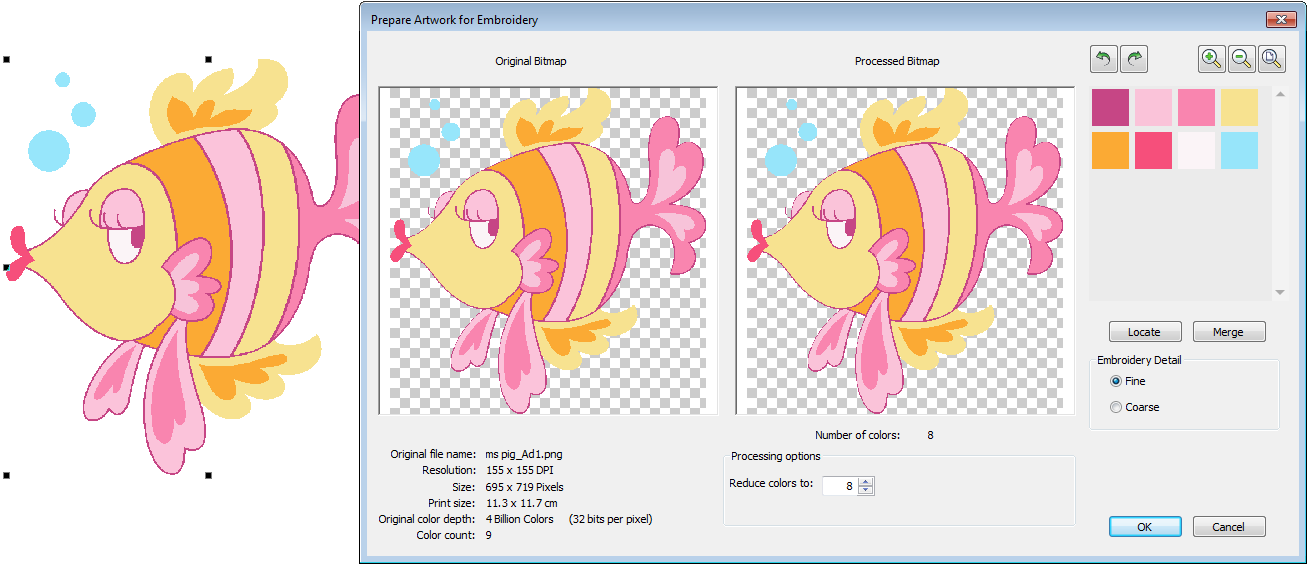
- Check the number of colors in the processed bitmap. The software suggests a color count and shows a preview of the resulting image. If there appear to be too many, the image probably contains noise.
- Use the scroll button on your mouse to zoom in and inspect details.
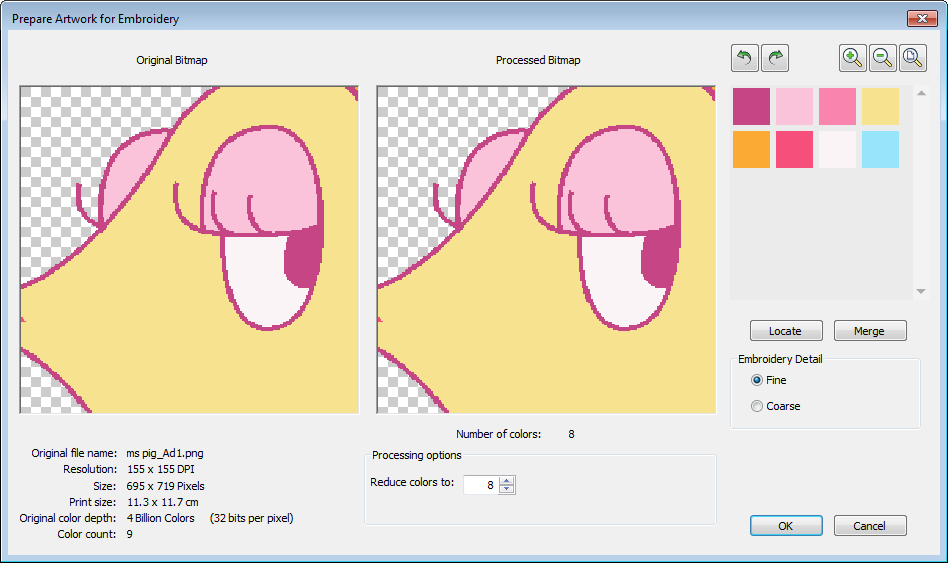
- If there appear to be too few colors to provide all the detail you want, use 'Processing options' to increase color count.
- Manually locate and merge like-colors as necessary:
- Holding the <Ctrl> key, click like-colors to select.
- Click and hold 'Locate' to preview.
- Click 'Merge' to merge like-colors into a single color.
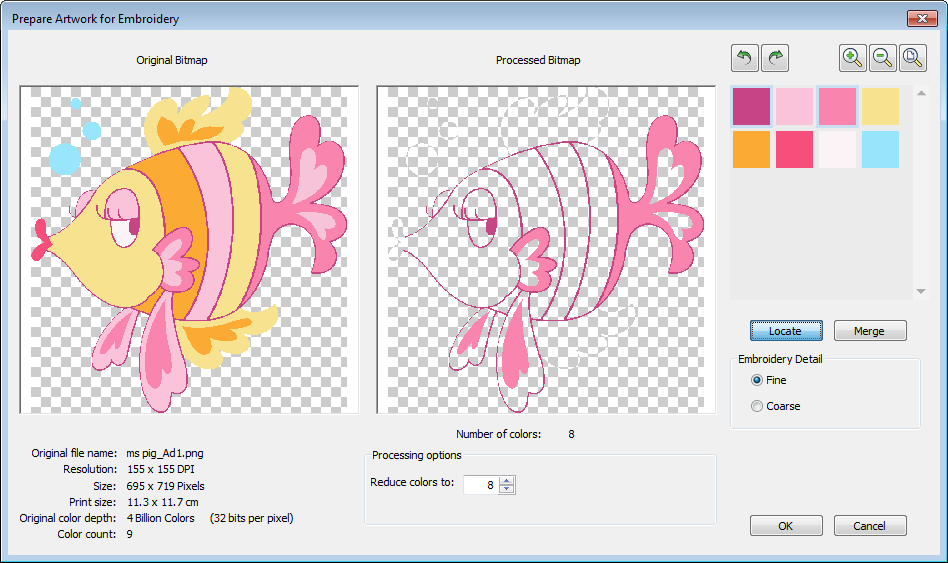
The Embroidery Detail setting affects the area used to generate embroidery objects. While it doesn’t affect the image, it does affect the embroidery result by filtering out smaller areas of color.
Fine Generally results in more detail and a greater number of embroidery objects. Coarse Generally results in slightly less detail but reduces the number of embroidery objects. It is useful for ‘noisy’ images with lots of small areas. It works especially well with JPG files which are inherently more noisy. - Click OK to process the image. Image colors should be reduced as per the preview. The artwork can now be auto-digitized. See Auto-digitize embroidery.

 | Use Artwork > Save Artwork to save currently selected bitmap artwork. |
Save processed artwork
All images placed in the design window, whether by scanning, pasting or inserting from hard disk, are saved together with the embroidery design in the EMB file. After editing in the embroidery software or third-party graphics application, you may want to save the image out as a separate file. To save a backdrop as a separate file...
- Select the image.
- Click the Save Artwork icon. The Save Bitmap dialog opens.
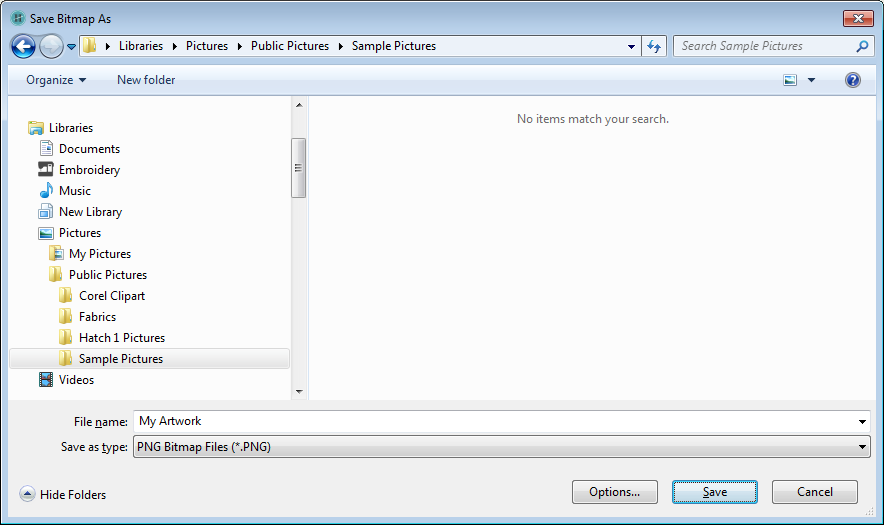
- Select a folder and a file format from the 'Save as type' droplist.
- Enter a new file name and click Save.
- This file is not referenced by the EMB file. Any external changes to it will not be reflected in the embedded image.
