
Viewing methods
 Your design software provides many viewing techniques to make it easier to work with your designs. Turn on or off design artwork. View selected parts of a design. Zoom in on an area to see more detail or view the design at actual size. The View toolbar and menu provide access to most of the viewing options you will need.
The screen illustrations in this publication are intended as representations, not exact duplicates of screen layouts generated by the software. The samples used to illustrate software features and capabilities may not be exactly duplicable, depending on your product level.
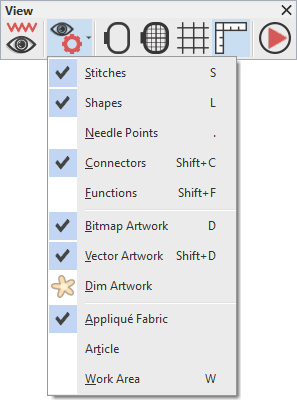
 | Use View > Show Design to show or hide design elements. Click to open droplist of view settings. |
Display backdrops
In addition to embroidery designs, artwork may be inserted, pasted or scanned into the software for use as digitizing ‘backdrops’, depending on product level. You can turn on or off embroidery, vector and/or bitmap artwork selectively. Depending on view options set in the Options dialog, bitmap images display in full color or dimmed. Use the Display Images and Display Vectors icons to selectively turn on or off backdrops. Alternatively, use the shortcut keys, <D> and <Shift + D>. See also Import images.
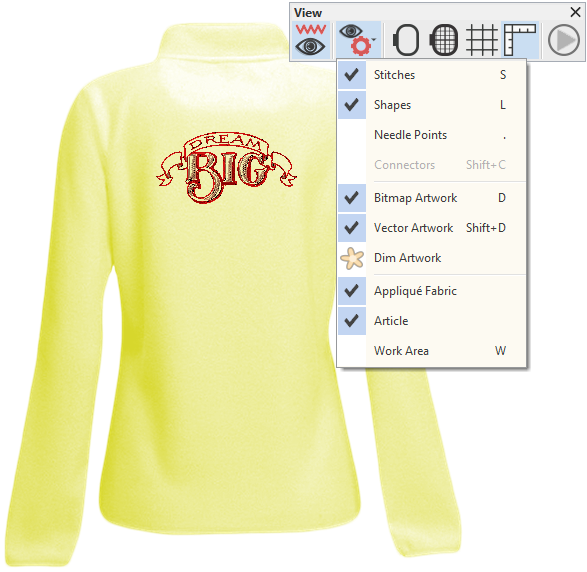
In addition to artwork, you may choose to display a garment or article on which to position your designs. The software provides a library of articles to choose from, including multi-color garments. Use the Show Design menu to toggle articles on or off. See also Backgrounds.
So you don’t accidentally move or delete the backdrop, select it and press <K> on the keyboard to lock it down.
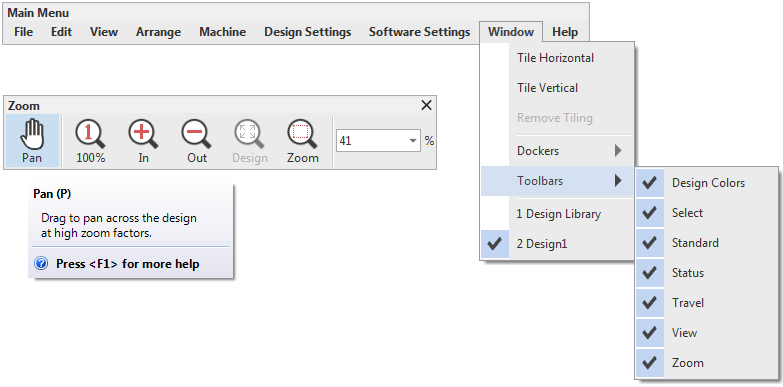
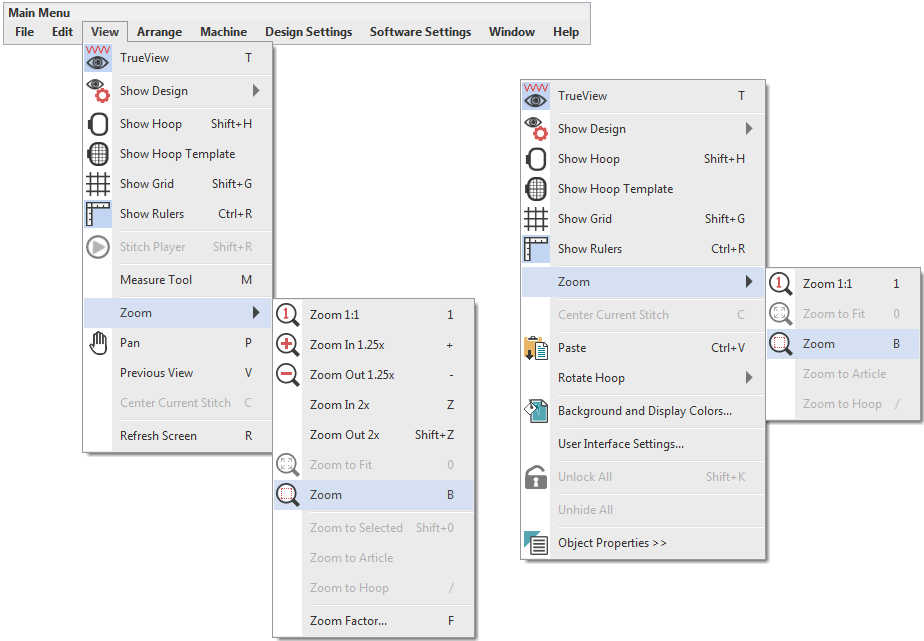
 | Use Zoom > Pan to pan across a design at high zoom factors. |
 | Use Zoom > Zoom 1:1 to display design at actual size. |
 | Click Zoom > Zoom In to zoom in for more design detail. |
 | Click Zoom > Zoom Out to zoom out for broader view. |
 | Use Zoom > Zoom to Fit to display whole design in the design window. |
 | Use Zoom > Zoom to zoom on a specific area of the design window. |
 | Click Zoom > Zoom Scale to display design at a specific scale. |
Zoom & pan
Magnify your view of the design by zooming in on individual stitches or details, or zoom out to display more of the design in the window. In addition to the scroll bars, panning provides a quick way to view parts of a design which are not currently visible in the design window. Panning is typically used after zooming in on an area.
- Activate the Zoom toolbar via the Window > Toolbars menu.
- Because you will use these tools frequently, it's a good idea to memorize the shortcut keys indicated in brackets after the tool name.
- For instance, to zoom in on a section of the design, press the <B> key on your keyboard, then drag a bounding box around the zoom area.
- To pan across a design in the design window, use Pan or press <P>. The cursor changes to a grabbing hand symbol. Click and drag to pan the design.
The same zoom options are available via the View menu. Alternatively, right-click the design window to open the popup menu.
- Press <Esc> to cancel tool selection.
.
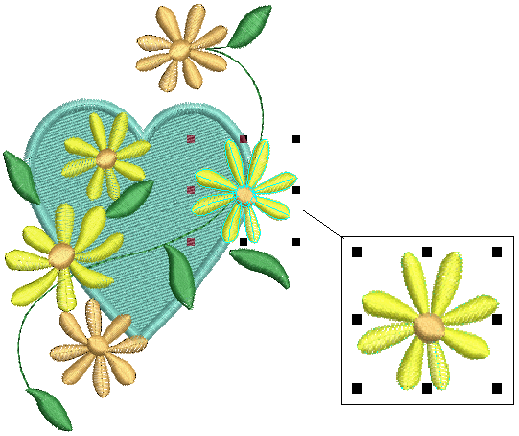
View selected parts of a design
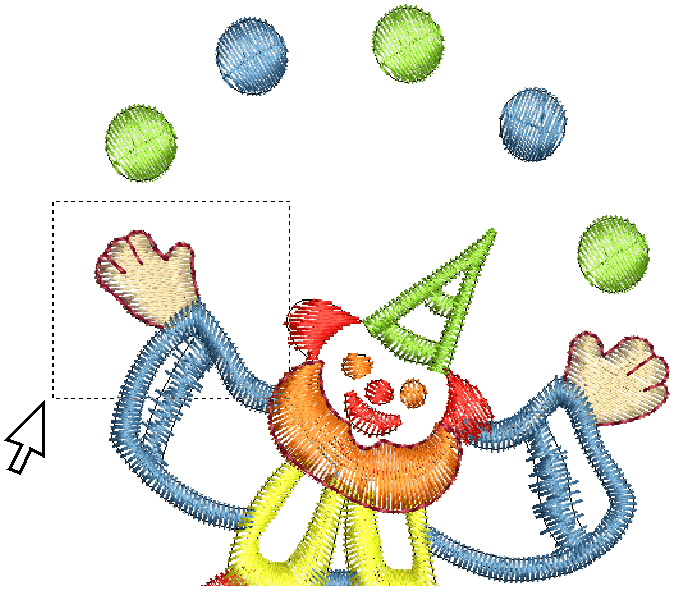
You can set your system to display all embroidery objects in a design, or hide all but the selected objects.
- To display selected objects, select View > Zoom > Zoom to Selected or press <Shift + 0>.
- To fit the whole design in the design window, select View > Zoom > Zoom to Fit or press <0>.
- To view the design at actual size, select View > Zoom > Zoom 1:1 or press <1>. See also Monitor calibration.
 | Use Edit Objects > Sequence >> to open the Sequence docker. Click again to close. Also available via Windows > Dockers menu. |
| Use Sequence > Show Color List to display color blocks with included object thumbnails in the docker. |
| Use Sequence > Show Object List to display individual object thumbnails in the docker. |
| Use Sequence > Show More to show more details in the docker. Object thumbnails are not resizable. |
| Use Sequence > Show Less to show only summary details in the docker. Object thumbnails are not resizable. |
View colors and objects
The Sequence docker provides an easy way to view color blocks and individual objects in a design. Use the 'Switch' buttons on the Sequence docker toolbar to toggle between color blocks and individual objects. Use the 'Show' buttons to expand the docker for more or less detail. The details view provides information about each color block or individual object in the design - color, type, stitch type applying, stitch count, etc.
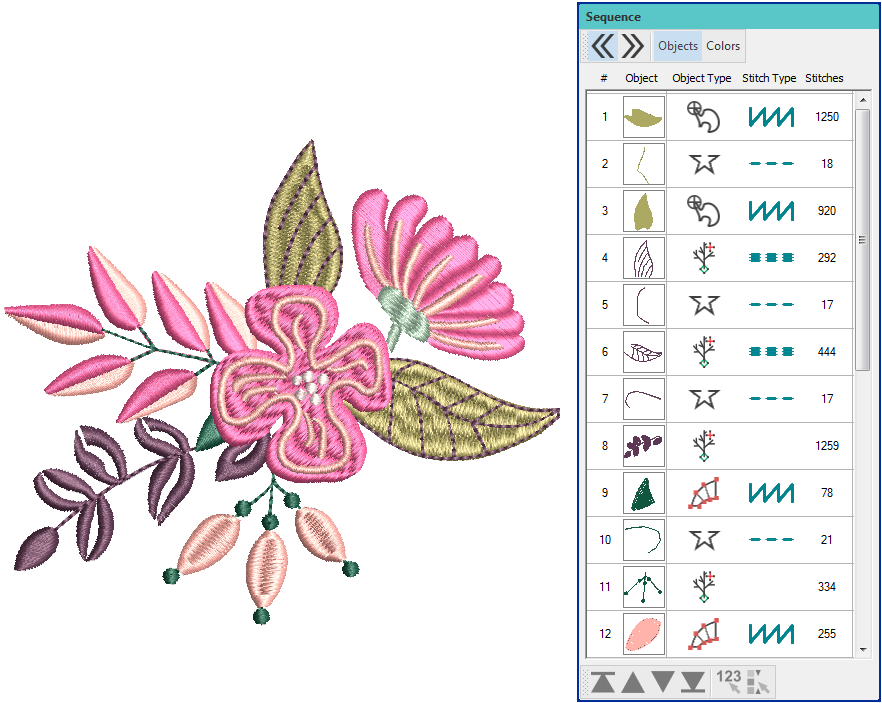
Object types correspond to the input methods used in their creation:
| Object type | Use | |
|---|---|---|
| Filled shape | Use Digitize Closed Shape to create closed shapes using fill stitching. See also Input methods. |
| Outline shape | Use Digitize Open Line to create a row of run or other outline stitching along a digitized line. See also Input methods. |
| Branched object | Use Branching to automatically sequence selected outlines for efficient stitchout. See also Embroidery connections. |
| Block object | Use Digitize > Digitize Blocks to digitize shapes of varying width with turning stitching. See also Input methods. |
| Freehand closed object | Use Digitize > Freehand Closed Shape to draw closed shapes on screen using current stitch settings for a hand-drawn look. See also Freehand. |
| Use Edit Objects > Sequence >> to open the Sequence docker. Click again to close. Also available via Windows > Dockers menu. |
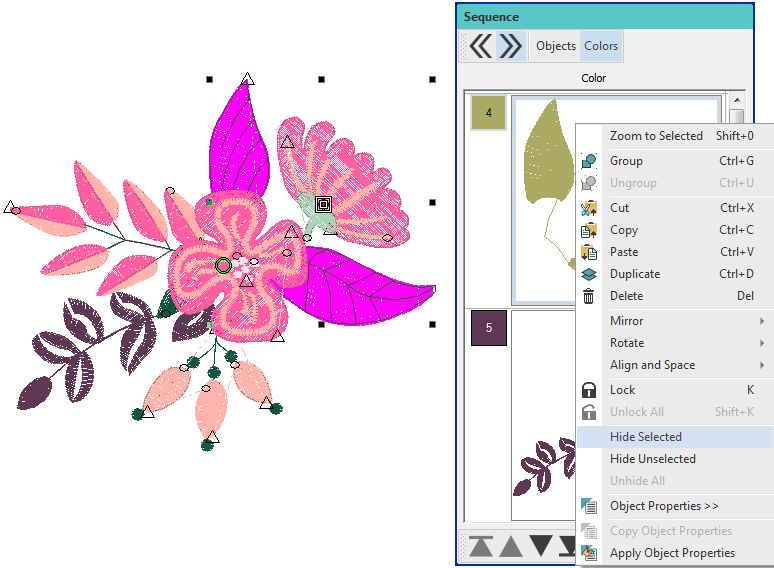
Hide colors and objects
Use the popup menu in the Sequence docker to hide objects. The command is also available in the Arrange menu. Use the same menu to 'hide unselected' which has the effect of hiding all other objects apart from the one you have currently selected. To reveal all hidden objects, select 'Unhide All'.
The Sequence docker provides various techniques for sequencing objects or entire color blocks in a design. See also Sequence objects.
.
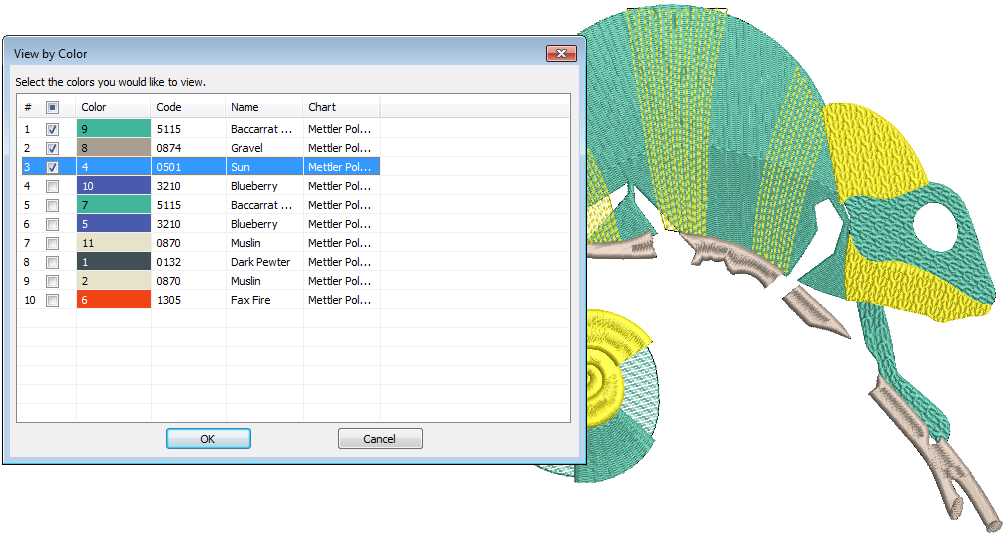
View by color
The View by Color function allows you to view objects by color block. This is useful when re-sequencing colors. The function will not work with grouped objects. Select the 'View by Color' command from the Arrange menu.
.
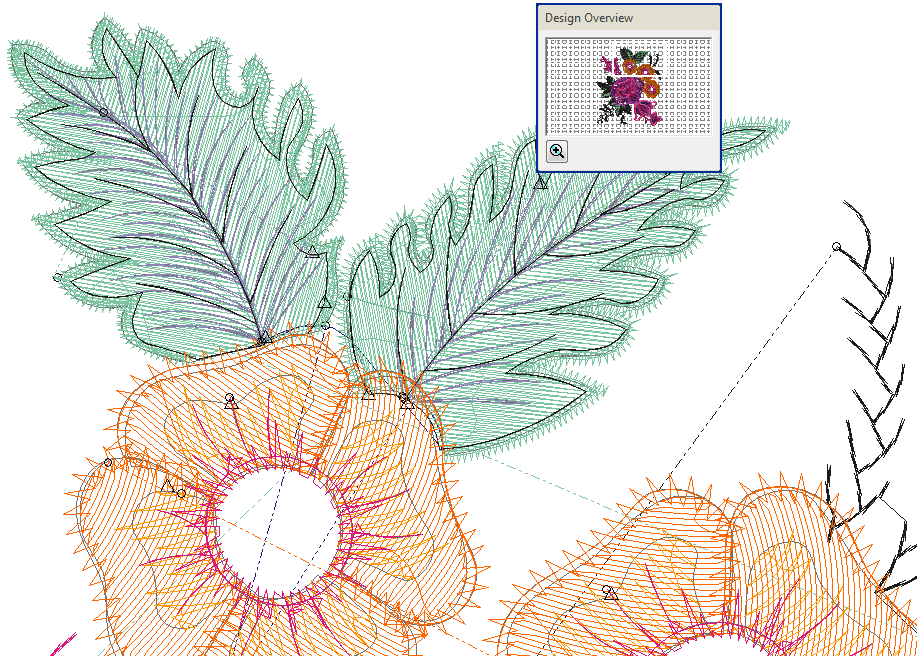
Design overview
Use the Design Overview docker to navigate designs at high zoom factors via a design thumbnail. The docker updates whenever you make a change and can be used to zoom in or pan across the design window.
- Toggle the docker on or off via the Window menu.
- Click the docker to make it active.
- Click the Zoom button at the bottom and drag a bounding box around the area to view.
- Click and drag the bounding box to pan across the design.
