Reshape objects
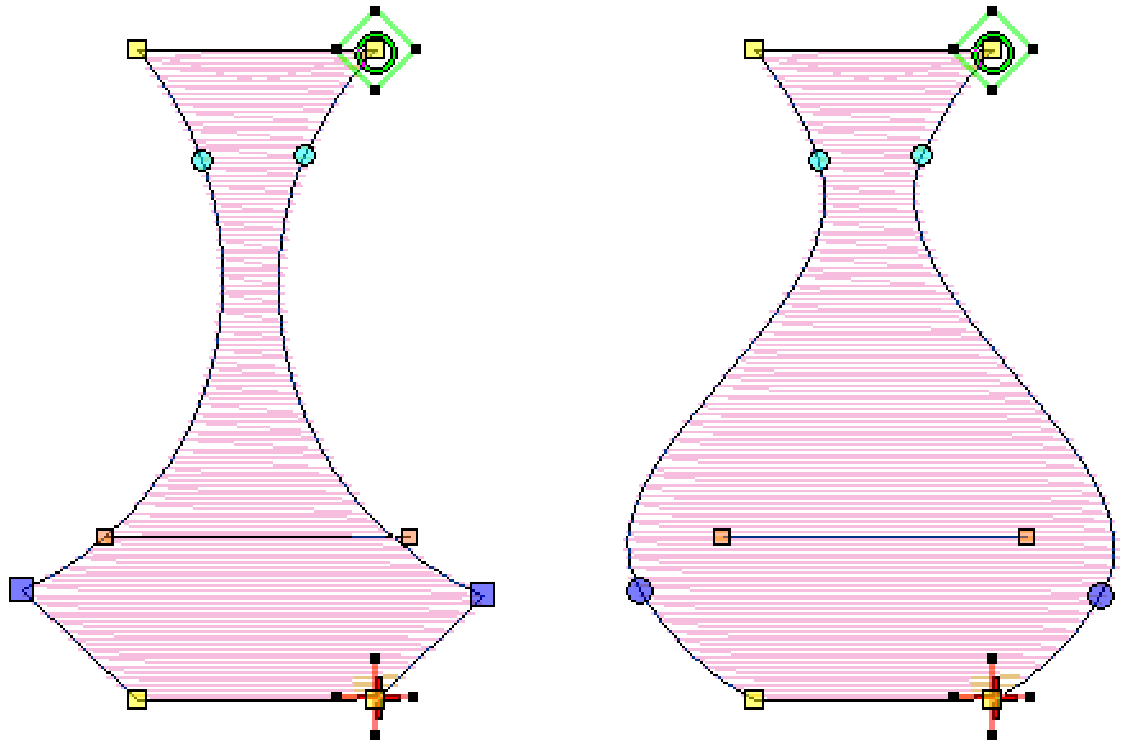 You modify object shapes in your embroidery software by means of control points similar to objects in a graphics package. These vary slightly with object type. For some objects, you can change control points from corners to curves. Stitch angle adjustments depend on object type. With some objects you can set a single stitch angle. With others, you adjust turning angles. You can also change entry and exit points. This is useful in order to minimize travel runs between objects. Modify outline by adding, deleting, or moving control points.
 | Use Select > Select Object to select an object or group. Or drag a selection marquee to select multiple enclosed objects or groups. |
 | Use Select > Reshape to adjust object outlines, stitch angles, start and end points, curved lines, etc. |
Adjust control points
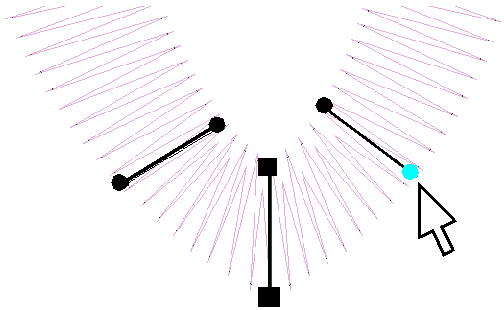
Control points can be selected individually or together, for repositioning or modification.
- Click to select a single control point.
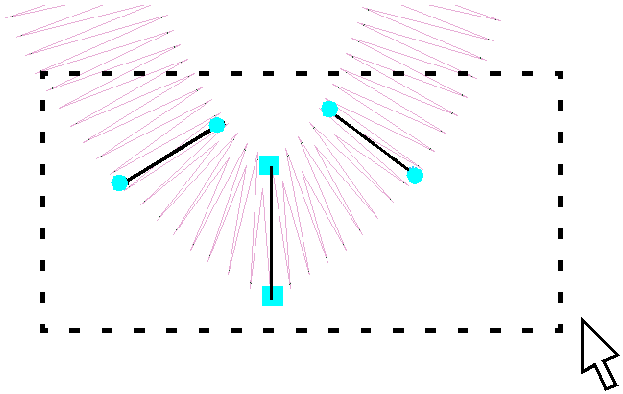
- Holding down <Ctrl>, click to select multiple control points. Or click and drag a bounding box around a group of control points.
- Press <Delete> to delete selected control points.
Add control points to object outlines by clicking with the Reshape tool selected. Left-click to add a corner point. Right-click for curve points.
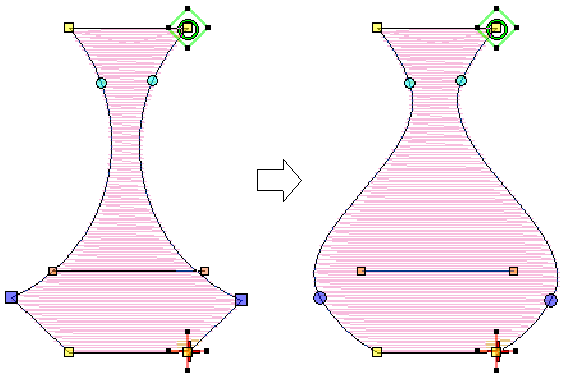
- Reposition control points to change an outline shape. Simply click and drag to a new position along the boundary. Or click and drag multiple points as needed. Use the arrow keys to ‘nudge’ selected reshape nodes.
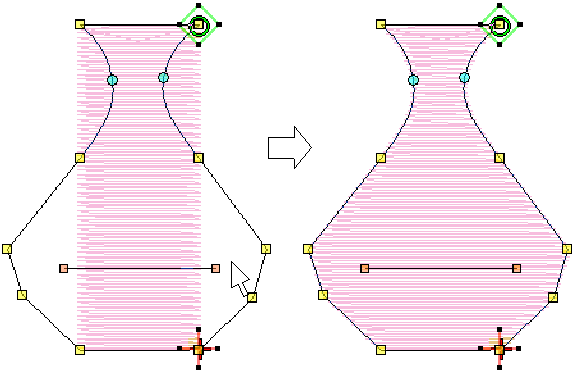
- Press <Spacebar> to toggle between corner and curve points.
- If you make a mistake, press <Ctrl> + <Z> to undo changes. Press <Esc> to exit Reshape mode.
- When in Reshape mode, use the <Tab> or <Shift + Tab> keys to jump between objects.
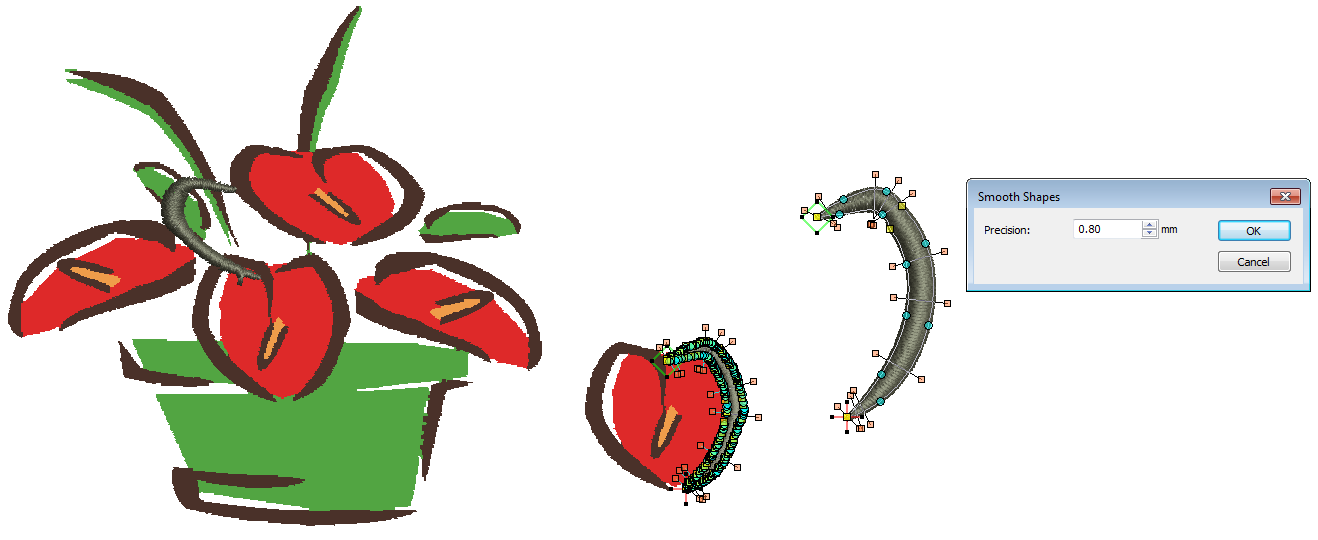
 | Use Auto-Digitize / Edit Objects > Smooth Shapes to remove excess reshape-nodes from embroidery objects for smoother outlines. |
Smooth shapes
Like vector objects, embroidery objects contain reshape nodes on their outlines. On curved shapes, the software may insert hundreds of nodes, making reshaping difficult. This is particularly so when using auto-digitizing methods to generate objects. And even more so if the edges of shapes are jagged. The Smooth Shapes command lets you apply curve ‘smoothing’ to embroidery objects. See also Smooth shapes.
| Use Select > Reshape to adjust object outlines, stitch angles, start and end points, curved lines, etc. |
Adjust entry & exit points
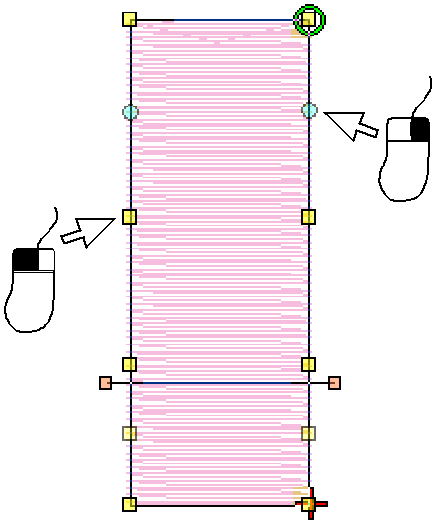
You can change stitch entry and exit points of individual objects. Do this to place the exit point next to adjoining objects for smaller connecting stitches, or to reduce the number of travel runs. Select the entry or exit point as required, and drag it to a different position on the object outline. The cross represents the end point.
- Select the object and click Reshape Object. Reshape nodes appear, including entry and exit points.
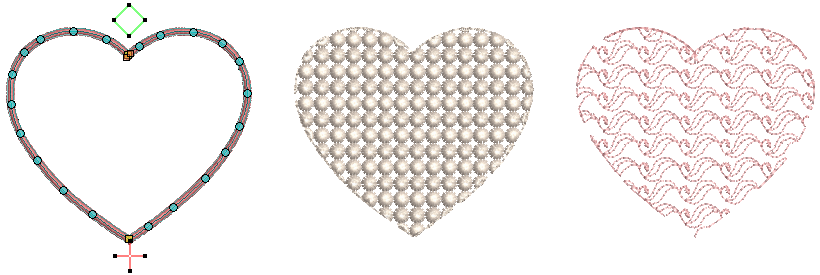
- Select the entry or exit point as required, and drag it to a different position on the object outline. To minimize gaps in your embroidery, place entry and exit points opposite each other on the outside boundary.
- Press <Enter> to apply the changes, then <Esc> to finish.
- It's a good idea to define the stitch angle so it is perpendicular to the line between entry and exit points.
The default Closest Join method automatically calculates the closest join between objects while digitizing – no need to think about object entry and exit points. The Software Settings > User Interface > General tab lets you deactivate if so required. When deactivated, all newly digitized objects are joined by the As Digitized method. This means you are prompted to enter entry and exit points as you digitize.
| Use Select > Reshape to adjust object outlines, stitch angles, start and end points, curved lines, etc. |
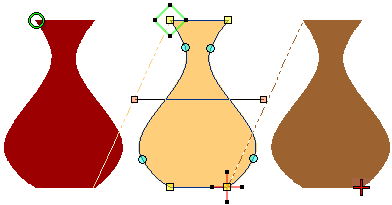
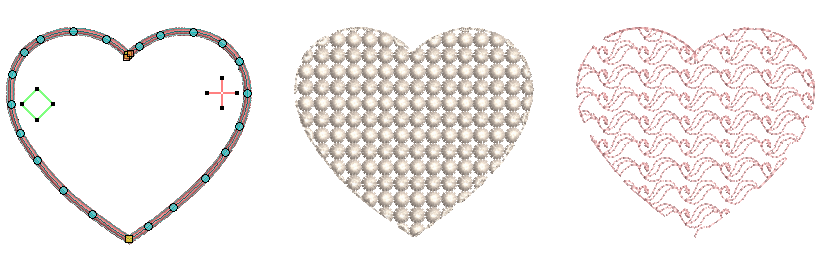
Reshape circle objects
You can change Circle objects to ovals using the Reshape tool. Circle objects have two reshape control points (used to change the radius and orientation of the object), a center point (used to reposition it), and a stitch entry point. You cannot add, change or delete control points in these objects.
 | Use Edit Objects / Digitize > Add Stitch Angles to add stitch angles to selected closed objects with or without holes. |
 | Use Edit Objects > Remove Stitch Angles to remove stitch angles from selected objects with turning stitching. |
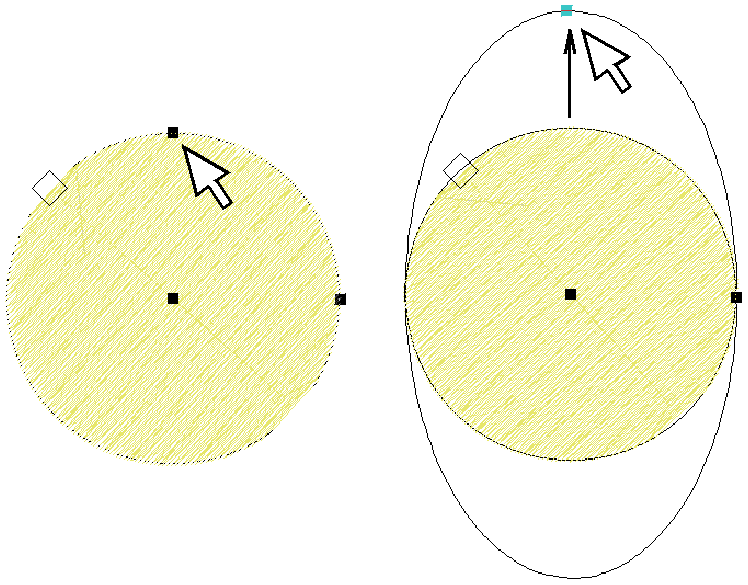
Adjust stitch angles
Stitch angle adjustments depend on the type of object you are working with. With filled objects you can set a stitch angle for the entire object. Alternatively, you can add multiple stitch angles with the Add Stitch Angles tool. You can also adjust the stitch angle using the Reshape Object tool. See also Stitch angles.
In Circle objects, only the entry point appears. The stitch angle is perpendicular to the line connecting the entry point to the circle center. Thus, changing the stitch entry point in a Circle object changes its stitch angle.
 | Use Edit Objects > Remove Overlaps to remove unwanted stitching from underlying objects or lettering. |
Remove underlying stitching
 Use the Remove Overlaps tool to remove underlying layers of stitching in overlapping objects. This helps to reduce the stitch count and prevent a build-up of stitches where they are not needed. See Cut & fill holes for details.