Monogram borders
 You can add up to four borders of the same shape to a monogram design.
The Create Border function allows you to create your own borders for use in monograms. These can be saved to the default ‘borders’ set or one of your own creation. See also Custom shapes.
 | Use Lettering / Monogramming > Monogramming to create personalized monograms using a selection of pre-defined styles, border shapes and ornaments. |
Modify border
If you are using one of the template designs, it is a simple matter to change borders. Use the Change button on the Borders tab to select from one of the many available.
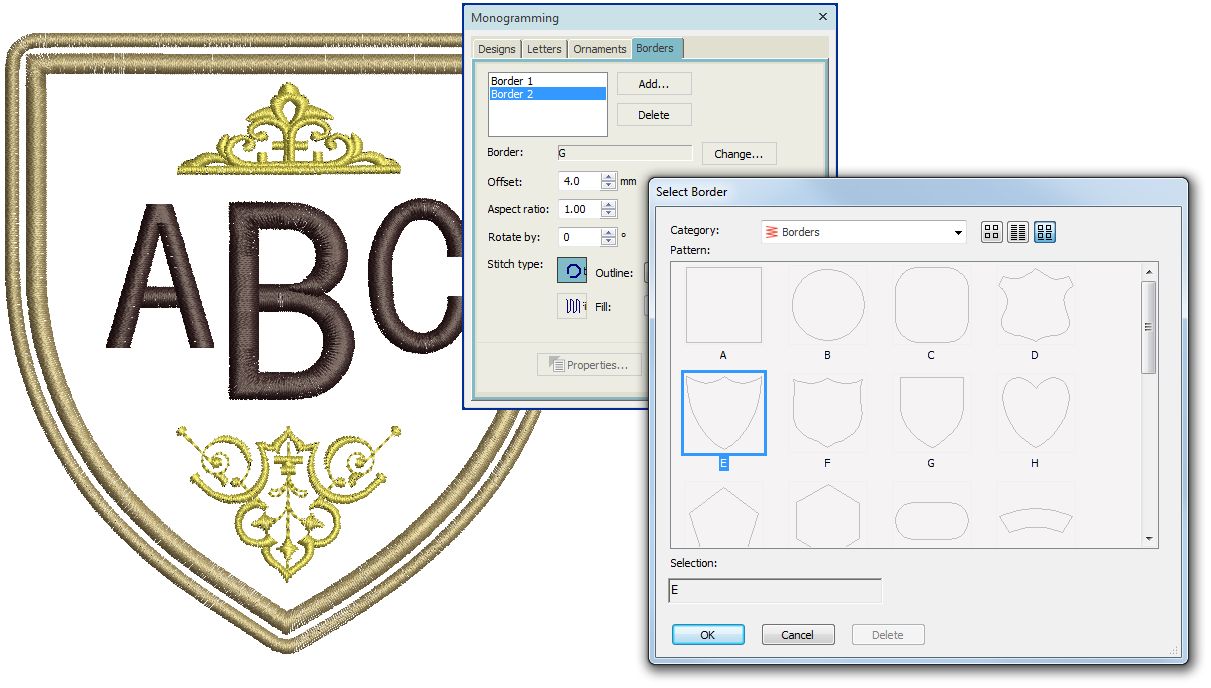
You can add your own borders to the built-in collection via the Advanced Digitize toolbox. See also Custom shapes.
.
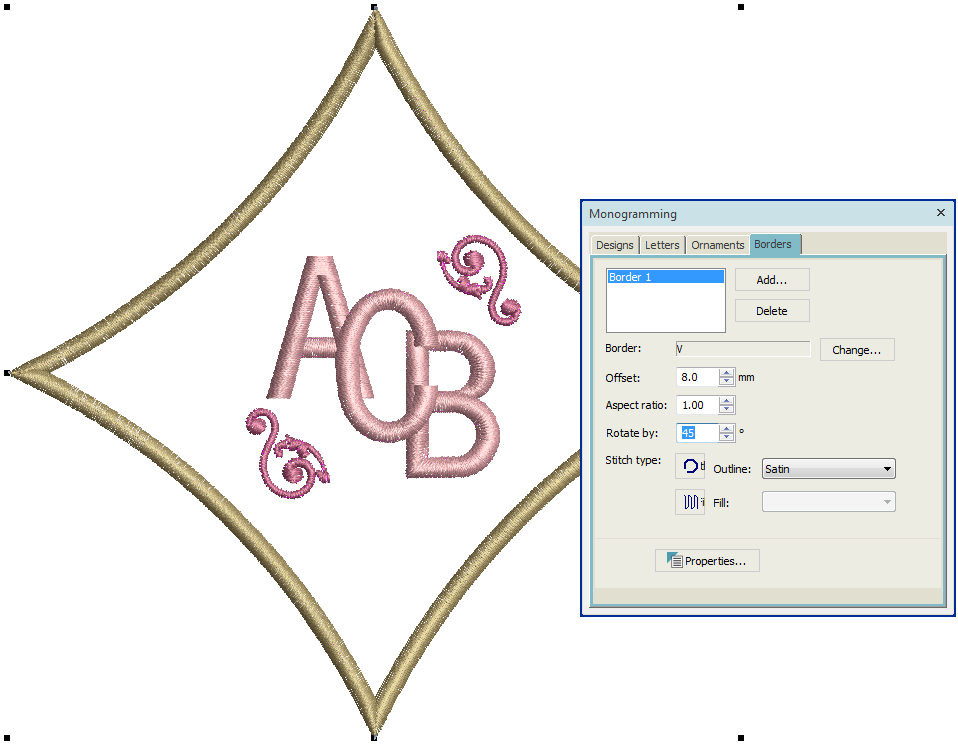
Adjust border shape & offset
Use the Aspect Ratio settings to adjust height and width proportions.
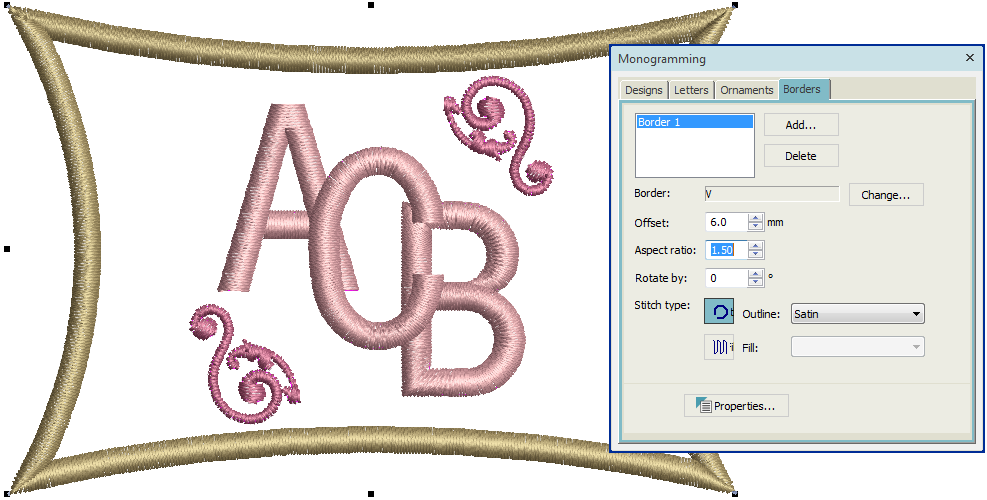
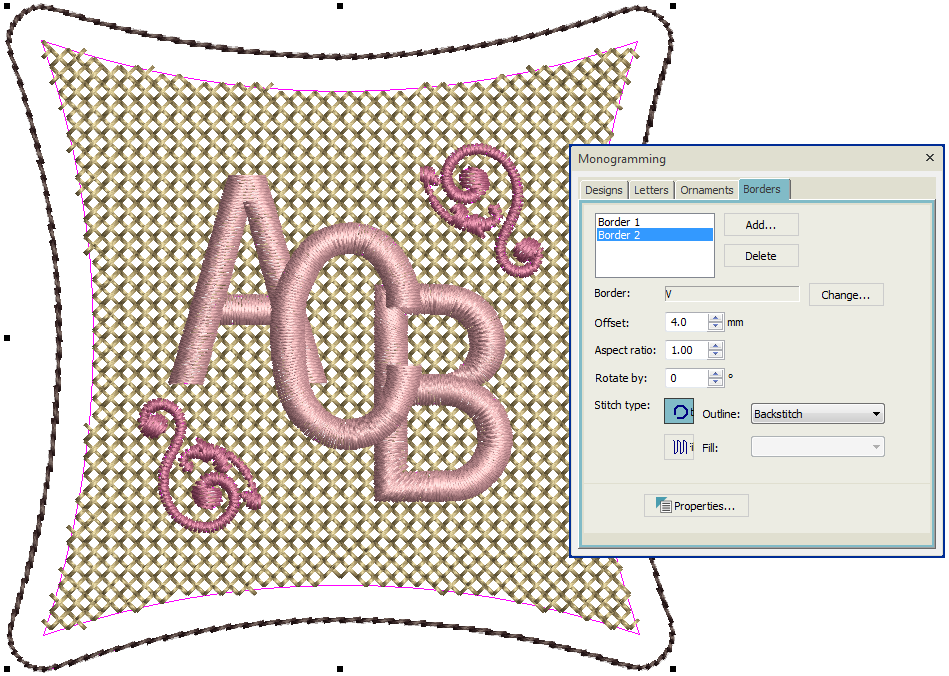
Use the Offset field to fine-tune margins between lettering and border, and between border and border.
Use the Rotate field to re-orientate the border as desired.
.
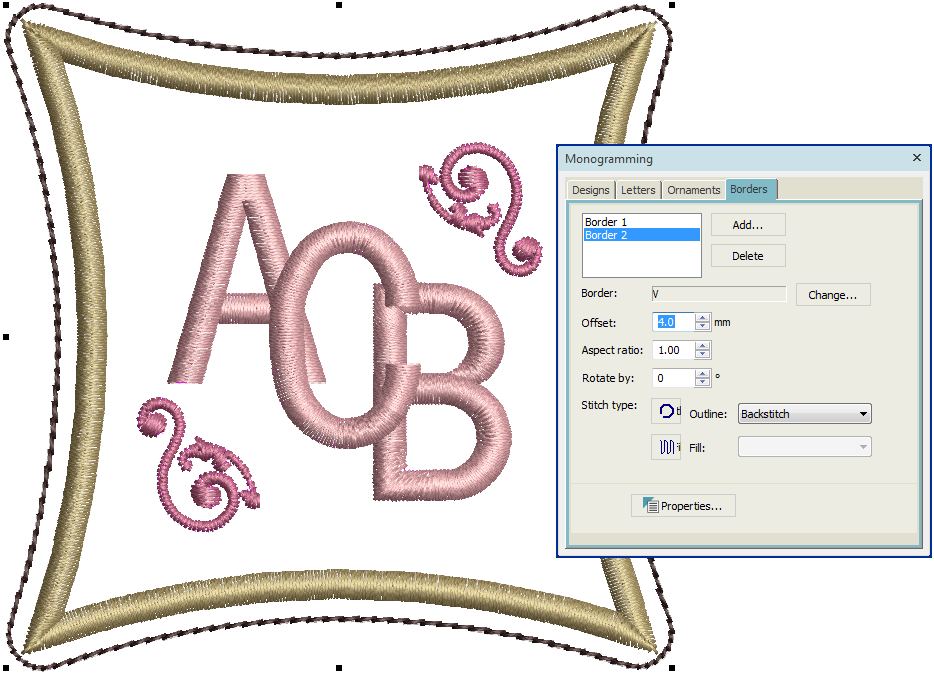
Add multiple borders
Add up to four borders to the selected monogram. Use the Offset field to adjust margins between multiple borders. When you set multiple borders, the offset you specify is calculated from the previous border. If you change the border offset, all borders are updated.
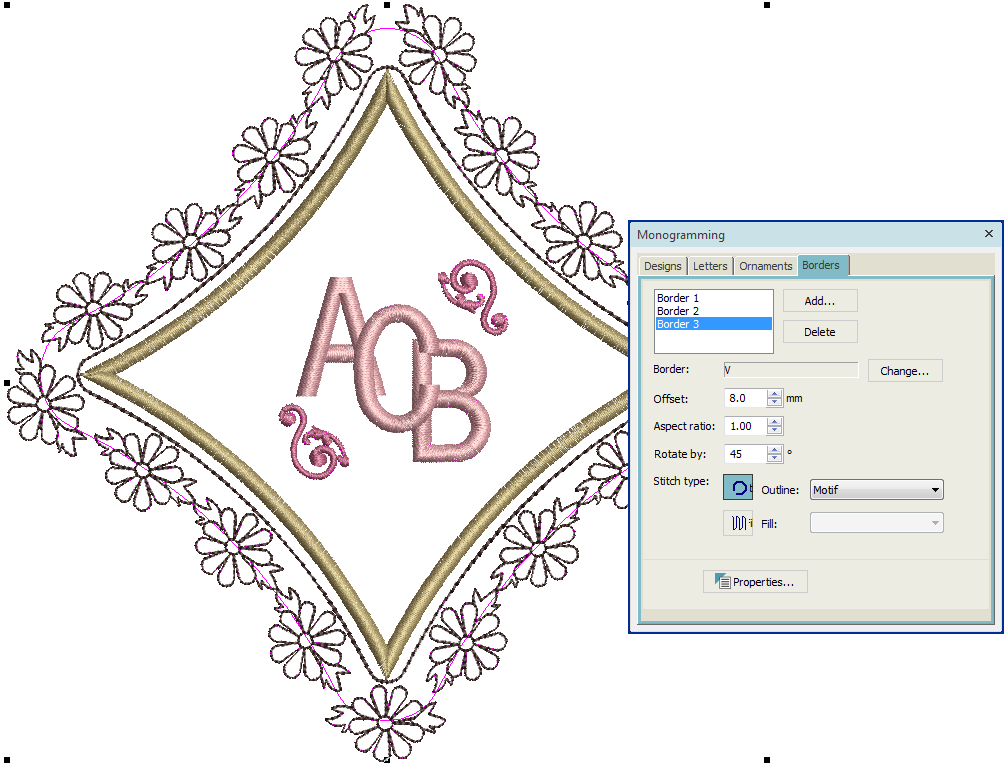
The software lets you enter a negative offset. This allows you to create multiple overlapping borders.
.
Use the Stitch Type buttons to change to line or fill stitch type for selected borders. Satin Line is the default stitch type. All line and fill stitch types available in the software can be used as borders. Click the Properties button to make further adjustments.
Remember, if you want to recolor monogram elements, you can select them individually without breaking apart the monogram. Simply hold down <Alt> and click the object.