Create automatic multi-hoopings
The easiest way to work out hoop positions is with the Automatically Add Hoops tool. Bear in mind that this method uses a purely rule-based software algorithm. It works best with simple designs.
 | Click View > Show Hoop to show or hide hoop. Right-click for settings. |
Use Multi-Hooping > Automatically Add Hoops to automatically add hoop positions to your design for the selected hoop type. |
Use Multi-Hooping > Multi Hooping Options to check and adjust your hooping settings. |
Use Multi-Hooping > Preview Hoopings to preview hoop positions in the Resequence docker. |
Create automatic hoopings
- Choose the hoop you want to use. Since a given stitchout can use only one size of hoop, you need to choose a hoop that will cover the largest object in the design. See also Hoop selection.
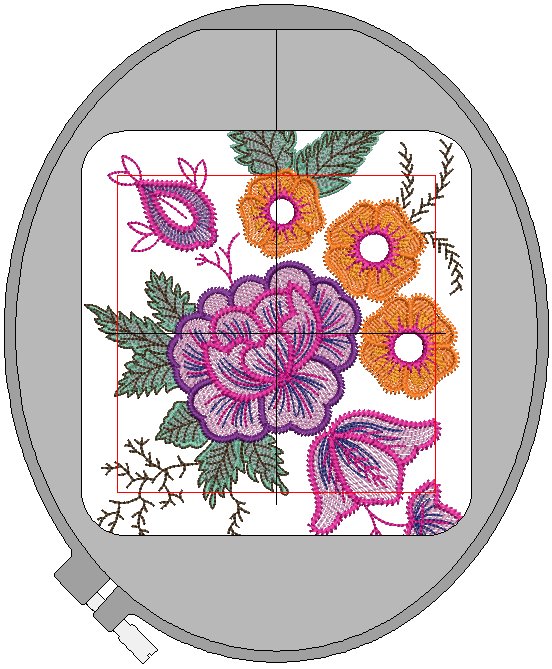
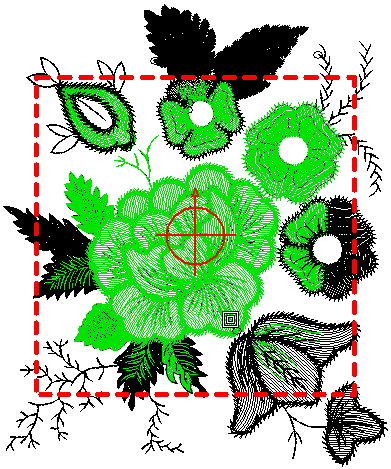
- Switch to Multi-Hooping mode. When you click Multi-Hooping on the toolbox, covered objects – those that fit wholly within a hoop – display as green stitches. Uncovered objects – those that do not fit – display as black stitches.
- Note that no embroidery object can be selected or manipulated in multi-Hooping mode.
- Check hoop settings via the Options command. Change hoops if you need to. Make sure the Foot setting reflects the foot you are using. This will affect the available sewing area within the hoop.

- Use the Automatically Add Hoops tools to add hoop positions automatically. These are calculated according to the object sequence.
- Use the Preview Hoopings tool to preview hoop positions in the Hooping Sequence docker. Click and hold to isolate the hooping in the design window.
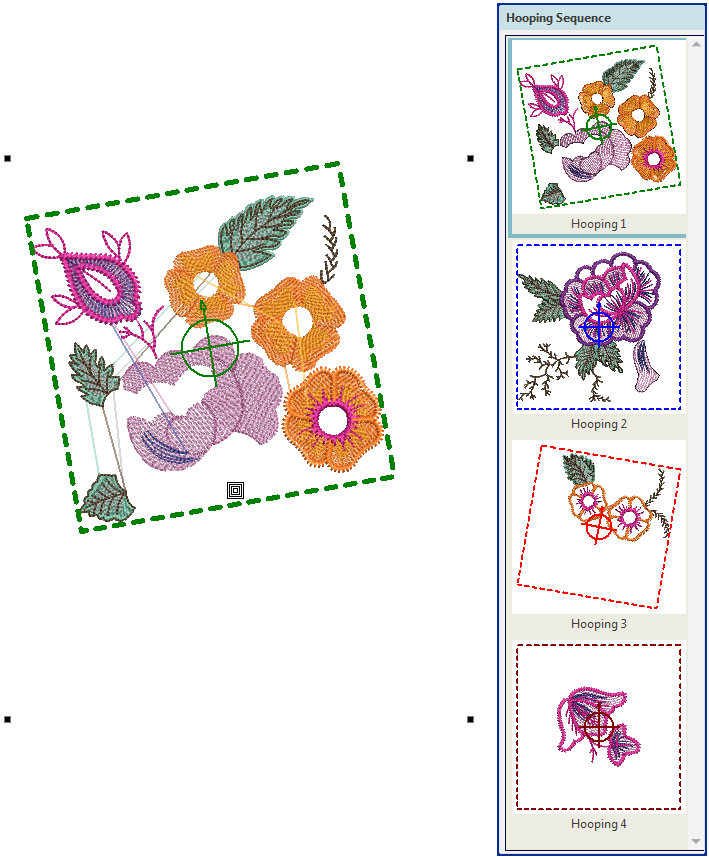
- The software always attempts to include whole objects within sequential hoopings. Where this is not possible, it will split objects between hoopings. Although split lines are only visible in Multi-Hooping, they are maintained when switching to other modes. They do not affect object integrity. See also Splitting objects between hoopings.
- The same hoop position may be repeated, depending on the object sequence. Moving a hoop slightly to cover an excluded object may reduce repeat hoopings. Alternatively, try adjusting the stitching sequence.
- Each hooping contains an object or group of objects that can be stitched out in a single hooping. These are stitched consecutively to form the whole design.
- You are now ready to save the design to one or more files or send it to machine. See Outputting multi-hooped designs for details.
Print a copy of the design showing the hoop positions to help you stitch it in the correct hooping order. See Print multi-hooped designs.