
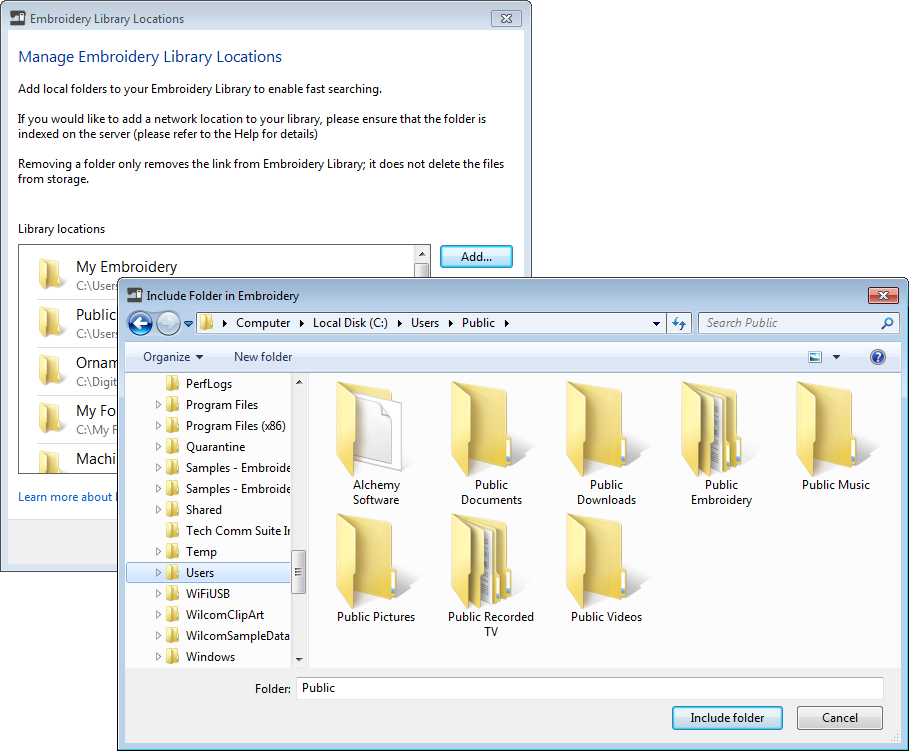
Manage folders
The embroidery library is a 'virtual library' in that any designs on your system can be located and displayed within the navigation tree. The design software doesn't care where they physically reside on your hard disk or external storage devices. Any folder containing embroidery designs can be included in the navigation tree.
| Use Manage Designs > Manage Design Library Locations to add or remove existing folders to/from the Design Library, enabling fast searching and filtering. |
Add folders to the library
Remember that the Design Library is a ‘virtual library’ in Windows. When you add or remove folders from the navigation pane, this only affects the Design Library. It does not affect the folder structure on your hard drive or network. To add design folders to your library, use the Manage Embroidery Library Locations function to locate folders containing designs anywhere on your local network. Use the Remove button in the dialog to remove a folder from the Design Library. All subordinate folders will disappear from the navigation pane.
.
Display embroidery libraries in Windows 10
Embroidery libraries do not automatically appear in Windows 10.
- Go to Windows Explorer.
- Select 'This PC' and right-click the empty window to invoke the popup menu as shown.
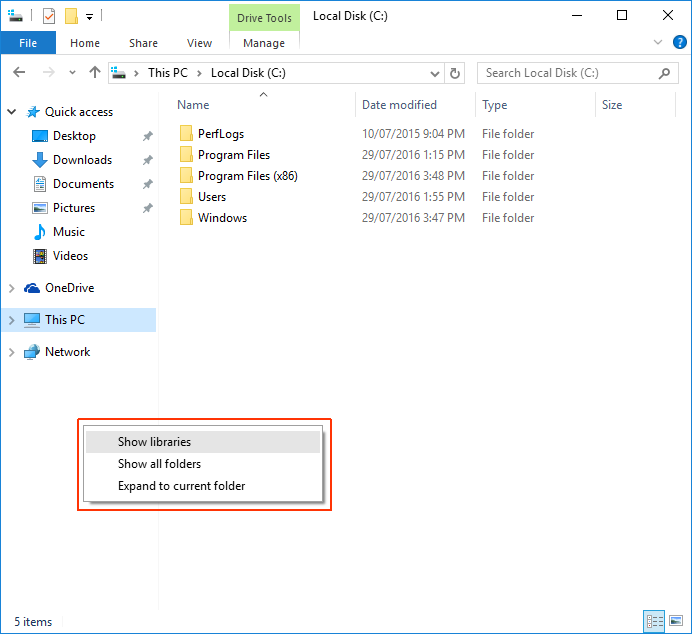
- Choose 'Show libraries'. Embroidery Libraries are added to Windows Explorer.

- If you want to display Embroidery Libraries in the Save As dialog, you need to activate in the same way.

