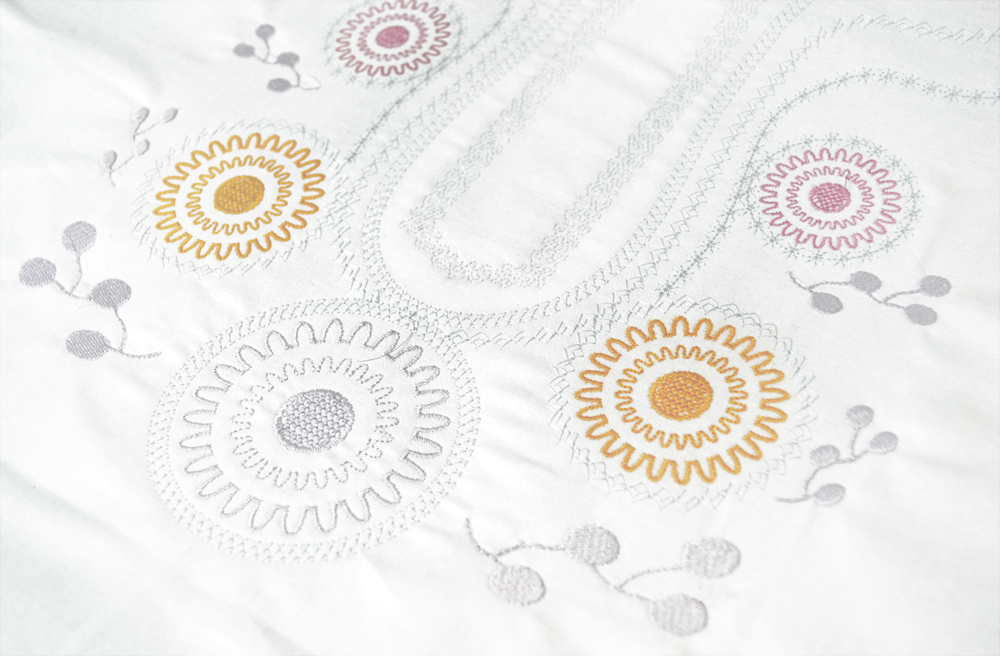
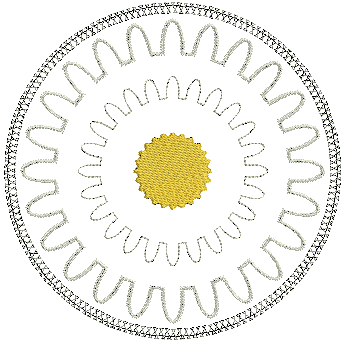
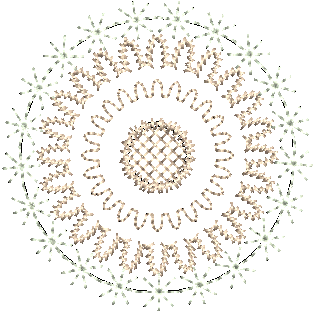
Here we create an attractive 'folkart' design for a light, summer tunic. We will take a clipart mandala and turn this into embroidery. Using a variety of digitizing techniques, we will create an embroidered 'placket' around the buttonholes. And we will add some embroidery fruit decorations. For the purposes of the project, we use 'R-A Super Brite Polyester 122' threads.
The project will show you a range of both manual and automatic digitizing methods to create embroidery from prepared artwork. You'll see just how simple and fun it is creating projects in your embroidery software.
The project assumes familiarity with basic techniques such as zooming and displaying stitches. All steps required to complete the project are provided below. For further information, you are referred to the User Guide.
A final design is included in your Embroidery Library > Projects > Folkart folder. Check your solution against this design. It's always good practice to analyze designs to see how they have been created and keep adding to your arsenal of embroidery digitizing techniques.
Set up project
To begin with, we need to open and save a new design file and set up our work environment.
 | Use Customize Design > Auto Fabric to change the properties of the design for stitching on a different fabric. |
Get started
First, we'll set up a blank design file and set the fabric type.
- Open your embroidery software from the desktop icon or Windows Start menu.
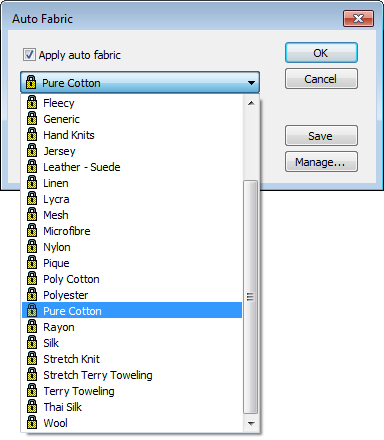
- Go to the Customize Design toolbox and select Auto Fabric Type.
Choose a light weight fabric you wish to stitch out on. See also Auto fabrics & densities.
 | Click View > Show Hoop to show or hide hoop. Right-click for settings. |
Select machine & hoop
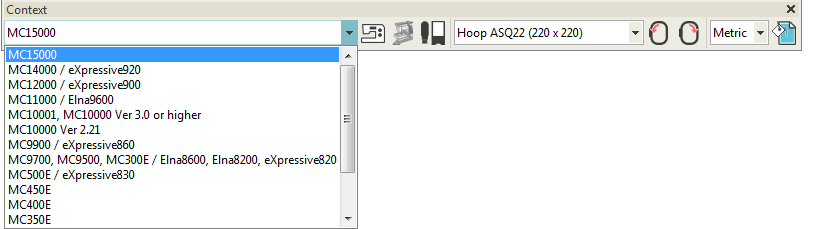
The software supports various sets of machine model. Some Janome machines can be connected by cable directly to your PC via the USB port.
- For the purposes of this project we are using the MC12000 machine. See also Machine selection.
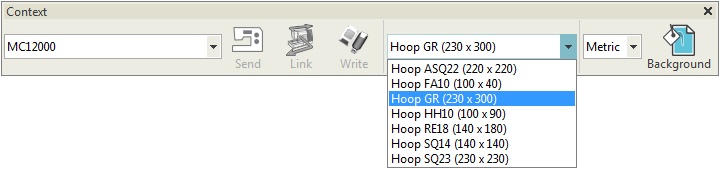
- Set the hoop in the View toolbar droplist to 'Hoop GR (230 x 300)'. See also Hoop selection.
 | Use Customize Design / Context > Background and Display Colors to set colors, fabrics, or articles as design backgrounds. |
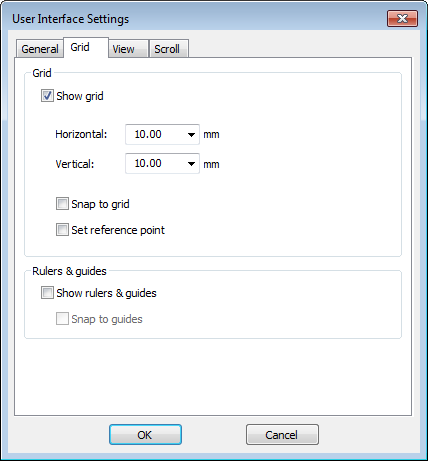
 | Click View > Show Grid to show or hide grid. Right-click for settings. |
Set background
- Click the Background & Display Colors button to change design background color and type. Set the background color to white.

- Right-click the Grid button and check Show Grid and set grid spacing to 10mm. See also Grids & guides.
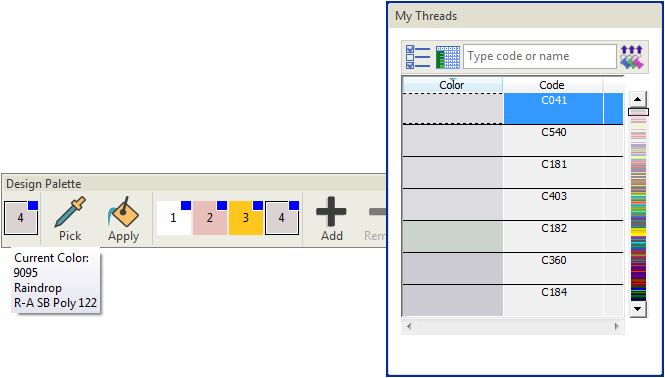
 | Use Customize Design > Change Design Color to show or hide the My Threads docker to find threads from different charts and change design colors. |
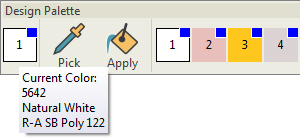
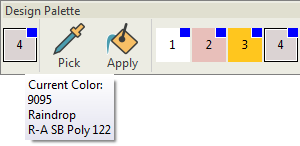
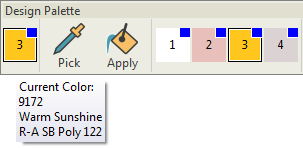
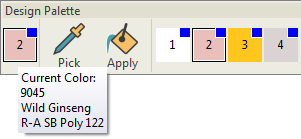
Set up design palette
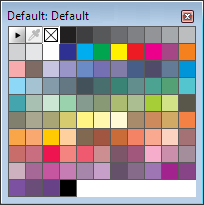
Before you start digitizing, it is good practice to analyze the artwork, work out the thread colors you want to use, and set up your design palette accordingly. For the purposes of the project, we'll use 'R-A Super Brite Polyester 122' threads with four colors - Natural White (5642), Wild Ginseng (9045), Warm Sunshine (9172), and Raindrop (9095). See also Design colors.
 | Use Standard > Save Design to save the current design. |
Save project
Having set up our project, we'll save the design file to disk straight away.
- Click the Save icon and give the project a name.
- Navigate to the Projects folder or a folder of your choice.
- Click Save.
Import & edit artwork
The first step in creating our 'folkart' design is to import some clipart and edit it for the mandala.
| Use Switch and Convert > Switch to Graphics Mode to import, edit or create artwork as a backdrop for embroidery digitizing, manual or automatic. |
 | Use Artwork / Auto-Digitize / Standard > Insert Artwork to import graphic files - both bitmap and vector - for use as digitizing backdrops or for auto-digitizing. This tool is also available via File menu. |
Import artwork
In this step, we import the mandala artwork.
- Go to the Switch and Convert toolbar and click the Switch to Graphics Mode button.
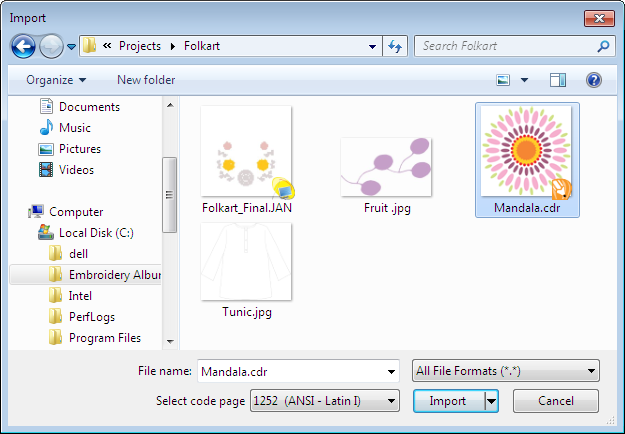
- Click Load Artwork tool and navigate to the Embroidery Library > Projects > Folkart folder and select a file called 'Mandala.cdr'.
Check the size of the artwork in the Property Bar. It should be approximately 164 x 164 mm.
Edit artwork
Now we need to adapt the artwork so that it is suitable for conversion to embroidery.
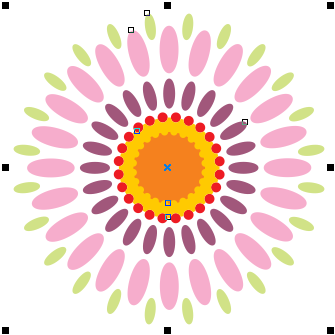
- Select the object and press <Ctrl + U> to ungroup.
- Select light green and red objects and press <Delete>.
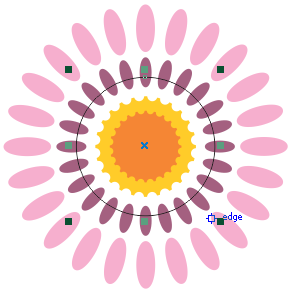
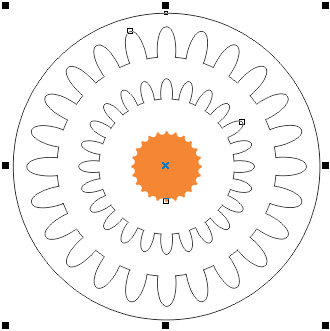
Select the Ellipse tool. Hold the <Shift + Ctrl> keys and draw the circle as shown.
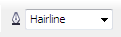
- Select the circle object and choose 'hairline' from the droplist on the Property Bar.
Select the wine-color objects and choose 'No Fill' and 'Hairline' for the outline.
- Holding down the <Ctrl> key, select the circle object together with the objects you've just edited, and choose Arrange > Shaping > Weld.

- Repeat for the pink objects.
- Delete the inner yellow doughnut shape.
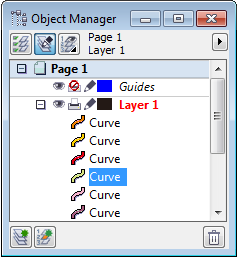
- Create an outer circle approximately 170mm in diameter with line width set to 'Hairline'. There should now be four objects left in the Object Manager.
- Select all objects and enter 80mm in the Width field of Property Bar and press <Enter> to resize. Make sure the aspect ratio lock is activated.

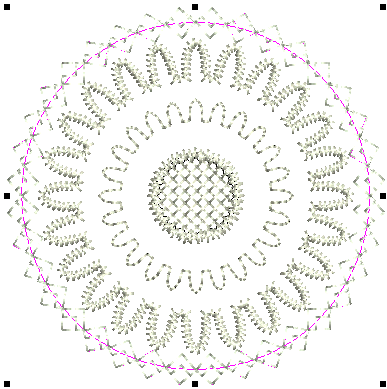
Create mandala
Now that we've created the base mandala object, we can convert it to embroidery.
 | Use Switch and Convert > Convert Artwork to Embroidery to convert selected vector or bitmap artwork to fill or outline stitches. |
 | Use View > Show Design to show or hide design elements. Click to open droplist of view settings. |
Convert artwork
Our first task in creating an embroidery mandala is to convert all vector objects to embroidery.
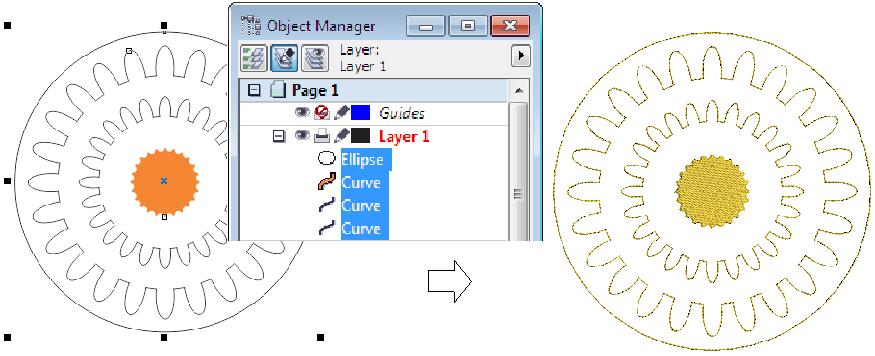
- Select all objects and click Convert Artwork to Embroidery.
- This will convert the selection to embroidery and switch back to Embroidery mode.
- Click Show Design and make sure Vector Artwork is turned on, or press <Shift + D>.
 | Use Edit Objects, Appliqué or Lettering / Monogramming > Break Apart to split composite objects - monograms, appliqués, lettering, etc - into components. Allows each to be edited individually. This tool is also available via Edit menu. |
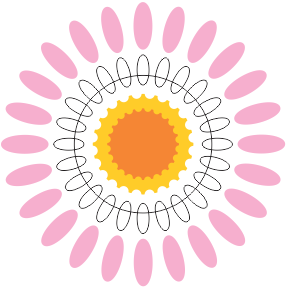
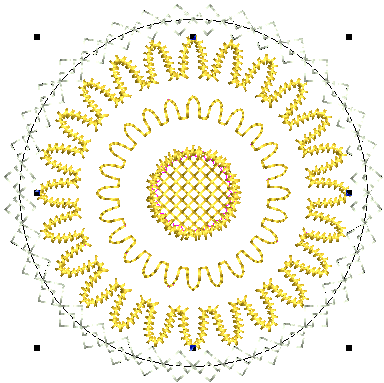
Edit outer circle
Now we can apply an attractive motif run to the outermost circle of our mandala.
- Select outer circle and click Break Apart.
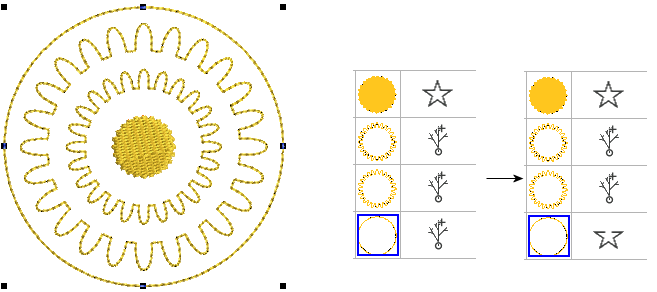
- Select and double-click the outer circle. The Object Properties open.
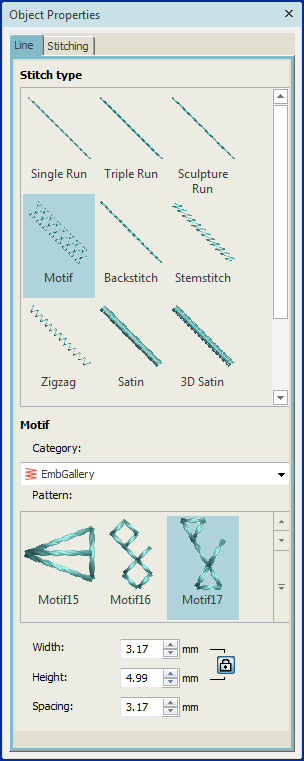
- Choose Motif Run Line in Pattern Set and Motif 17 in Pattern and click OK.
- Choose 'Natural White' from the Design Palette.
 | Use Select > Select Object to select an object or group. Or drag a selection marquee to select multiple enclosed objects or groups. |
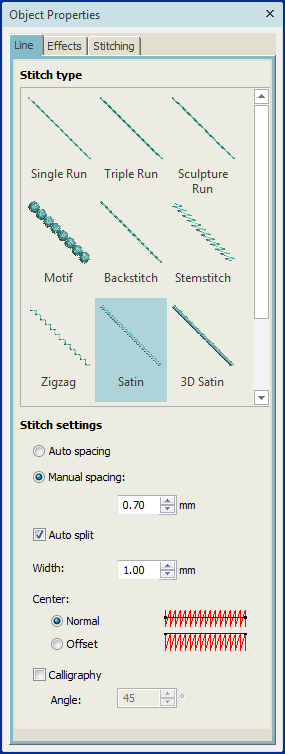
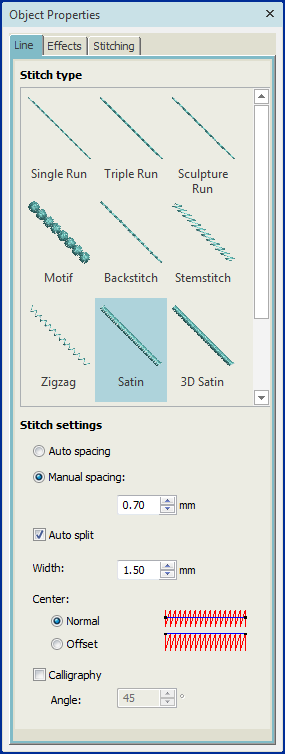
Use Object Properties > Line > Satin to create thicker borders or columns of even thickness. |
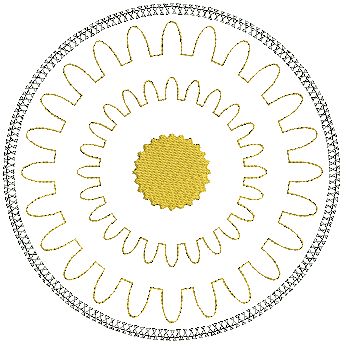
Edit the inner circles
Having broken apart and edited the outer circle, we will apply the same techniques to the inner circles.
- Break apart the two inner circles in the same way as you did the outer circle.
- Select the outermost inner circle and change the stitch type to Satin Line
- And adjust the settings as shown - set width to 1 mm and spacing to 0.7 mm.
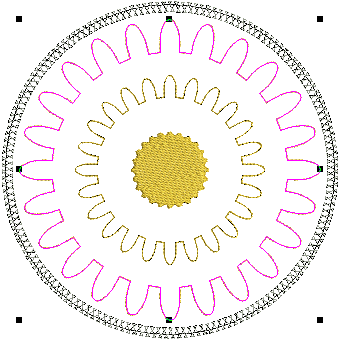
- Change the stitch type to Triple Run Line for the second inner circle.
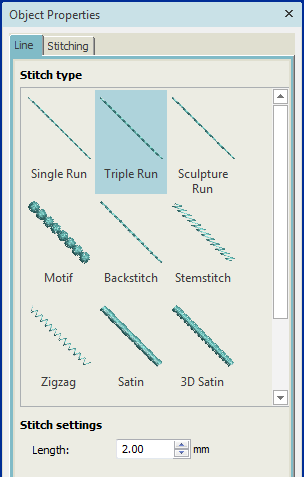
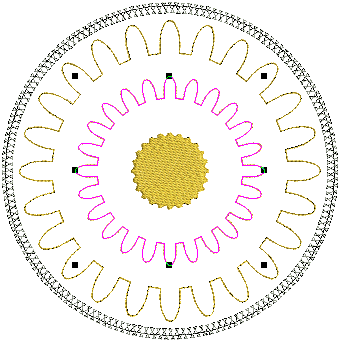
- Select both circles and choose 'Raindrop' from the Design Palette.
 | Use Advanced Digitize > Create Outlines & Offsets to create outlines or offset borders around closed objects or entire designs. |
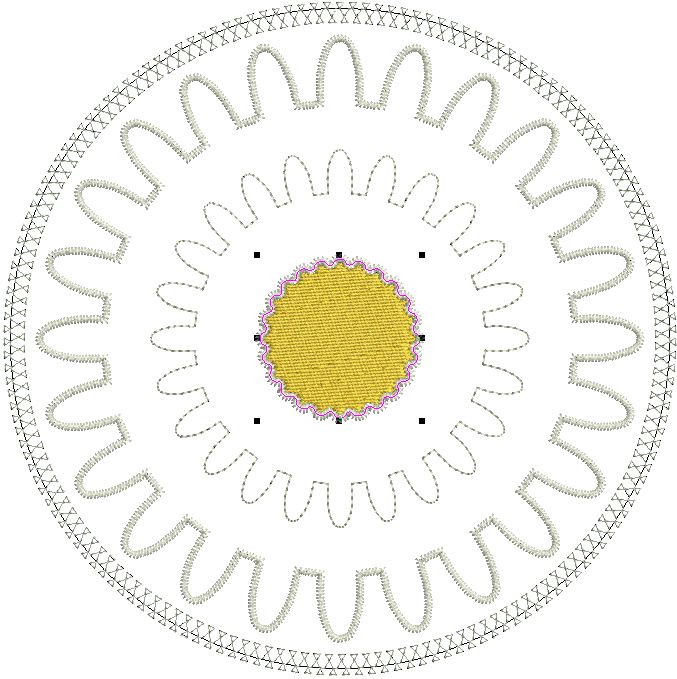
Edit mandala center
Now we can turn our attention to the center of the mandala.
- Select the center circle and click Outlines & Offsets. See also Outlines & offsets.
- Click the Offset Outlines checkbox and adjust settings as shown.
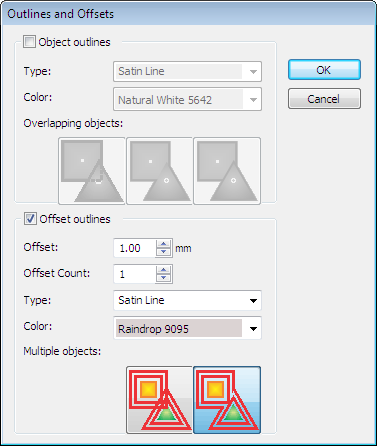
- Double-click the object you've just created to open Object Properties docker.
- Adjust settings as shown.
- Select and double-click the center round object to open Object Properties dialog.
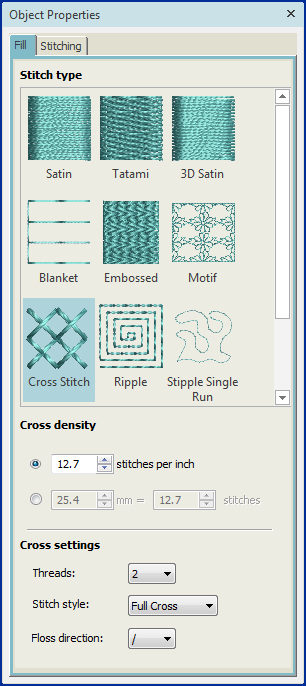
- Change to Cross Stitch and choose 'Raindrop' from the Color Palette.

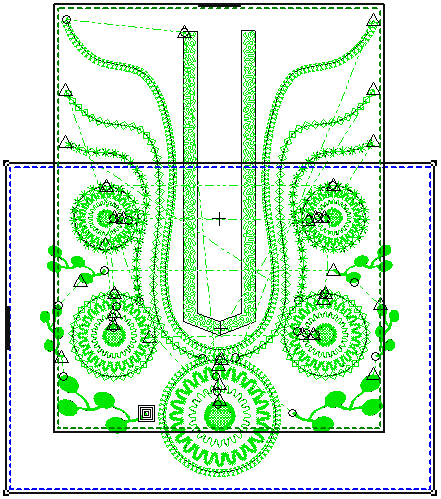
Position mandala on garment
Now we can import a garment backdrop in order to better visualize the mandala and other 'folkart' components on the final product.
| Use Artwork / Auto-Digitize / Standard > Insert Artwork to import graphic files - both bitmap and vector - for use as digitizing backdrops or for auto-digitizing. This tool is also available via File menu. |
Import backdrop
First we import the garment backdrop.
- Go to the Artwork toolbox and choose Insert Artwork.
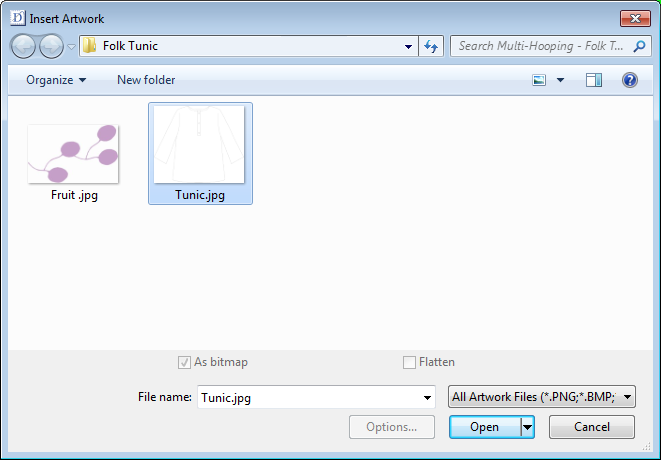
- Select 'Tunic.jpg' and click Open.
- Place the backdrop in the center of the screen.
 | Use Artwork > Lock to lock selected objects into position for protection. This tool is also available via Arrange menu. |
- Lock the backdrop in place via the button or <K> keypress.
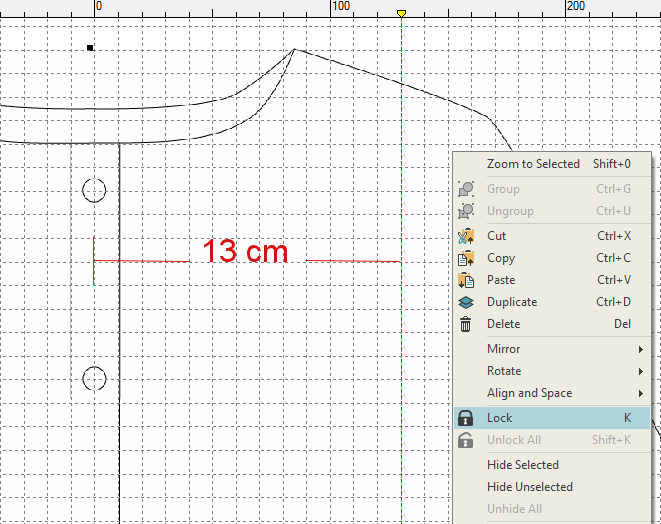
- Drag the zero point from the ruler to coincide with the center of the tunic as shown.
Drag a guideline 13cm to the right of center. This line forms the design width extent.
Lock the digitized line.
| Use Select > Select Object to select an object or group. Or drag a selection marquee to select multiple enclosed objects or groups. |
 | Use Context > Group to group a selection of objects. Or press <Ctrl+G>. This tool is also available via Arrange menu. |
 | Use Context > Ungroup to ungroup to a grouped selection. Or press <Ctrl+U>. This tool is also available via Arrange menu. |
Position mandala
Now we can place our mandala on the garment backdrop.
- Select all embroidery objects in the Resequence docker.
- Select Group or press <Ctrl + G>
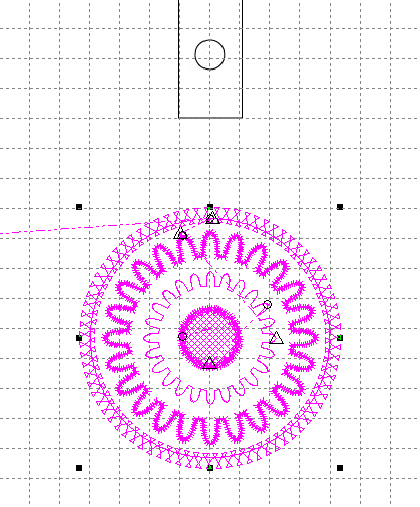
- Place the grouped mandala 3cm below the button line.
Create buttonhole borders
Now we are going to create an attractive border design around our tunic buttonhole 'placket'.
 | Use Digitize > Digitize Blocks to digitize shapes of varying width with turning stitching. |
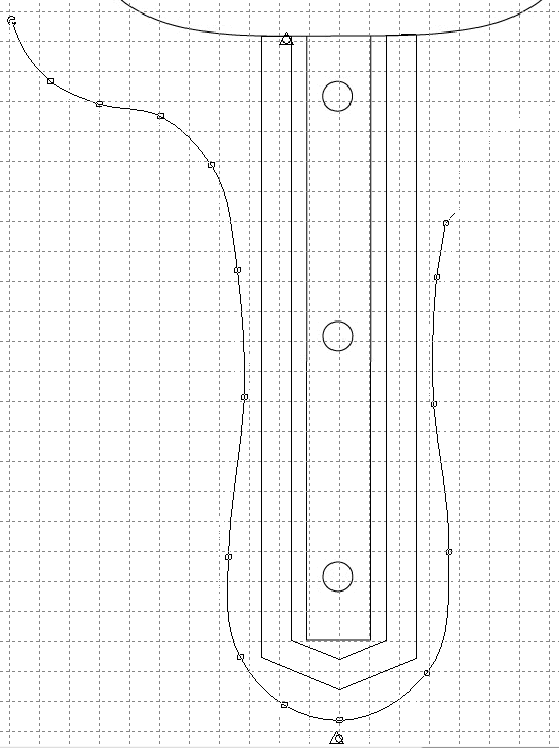
Create stipple fill border
First we'll create a stipple fill border around the placket.
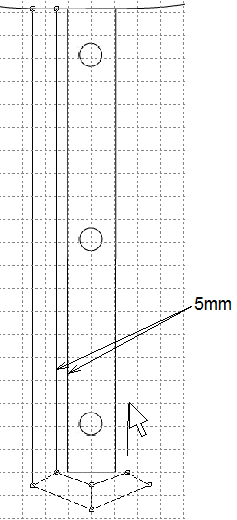
- Use the Digitize Blocks tool to create a border 5mm from the placket and 10mm wide as shown. See also Input methods.
Use Object Properties > Fill > Stipple Single Run to create fills made up of run stitches which meander within a border. | |
Use Object Properties > Fill > Stipple Stemstitch to create heavier stipple run fills with stemstitch outlines. | |
Use Object Properties > Fill > Stipple Backstitch to create heavier stipple run fills with backstitch outlines. |
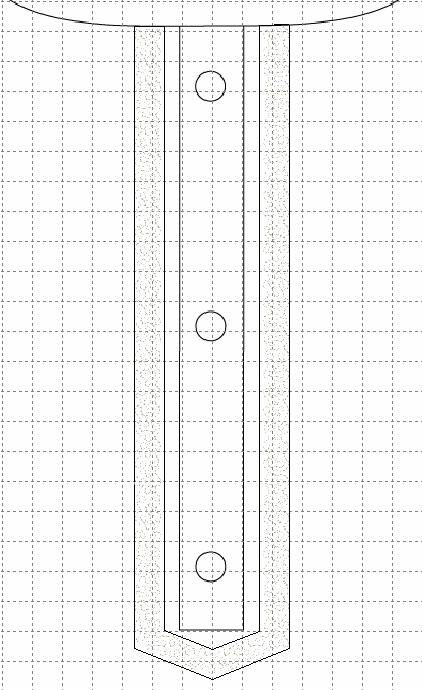
Select the border and select Stipple Single Run Fill.
Adjust Loop Spacing to 2mm.
Choose 'Natural White' from the Design Palette.
 | Use Digitize > Digitize Open Line to create a row of run or other outline stitching along a digitized line. Left-click for corner points, right-click for curves. |
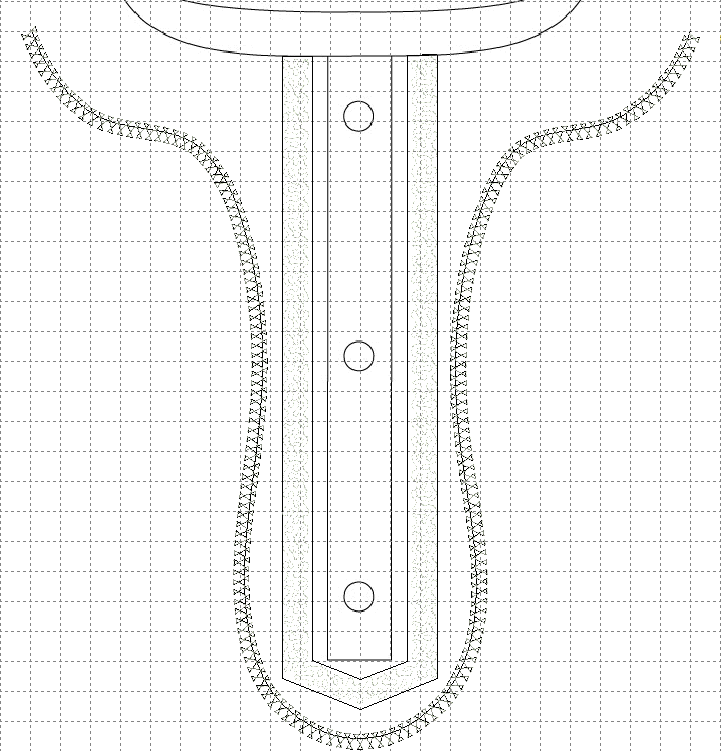
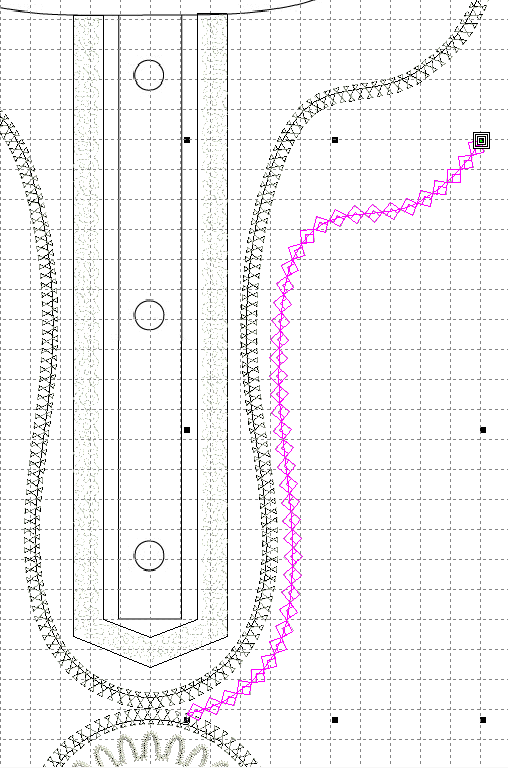
Create motif run border
Now we'll add a motif run line around the placket.
- Digitize an open line using Motif Run as shown.
- Select and double-click the border. The Object Properties open.
- Select 'Motif 17' from the Pattern droplist and choose 'Natural White' from the Design Palette.
Build design
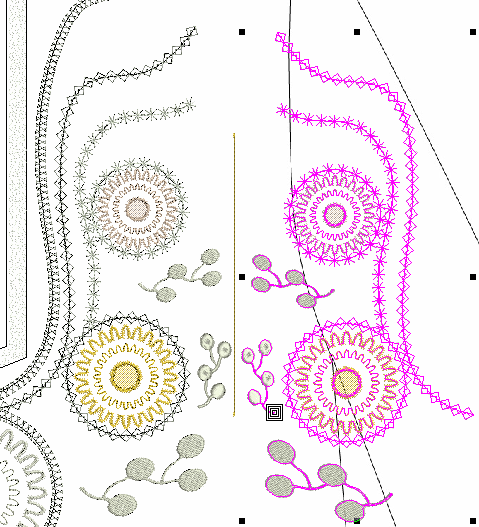
To begin with, we'll start building the right half of the design which can then duplicate and mirror.
| Use Select > Select Object to select an object or group. Or drag a selection marquee to select multiple enclosed objects or groups. |
Duplicate mandala
Since we'll be using the mandala in other parts of the design, we'll simply duplicate it.
- Select the grouped mandala and right-click and drag to clone.
- Select the duplicated object.
- In the Context toolbar, resize the object to approximately 65mm in width and height.

| Use Context > Group to group a selection of objects. Or press <Ctrl+G>. This tool is also available via Arrange menu. |
| Use Context > Ungroup to ungroup to a grouped selection. Or press <Ctrl+U>. This tool is also available via Arrange menu. |
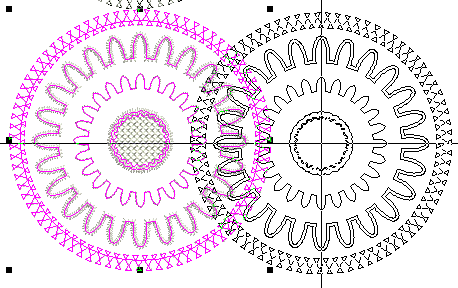
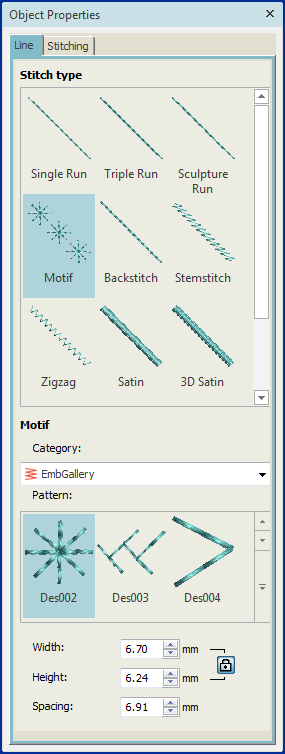
Edit mandala
Now that we've cloned the mandala, we'll edit the copy to apply different stitch effects.
- Ungroup the 65mm mandala via the Ungroup button or <Ctrl + U> keypress.
- Select and double-click the outer circle. The Object Properties open.
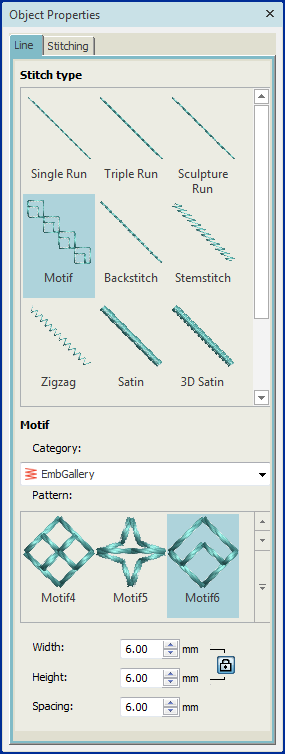
- Select 'Motif 6' as a pattern and set size and spacing to 6mm.
- Select all circles except the outer one and choose 'Warm Sunshine' from the Color Palette.
- Group the mandala you've just created and clone again. This time, set the width to 50mm.
- Ungroup and change the outer circle to 'Des 002' as the pattern.
- Change the inner circles to 'Wild Ginseng'.
- Group the objects.
| Use Digitize > Digitize Open Line to create a row of run or other outline stitching along a digitized line. Left-click for corner points, right-click for curves. |
Use Object Properties > Line > Motif to create ornamental craftstitch borders. Choose from pattern library. |
Place cloned mandalas
Now we are going to place our cloned mandalas along a motif run line.
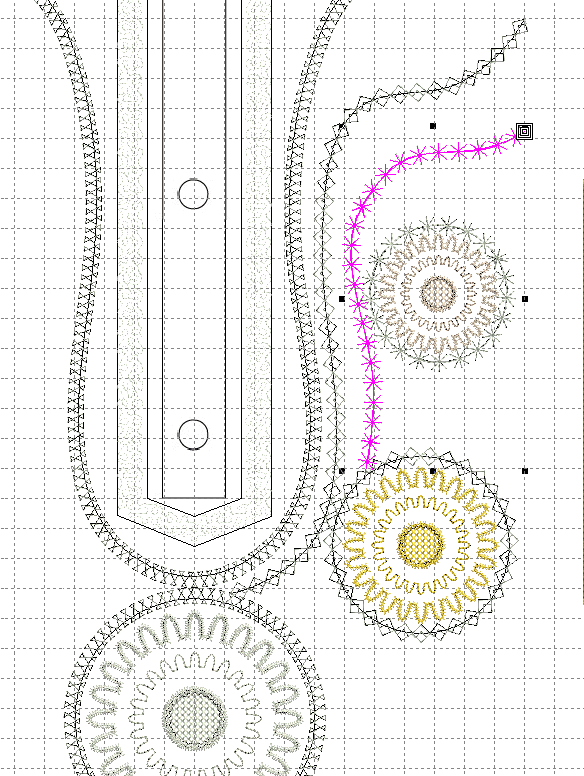
- Click Digitize Open Line tool and digitize a half-border as shown.
- Select and double-click the border. The Object Properties open.
- Select 'Motif 6' from the Pattern droplist and choose 'Natural White' from the Color Palette.
- Select the 65mm mandala and place as shown.
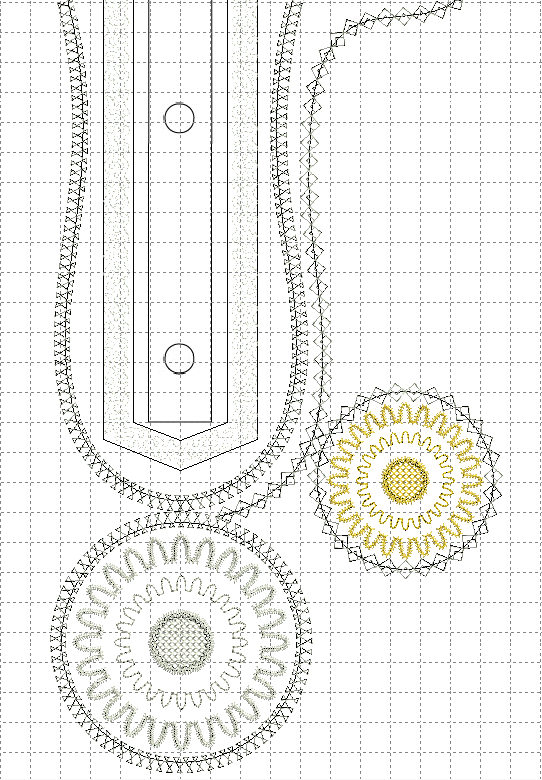
- Repeat the steps for the smaller mandala. Create a second half-border with 'Des 002' pattern and place the mandala as shown.
Add fruit decoration
We're getting close to finishing our design. Now we will add some fruit decoration for 'folkloric' effect.
| Use Switch and Convert > Switch to Graphics Mode to import, edit or create artwork as a backdrop for embroidery digitizing, manual or automatic. |
| Use Artwork / Auto-Digitize / Standard > Insert Artwork to import graphic files - both bitmap and vector - for use as digitizing backdrops or for auto-digitizing. This tool is also available via File menu. |
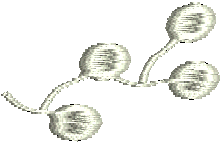
Import & convert fruit artwork
First we need to import the vector artwork we will use for the fruit decorations.
- Switch to Graphics mode.
- Click Load Artwork on the Artwork toolbar.
- Navigate to the Embroidery > Projects > Folkart folder.
- Select the 'Fruit.jpg' file and click Import.
| Use Switch and Convert > Convert Artwork to Embroidery to convert selected vector or bitmap artwork to fill or outline stitches. |
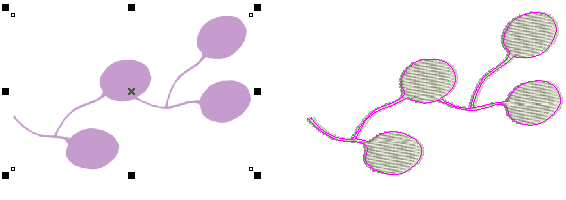
- Select the imported artwork and click Convert Graphics to Embroidery. The vector graphic is converted to embroidery and the system switched back to Embroidery mode.
- Choose 'Raindrop' from the Design Palette.
| Use Select > Select Object to select an object or group. Or drag a selection marquee to select multiple enclosed objects or groups. |
Duplicate & edit fruit
Now we will duplicate and edit the fruit motif.
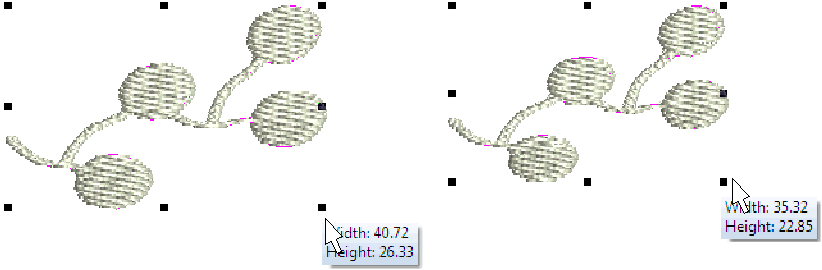
- Select the fruit object and clone twice. There should be three fruit objects in total. See also Handle objects.
- Resize the duplicated objects via the resize handles as shown. One approximately 40mm in width, the other 35mm.
Use Object Properties > Line > Satin to create thicker borders or columns of even thickness. | |
Use Object Properties > Fill > Satin to create stitch fills for narrow shapes and thick borders. |
- Select the smaller fruit object and choose Satin Fill stitch type.
- Using the rotate handle, rotate the smaller object as shown.
| Use Select > Select Object to select an object or group. Or drag a selection marquee to select multiple enclosed objects or groups. |
Place fruit
Finally, we’ll place the fruit decorations.
- Select the fruit objects and position as shown. Make sure objects do not go beyond the guideline
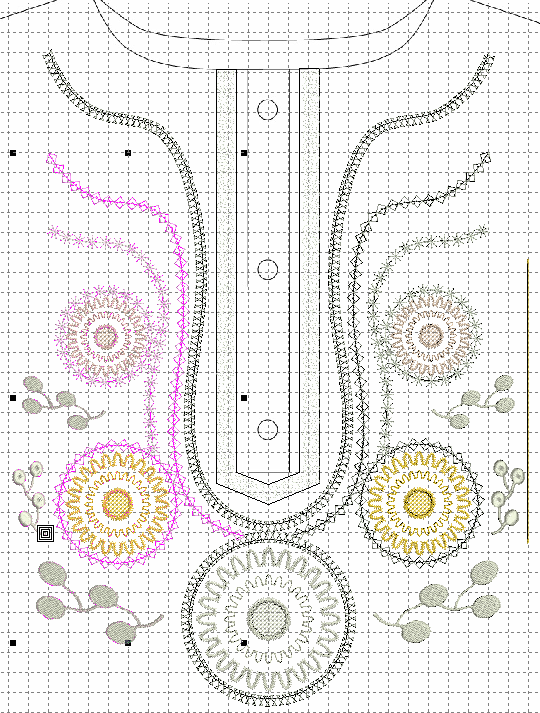
Create other half of design
Now that we're created our design, we simply duplicate and flip it horizontally.
| Use Context > Group to group a selection of objects. Or press <Ctrl+G>. This tool is also available via Arrange menu. |
| Use Context > Ungroup to ungroup to a grouped selection. Or press <Ctrl+U>. This tool is also available via Arrange menu. |
Duplicate objects
To begin with, we'll duplicate the objects on the right.
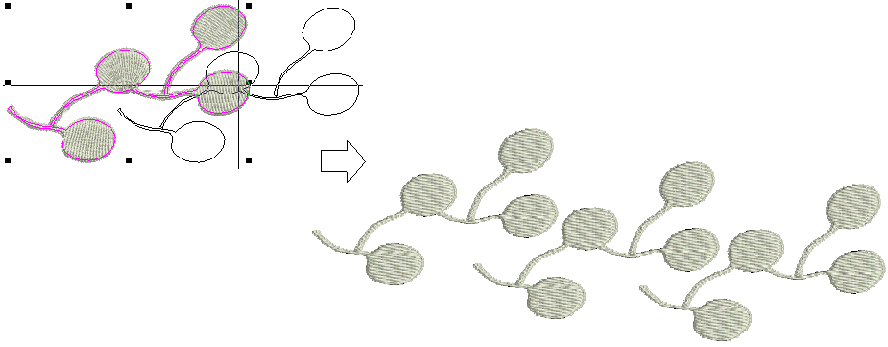
- Select the two smaller mandalas, two half-borders, and fruit objects, and group them.
 | Use Layout > Mirror-Copy Horizontal to mirror and copy selected objects horizontally. |
- With the grouped object selected, use the tool to mirror and copy horizontally.
| Click View > Show Grid to show or hide grid. Right-click for settings. |
- Turn on the grid and drag the duplicated objects into place as shown.
Finalize design
Before stitchout, there are a number of steps we should take to improve the stitching sequence and minimize jumps and travel runs. We'll also adjust stitch angles to help minimize the 'pull-push' effect.
 | Use Edit Objects > Resequence Manually to show or hide Resequence docker. Use it to resequence objects and color blocks in a design. |
| Use Context > Group to group a selection of objects. Or press <Ctrl+G>. This tool is also available via Arrange menu. |
| Use Context > Ungroup to ungroup to a grouped selection. Or press <Ctrl+U>. This tool is also available via Arrange menu. |
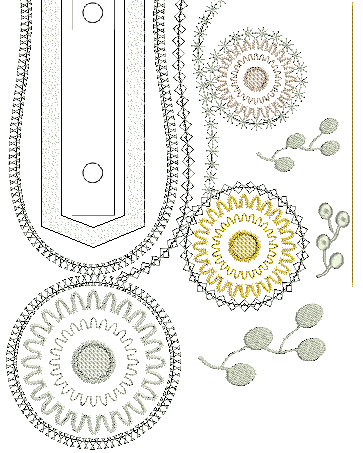
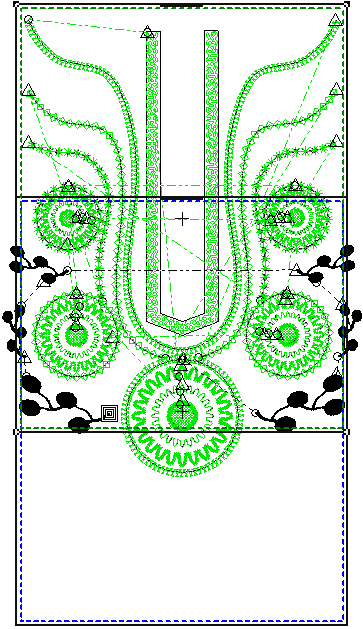
Check stitching sequence
When working with embroidery designs, you need to understand the stitching sequence or order in which objects are stitched out. The stitching sequence is initially defined by the digitizing sequence - i.e. the order in which you created the objects. It's always a good idea to check this before stitching out. You can always fine-tune the sequence in order to minimize color changes and travel runs.
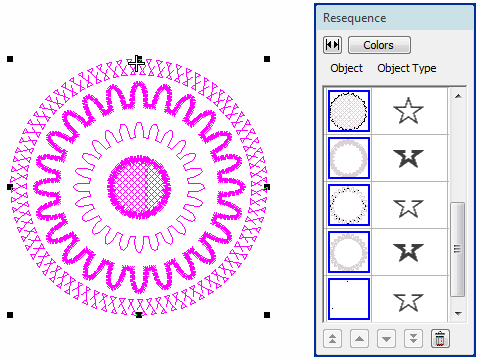
- Open the Resequence docker and switch to object view.
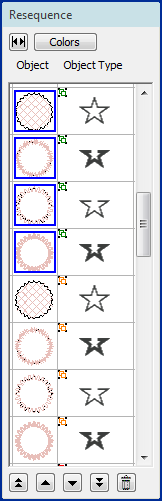
- Ungroup all grouped objects. Ungroup the mandalas and re-group the colored circles.
- Unlock and delete the guideline and unused graphic objects. To delete the mandala artwork, you will need to go back to Graphics mode via the Switch and Convert toolbar.
- Starting with the topmost object, select each in turn to view its place in the stitching order.
- Drag-&-drop objects to change their position in the sequence, or use the dialog buttons. Like-colors should be stitched with like and objects placed consecutively to reduce color changes and minimize jumps and travel runs. In order to ensure that registration is as accurate as possible, borders should be stitched first, from inside out, followed by mandalas and fruit.
| Use View > Show Design to show or hide design elements. Click to open droplist of view settings. |
 | Click View > TrueView to show or hide simulation of stitched embroidery. |
 | Click View > Zoom In to view design in greater detail. |
 | Use Select > Reshape to adjust object outlines, stitch angles, start and end points, curved lines, etc. |
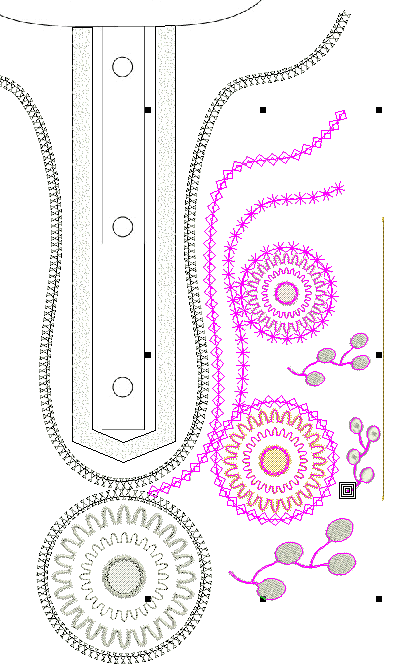
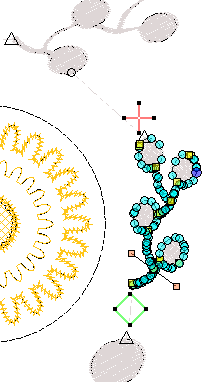
Reset object entry & exit points
We should now check entry & exit points for individual objects.
- First of all, turn off or dim the backdrop image, turn off TrueView, and zoom into the design.
- Select the object in the Resequence dialog and click the Reshape Object tool.
- Press the <Tab> and <Shift + Tab> key combinations to cycle forwards and backwards through the stitching sequence.
The entry point is indicated by a diamond shape, the exit point by a cross. It will be clear to you that some need to be changed in order to minimize needle traveling distance. Drag & drop to the required locations. Make sure each object ends as nearly as possible to where the next begins.
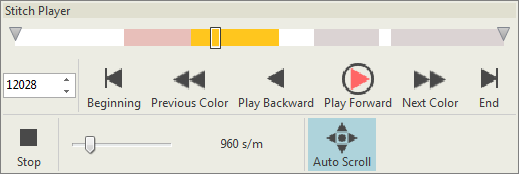
 | Use View > Stitch Player to simulate embroidery design stitchout onscreen in either stitch or TrueView. |
- Do a final check with Stitch Player. See also Travel through designs.
| Use Select > Reshape to adjust object outlines, stitch angles, start and end points, curved lines, etc. |
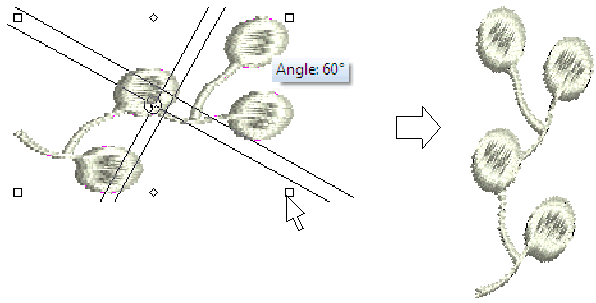
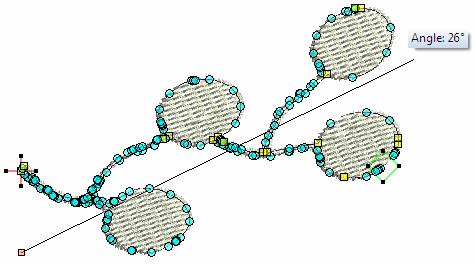
Adjust stitch angles
We'll now check the stitch angles of the our filled objects. Most fabric weave runs at 90° or 0°. As a rule of thumb, you need to set the embroidery stitching to sew in contrast to the weave.
- Select the object and click the Reshape tool.
- Press the <Tab> and <Shift + Tab> key combinations to cycle forwards and backwards through the stitching sequence.
Note the stitch angle of each of the filled objects and adjust as required by click-&-dragging the angle line as shown. See also Reshape objects.

Multi-hoop design
A problem arises when you create a large design which has multiple design elements spread over a large area which cannot fit in a single hoop. Using the Multi-Hooping toolbox functions, you can combine one or more designs in a single hoop or place multiple hoops over a large design layout. These can then be sent to the embroidery machine as a single stitch file per hooping.
- Choose the hoop you want to work with. In this case, 'Hoop GR (230 x 300)' available for the MC12000 machine.
- Click the Multi-Hooping toolbox
This places the design in multi-hoop view and enables the Add Hoop and Calculate Hoopings tools.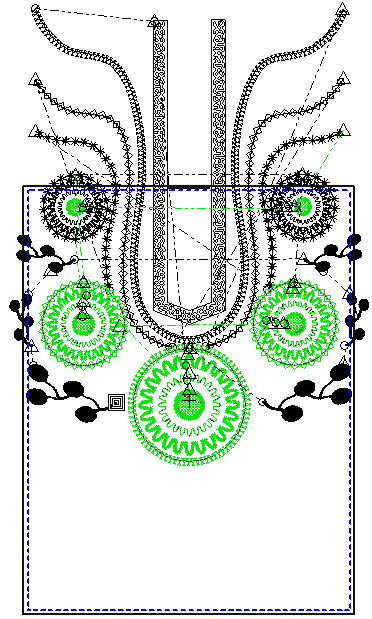
 | Use Multi-Hooping > Add Hoop Up to place a new hoop position above selected hoop. Allows 10mm overlap between sewing fields. |
- Click the Add Hoop Up button to add another hoop position. See also Create multi-hoop designs.
- Position this hooping over the design elements you want to stitch first.
- Select the first hoop and click twice. Use the rotation handles to move it into position.
 | Use Output Design / Standard > Print Preview to preview design worksheet. Print from preview window. |
Preview design printout
Finally, use Print Preview to view your stitching information. Use it to check the sewing sequence before you stitch out your design. The design worksheet contains a design preview and essential information, including design size, color sequence, threads, fabric and required stabilizer, as well as the total amount of thread required.
- Click the Print Preview icon in the Output Design toolbox.
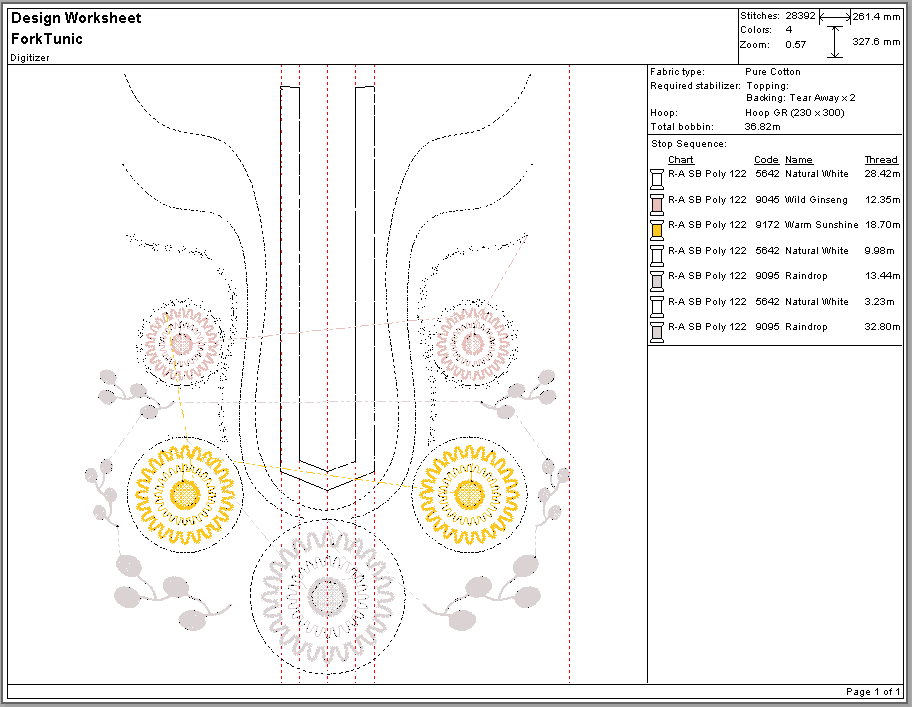
Print it out as you require. You are now ready for stitchout. See also Print designs.
Comments