
Output selected designs
 Send selected designs to a preset folder on your network or PC. Create a hard copy report of a selected design using a printer or plotter. Report types may include design worksheets, appliqué patterns, color films, hooping sequence reports, as well as catalogs and lists of selected designs. See also Print designs.
The screen illustrations in this publication are intended as representations, not exact duplicates of screen layouts generated by the software. The samples used to illustrate software features and capabilities may not be exactly duplicable, depending on your product level.
Use Manage Designs > Transfer Selected Design to transfer the design selected to the default Machine Folder. |
Transfer selected designs
The software provides a method of connection to machines that appear as removable media or use a third-party application to connect to the machine and require files to be placed in a specific network location. Once your machine is set up, it only requires a single click to send a selected design to the preset folder on your network or PC. The first time you do it, you will be prompted to specify your machine type and file type. See also Transfer designs.
Using the Output Design toolbox you can output embroidery designs in a variety of ways – by printing as worksheets, as appliqué patterns, color sequence, or as thread charts. See also Output designs.
 | Use Manage Designs > Convert Selected Designs to convert the design selected in the Design Library window into different file types. |
Convert multiple designs
You can convert your EMB and other design files to and from other file formats directly from your design library.
- Select the file(s) to be converted and click the Convert Selected Designs icon. The dialog lists all machine file formats the software supports.
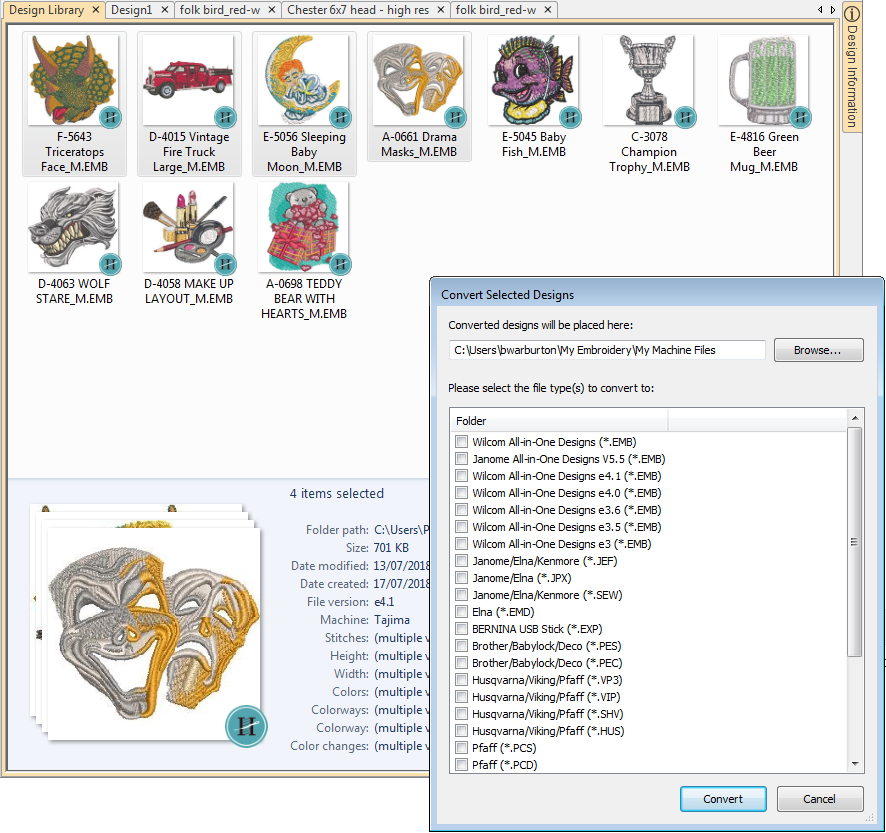
- Select the file types you want to convert to.
- Click Browse to locate a destination folder for the converted designs.
- Click Convert to start the conversion. The converted designs will be stored in the nominated folder.
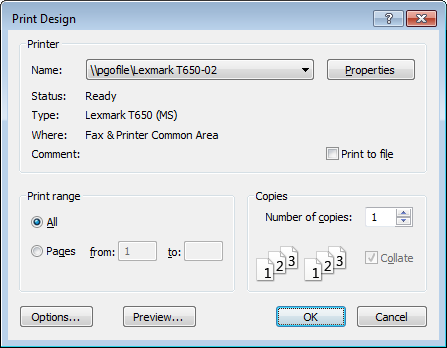
 | Use Manage Designs > Print Selected to print the design selected in the Design Library window. |
Print selected designs
The Print Selected command allows you to print worksheets directly from Design Library.
- Go to the Design Library (Manage Designs) and select a design to print.

- Click the Print Selected icon. The Print Design dialog opens.

To customize the printout, click the Options button.
Set worksheet options to show the information you want in the format you require.
Report Purpose Design worksheet
This provides complete sewing information for the design. All related information, such as bobbin length, design size, garment fabric, etc, is provided.
Appliqué patterns This shows appliqué patterns – cutter information – isolated from the design. These can be used as a guide to cutting out fabric pieces.
They also show which appliqué pieces are to be included.Color sequence Provides a list of colors in the design, together with color and stitch information for each color layer. This helps the machine operator to see each stitch color in order of stitchout. Hooping sequence If there is more than one hooping in the design, this option displays hoopings in their correct color sequence.
Use the preset buttons to filter the design worksheet options - 'Standard', 'Design View', and 'Template Mode'. The Design Worksheet panel provides options for further customization. See also Print designs.
Click OK and ensure correct printer settings in the MS Windows® Print Setup dialog.
- The dialog and the settings available will vary from printer to printer. See your printer manual for details.
 | Use Manage Designs > Export Design List to export a text or CSV file containing a list of the visible design files and their properties. |
Export design lists
The Export Design List option can be used to print design lists for selected folders. This option allows you to create a simple design report which can easily be imported into a spreadsheet. You may want to use this in order to manage designs by file name.
- Preset the measurement units you want to use - metric or U.S.

- Open the Embroidery Library and select a design folder.
To customize the printout, click Options.

- Sort and filter the designs to be printed. See also Browse designs.
Click the Export Design List icon and choose a location to save the list. Choose whether to save as a tab-delimited or comma-separated text file.

- Open the text file in a spreadsheet for further sorting and printing.

 | Use Manage Designs > Print Selected to catalog to print selected designs to an HTML catalog. |
Print design catalogs
Printed catalogs contain thumbnails plus limited text details. You can prepare catalogs of selected designs to suit your needs. To print a design catalog...
- Open Design Library and filter designs as desired.

- Select the designs you want to include in the catalog.
- Select Manage Designs > Print Selected to Catalog. The Print Catalog Options dialog opens.

- Adjust settings as preferred:
- Change Scale (%) to adjust thumbnail size.
- Select a catalog format – thumbnails with or without design details.
- Choose output target – PDF file or actual printer.
- Click Print. The Print Design dialog opens.
- Click Preview to view the catalog.

- Click Print Now to send the design report to your local printer. If the catalog requires more than one page, you can select which page to print in the MS Windows® Print Setup dialog.
.
Designers frequently want to distribute designs for viewing in real colors, in TrueView or otherwise, with or without fabric backgrounds. Screen images can be captured in PNG format and send as email attachments. See also Capture designs.
