
Stitch angles
 Stitch angle adjustments depend on the type of object you are working with. With filled objects you can set a stitch angle for the entire object. Alternatively, you can add multiple stitch angles with the Add Stitch Angles tool. You can also adjust the stitch angle using the Reshape tool.
 | Use Edit Objects / Digitize > Add Stitch Angles to add stitch angles to selected closed objects with or without holes. |
 | Use Edit Objects > Remove Stitch Angles to remove stitch angles from selected objects with turning stitching. |
Add stitch angles
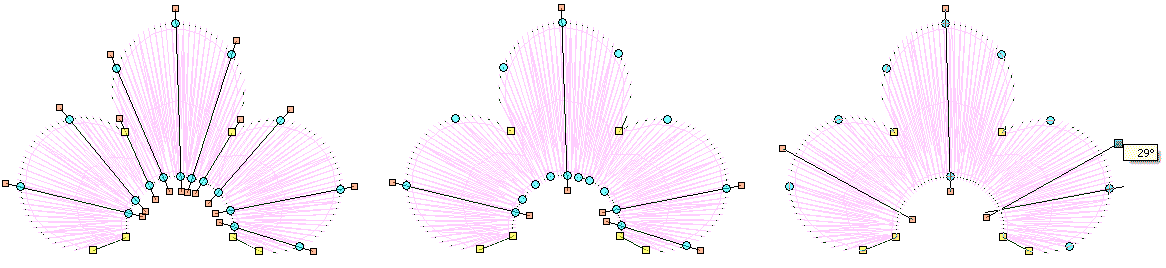
The stitch angles of all filled objects, with or without holes, are modified in the same way. Multiple stitch angles can be added or subtracted with the Stitch Angles tools.
- To add stitch angles, select a closed object with or without turning stitches.
- If necessary, click the Remove Stitch Angles tool to return it to the current nominal stitch angle.
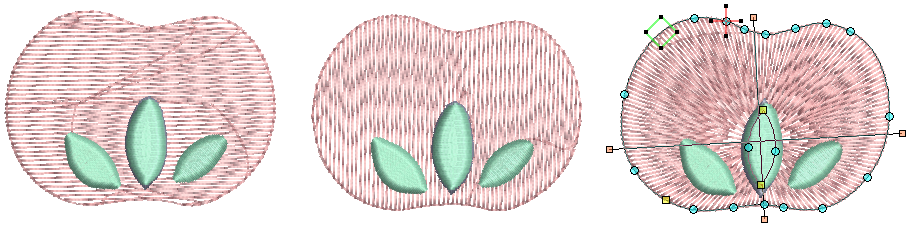
- Click the Add Stitch Angles icon. Enter stitch angles as prompted. Stitch angles can overlap holes within objects.
 | Use Select > Reshape to reshape an object shape, edit stitch angles, adjust entry and exit points, or customize envelopes. |
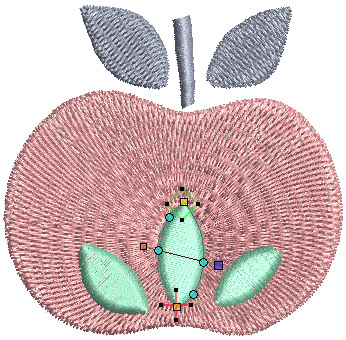
Adjust stitch angles
You can change stitch angles of filled objects using the Reshape tool. To adjust stitch angles, select the filled object and click the Reshape icon.
- Select stitch angle nodes and press <Delete> to remove stitch angles.
- When you move the mouse pointer over the stitch angle point, a tooltip displays the stitch angle of the selected object.
- Click and drag lines as required.
- Press <Enter> to apply the changes, then <Esc> to finish.
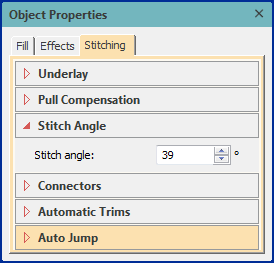
- Note that the nominal stitch angle can also be controlled via Object Properties:
| Use Select > Reshape to reshape an object shape, edit stitch angles, adjust entry and exit points, or customize envelopes. |
Circle objects
You can change the stitch angle of circle objects by moving the stitch entry point.

