Design settings
 The software provides a number of global settings which apply to entire designs. The Auto Start & End feature is available to connect first and last stitches in a design. This is important for needle positioning. The Remove Small Stitches function automatically removes unwanted small stitches from a design either on opening or on output.
 | Use View > Show Design to show or hide design elements. Click to open droplist of view settings. |
 | Use Customize Design / Output Design > Auto Start & End to set auto start and end points for entire design. |
Automatic start & end points
Before stitching, some embroidery machines require you to position the hoop precisely in relation to the needle. The Auto Start & End feature is available to connect first and last stitches in a design. This makes it easy to position the needle before stitching, and reduces the chance of the needle hitting the side of the frame.
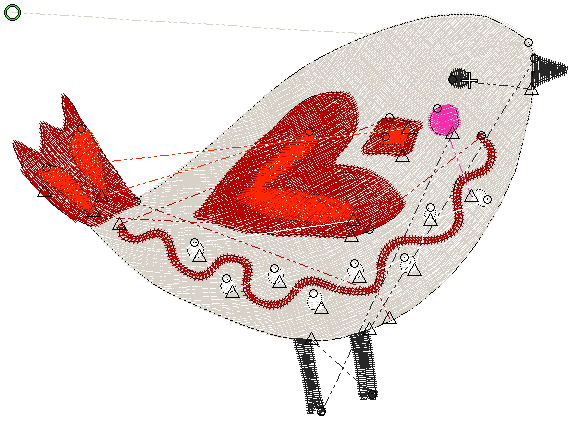
Turn on connectors via the Show Design droplist or press <Shift + C>. Note that a green circle indicates the start point while a white cross indicates the end point.
- Click Auto Start & End. In the example below, start and end points are set to top left and bottom left respectively.
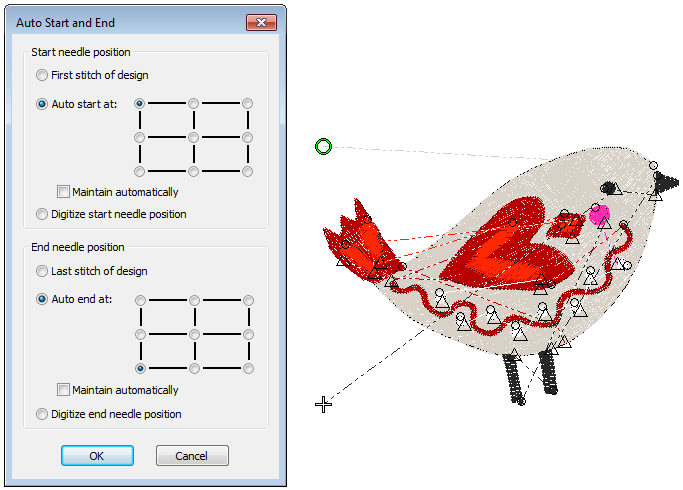
Select a centering method for start and end needle positions...
Method Description First / last stitch Start and end the design at the first and last stitches wherever they may occur in the design. Auto start / end Select one of the nine preset start and end points. Connecting stitches are added to first and last stitches of the design. Digitize start / end Digitize your own start and end points. Used where you want to strictly define the start/end point of the embroidery usually to align with some other component. If you select this option, you are prompted to click the point after clicking closing the dialog. - Select 'Maintain automatically' to maintain the design center after modifying the design.
- Click OK.
- Connectors – travel runs or jumps – are inserted as necessary before first and after last stitches of the design.
.
Eliminating small stitches
Small stitches can damage fabric and cause thread or needle breakage. Before you stitch out, unwanted small stitches can be automatically removed. The filter can be applied continuously, on output only, or never. To eliminate small stitches...
- Select Design Settings > Remove Small Stitches.
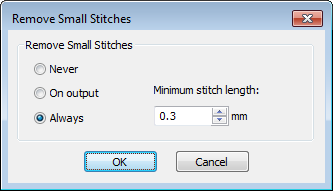
- Choose your preferred option:
- When set to ‘Always’, the filter will be automatically applied in the background whenever objects are edited or digitized.
- When set to ‘On Output’, the filter is only applied when printing or outputting files.
- Enter the minimum stitch length you want to preserve.
- Click OK to confirm.
- Check the Status Bar for the new stitch count.