Sequence designs
 The embroidery objects in a design form a stitching sequence. Initially, objects are stitched in the order in which they were created. You can change the position of a selected object by cutting and pasting it elsewhere in the sequence, or by using the Resequence docker. As a general rule, it is important to establish the stitching order so that objects in the foreground are sewn after those in the background. If you combine designs or design elements, you will also want to ensure that like-colors are sewn together.
 | Click Standard > Copy to copy the selection and place it on the clipboard. This tool is also available via Edit menu. |
 | Click Standard > Cut to cut the selection and place it on the clipboard. This tool is also available via Edit menu. |
 | Click Standard > Paste to paste contents of the clipboard. This tool is also available via Edit menu. |
Sequence by cut & paste
You can resequence objects by cutting an object from the design and pasting it back at a different point in the sequence. This does not change the physical location of the object.
Cut the object to resequence and paste. By default, the object is pasted at the end of the sequence. Alternatively, travel to a point in the stitching sequence where you want to paste the object. You can paste between other objects or ‘nest’ the cut object within another object.
 | Use Edit Objects > Resequence Manually to show or hide Resequence docker. Use it to resequence objects and color blocks in a design. |
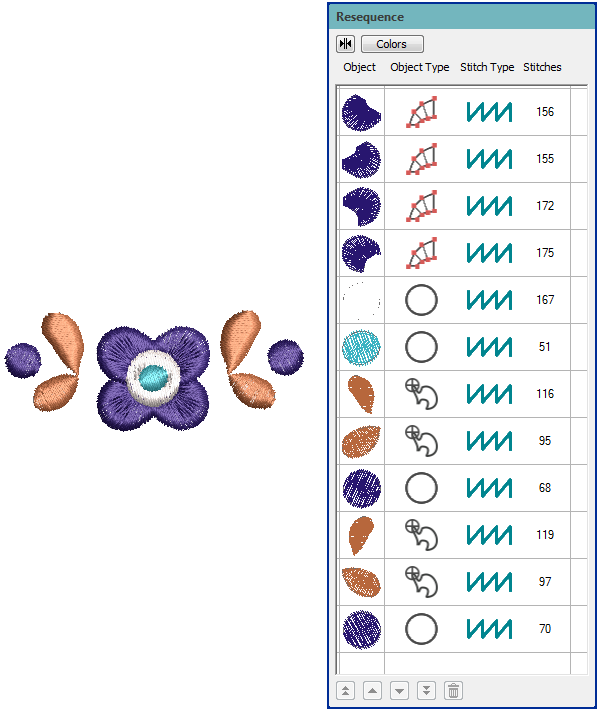
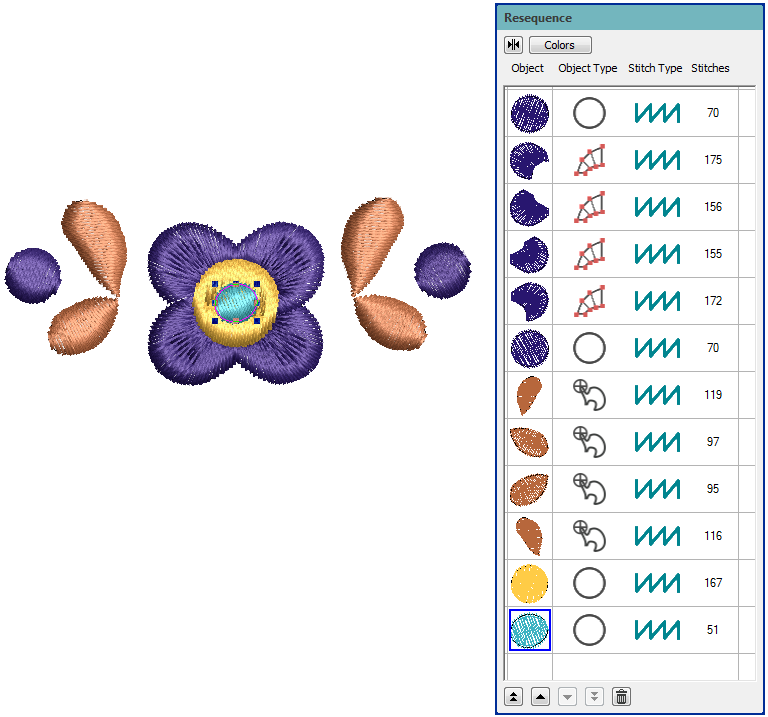
Sequence by object
The Resequence docker provides an easy way to select objects in designs and sequence them in the preferred stitching order. Use the button at the top to toggle between objects and color blocks. Select the object or objects you want to resequence. Hold down <Ctrl> to select multiples.
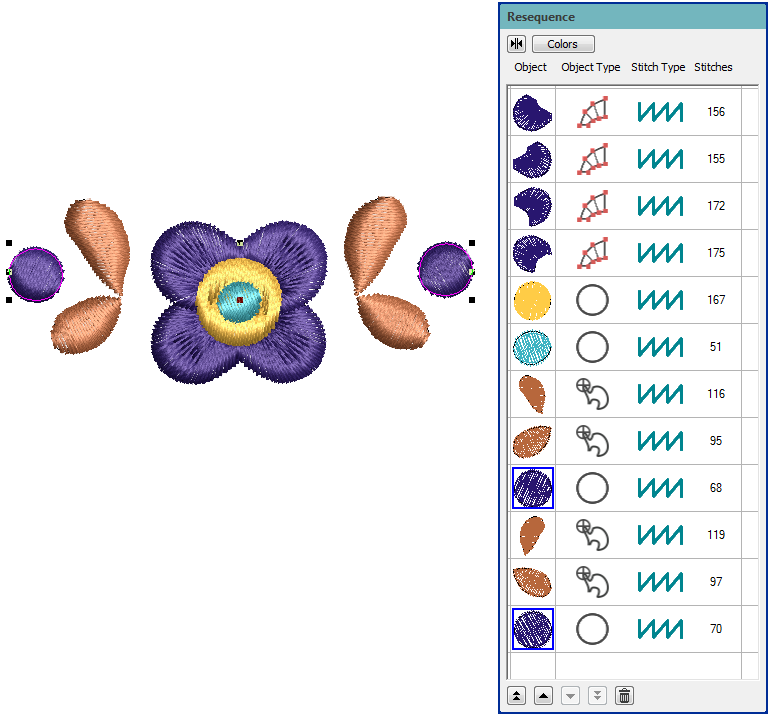
Use the buttons at the bottom or drag-and-drop to reposition. The object sequence should involve the minimum color changes.
The Apply Closest Join feature allows you to (re-)apply closest join to selected objects after editing. It is available from the Edit menu or by pressing <J>. See also Closest joins.
Object details
Use the button at the top to expand the Resequence docker for more object details. This will give you information about each object in the design - its color, type, stitch type applying, and stitch count.
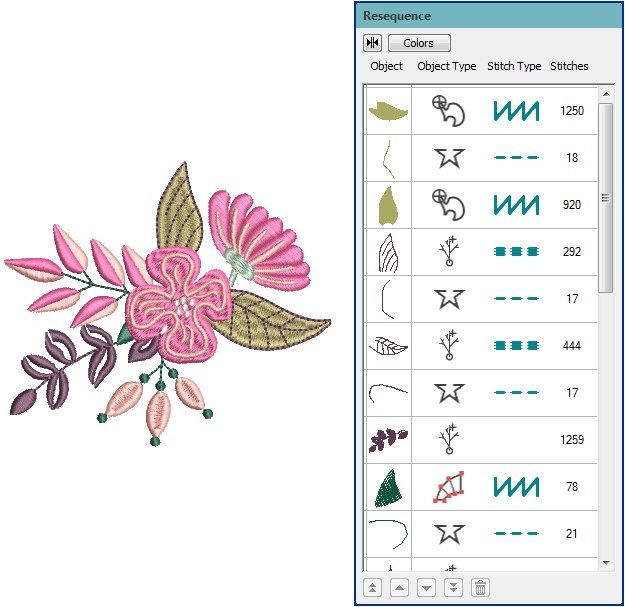
Object types correspond to the input methods used in their creation:
| Object type | Use | |
|---|---|---|
 | Closed shape | Use Digitize Closed Shape to create closed shapes using either outline or fill stitching. See also Input methods. |
 | Open shape | Use Digitize Open Line to create a row of run or other outline stitching along a digitized line. See also Input methods. |
 | Branched object | Use Branching to automatically sequence selected outlines for efficient stitchout. See also Embroidery connections. |
 | Block object | Use Digitize > Digitize Blocks to digitize shapes of varying width with turning stitching. See also Input methods. |
 | Freehand closed object | Use Digitize > Freehand Closed Shape to draw closed shapes on screen using current stitch settings for a hand-drawn look. See also Freehand. |
| Use Edit Objects > Resequence Manually to show or hide Resequence docker. Use it to resequence objects and color blocks in a design. |
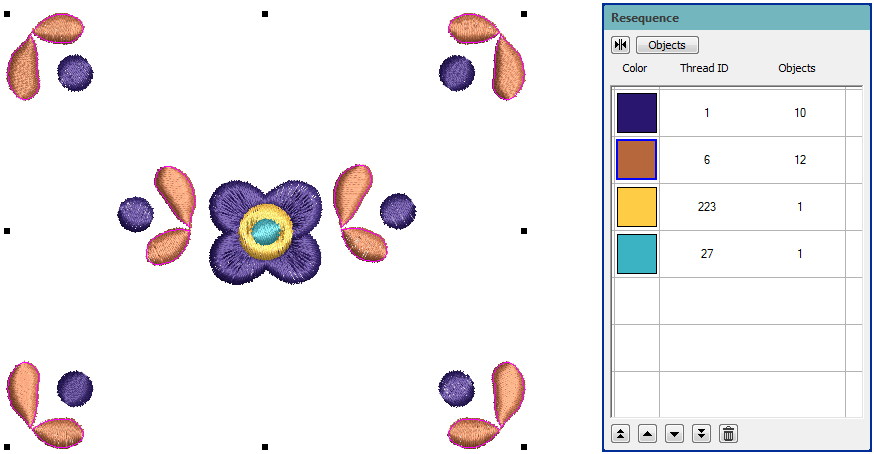
Sequence by color
The Resequence docker also provides an easy way to resequence designs by color. Use the button at the top to toggle between objects and color blocks. Select the color blocks you want to resequence. Hold down <Ctrl> to select multiples.
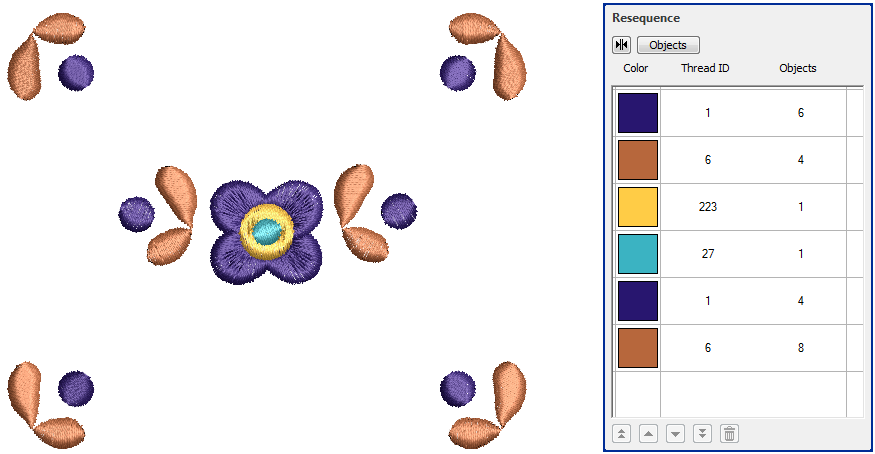
Use the buttons at the bottom or drag-and-drop to reposition.
 | Use Edit Objects > Optimize Color Changes to optimize design by reducing color changes to a minimum, while maintaining color layers. |
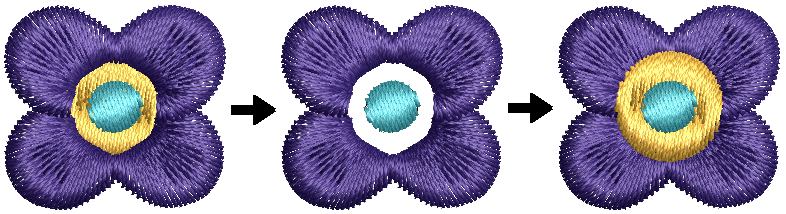
Optimize color changes
It is important to be able to resequence objects by color. This reduces the number of potential color changes in a design. Use the dialog to manually resequence objects of the same color.
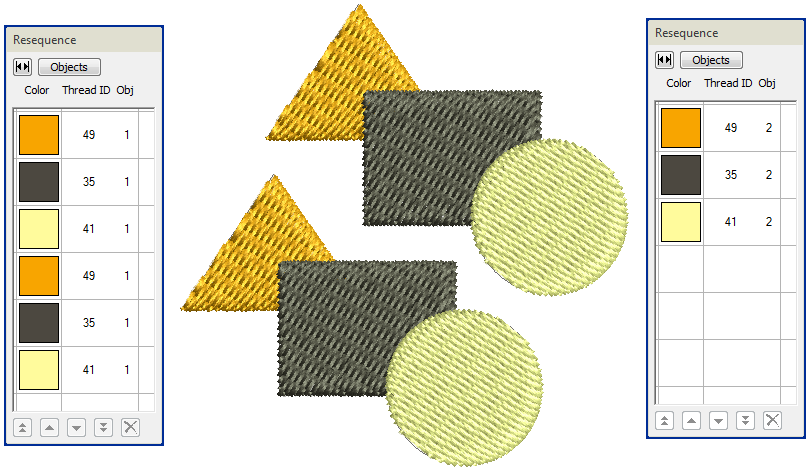
Alternatively, click the Optimize Color Changes button. This command optimizes production by reducing color changes to a minimum while maintaining color layers. In many cases you can rely on the software to work out the optimum stitching sequence for you. The example shows the results of color resequencing on the right - three color changes as opposed to the original six.
Don't rely on automatic color change optimization as there may be instances where you want the same color to be stitched at different stages.
 | Use Edit Objects > Resequence by Selected Order to resequence objects in the order of selection. Hold down <Ctrl> and click to select. |
Sequence by selection order
Another useful technique is to sequence objects by order of selection. Simply select the first object you want to include in the sequence. Holding down <Ctrl>, select subsequent objects in the desired stitching order. You can do this on-screen or with the Resequence docker. Click the Resequence by Selected Order button. The objects are resequenced in the order of selection.