
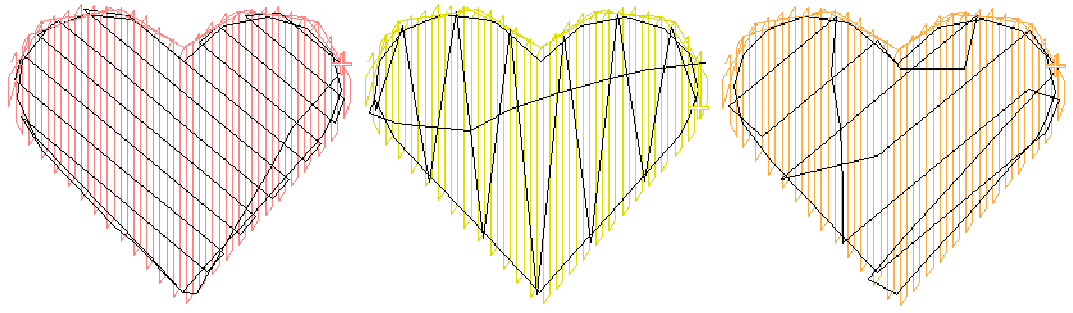
Stitch reinforcement
Embroidery appearance and quality depends a lot on underlay which serves as a foundation for cover stitching. Without an underlay, embroidery lies flat on the underlying fabric which can often show through. New digitizers might be tempted to increase stitch density but it is much more effective to apply an automatic underlay. Although it increases the stitch count, underlay helps to stabilize fabrics and reduce puckering and pulling especially on larger designs. It also provides ‘loft’, raising cover stitches and preventing them from sinking into soft fabrics. It is also used to prepare a napped fabric by flattening it.
The screen illustrations in this publication are intended as representations, not exact duplicates of screen layouts generated by the software. The samples used to illustrate software features and capabilities may not be exactly duplicable, depending on your product level.
 | Use Context > Underlay to apply or exclude automatic underlays to new or selected objects. Right-click for settings. |
Automatic underlay
The Underlay tool is a toggle button that allows you to apply automatic underlay to new or selected objects. Underlay is deselected by default.

In addition to the basic underlay stitch types – Center Run, Zigzag, Edge Run, and Tatami – the software also provides a selection of underlay combinations such as Double Zigzag, Center Run + Zigzag, etc. This allows you to apply dual underlays to design objects.
| Underlay | Type | Purpose |
|---|---|---|
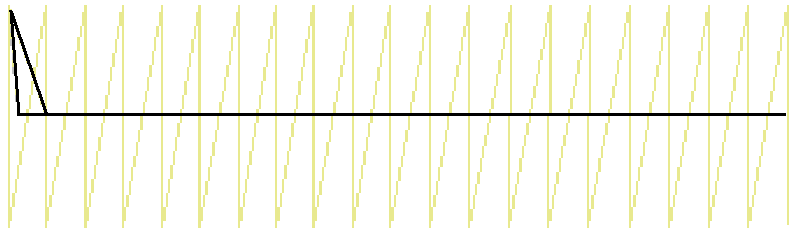
| Center Run underlay | Use to stabilize narrow columns – e.g. 2-3mm wide. You can't use Center Run with Parallel Fill or Parallel Fill Rectangle objects. |
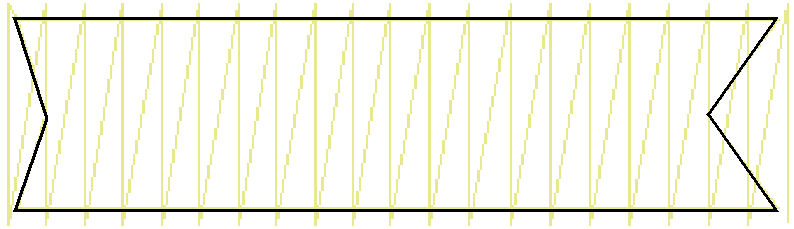
| Edge Run underlay | Use to stabilize somewhat larger shapes such as letters. |
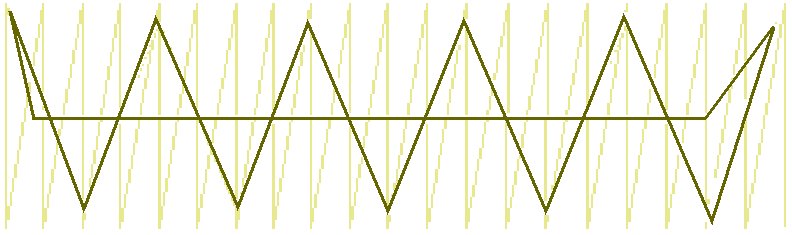
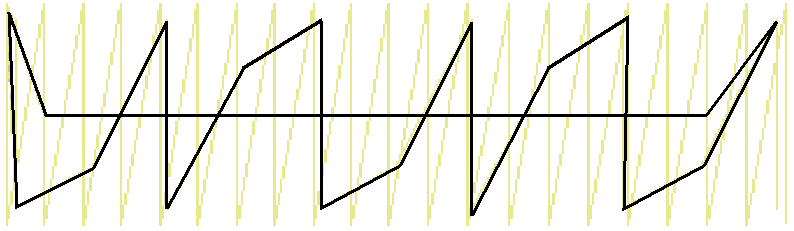
| Zigzag underlay | Use Zigzag underlay stitching to support wide columns. You can set stitch length properties for Zigzag underlay. The stitch length is the length of each zigzag stitch. |
| Tatami underlay | Tatami underlay is used to stabilize large, filled shapes. It resembles an extremely open Tatami fill stitch, where rows of stitches are placed across the object to create the support. |
| Use Context > Underlay to apply or exclude automatic underlays to new or selected objects. Right-click for settings. |
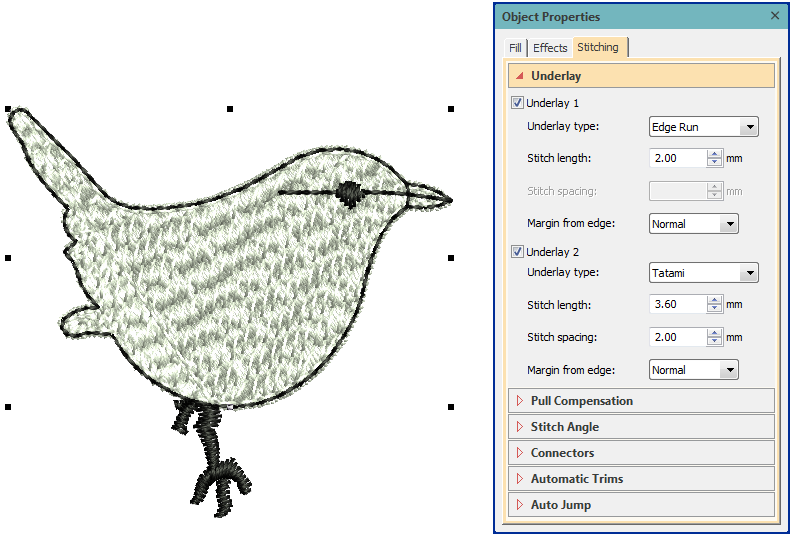
Underlay settings
The software lets you adjust values to suit different fabrics, lettering appearance and size. Larger areas and stretchy fabrics such as knits and pique generally need more underlay than smaller areas and firm fabrics such as drill or leather. At times, when you want a full design with extra lift under the stitches, a tatami underlay is preferable. On knits, edge run is best. To change underlays, select and double-click a filled object. Go to the Stitching tab and open the Underlay settings. If not already checked, select the Underlay checkbox and make a selection from the droplist.
Underlay stitching has similar settings available as the cover stitch except that default stitch spacing is much more open.
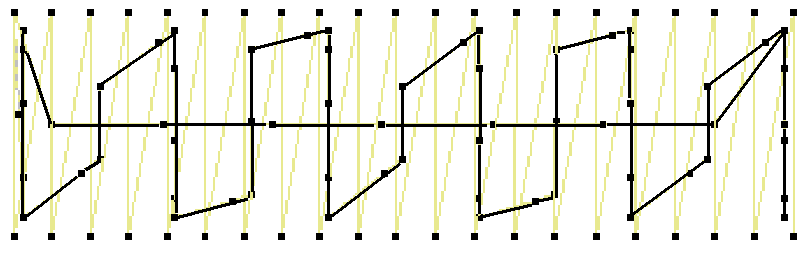 | Stitch length: 2.0 mm |
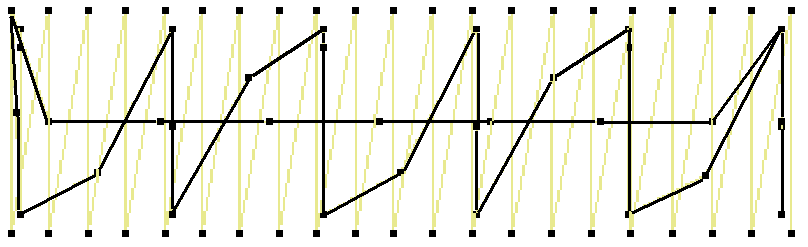 | Stitch length: 4.0 mm |
Hatch Embroidery sets the underlay automatically for each object. In certain cases however, you might want to do things a little differently. The kangaroo design has many objects and because we use embossed fills for almost all of them, the stitch angles are the same. In order to reduce the push-pull effect in the design and avoid potential gaps between the objects, we use a different technique by digitizing a global underlay.Click the thumbnail to read more or right-click to open the link in a new tab... |  |
.
Pull compensation
Embroidery stitches tend to pull fabric inwards where the needle penetrates. This can cause fabric to pucker and gaps to appear in the embroidery. Experienced digitizers can manually compensate for pull by overlapping objects as they digitize. Automatic pull compensation, however, counters the pull effect by ‘overstitching’ outlines of filled shapes on the sides where the needle penetrates.
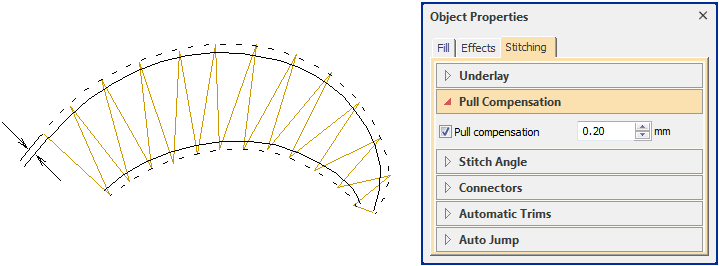
The Auto Fabric you choose applies a calculated amount of pull compensation automatically. However, you can adjust overstitching yourself in the Object Properties dialog. This is handy if you want to override auto fabric settings to compensate for varying degrees of stretch.
Applying underlay stitching, and using appropriate backing and topping when stitching out can also reduce the push-pull effect.
