
Output multi-hooped designs
When working with designs that are larger than the available physical hoop, the software will split them into parts, each containing an object or group of objects. When a multi-hooped design is output, each part is stitched separately after the fabric has been re-hooped. When saving to stitch file or sending to machine, multi-hoopings and split lines are applied. Hooping Sequence mode is activated, showing the separate hoopings.
When aligning a multi-hooped design for stitchout, make sure you know where the true center of the overall design is. This should guide you in the placement of your first hooping. Bear in mind that the center of the design will not generally coincide with the center of the first hooping. This is not a problem if you are stitching onto a piece of fabric which is to be cut and sewn onto something else. But if you are stitching directly onto a ready-made item, it is critical. To help in your placement of the first hooping, print out a worksheet which includes a background image of the article. See also Backgrounds.
Hoopings vs output files
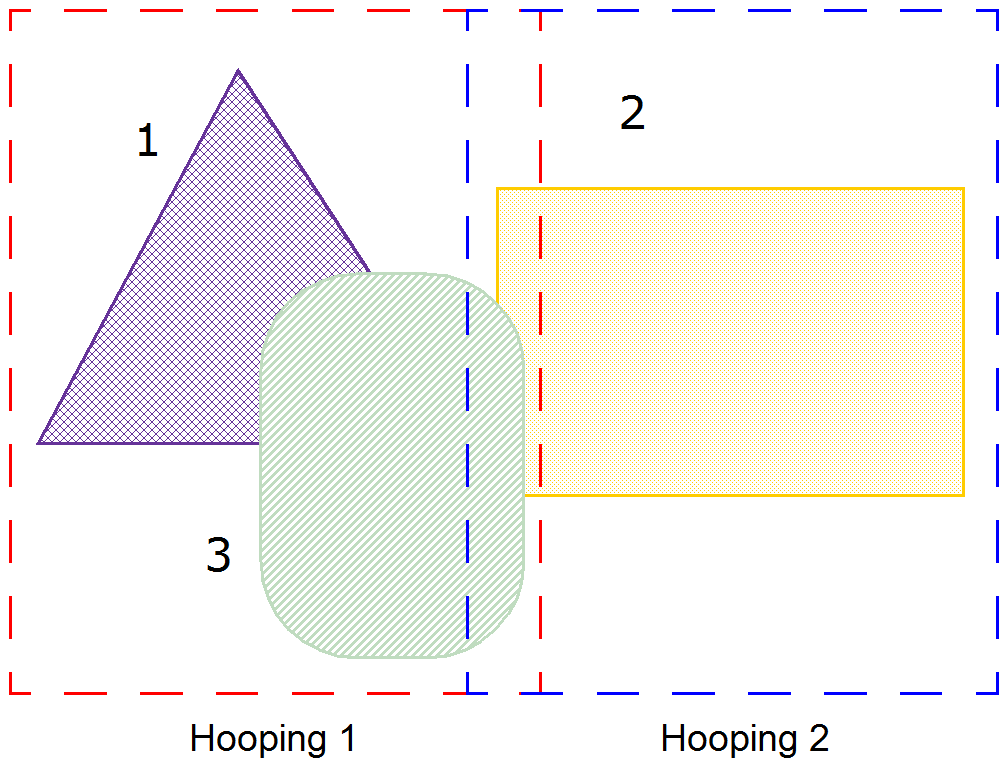
It is important to realize the numbers of hoopings in a multi-hooped design do not necessarily correspond to the number of output files. It all depends on the layering of objects within the design. In order to preserve the digitized stitching sequence, the same hooping may need to be visited more than once. Take the simple scenario illustrated here. Here we have one design with three objects and two hoopings. Object #1 gets stitched first. But then a change of hooping is required to stitch Object #2. To stitch Object #3, we need to return to our first hooping. That’s how we come to have more output files than we have hoopings.
| Use Multi-Hooping > Multi-Hooping Options to change multi-hooping options in the Multi-Hooping tab of the Embroidery Settings dialog. |
Add registration marks
To help you correctly align multiple hoopings during stitchout, the software can stitch out registration marks for each hooping. These do not form part of the design and are not saved with the design file. However, they are added during output and are viewable in the Hooping Sequence dialog. See below.
- To set registration marks, click the Multi-Hooping Options icon to access the Multi-Hooping tab.
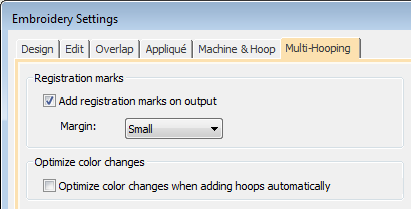
- Choose 'Add registration marks' and set a margin. The larger the margin, the greater the distance between the registration mark and the maximum embroidery area of the hoop. This makes it easier to align but there may be some trade-off in the precision of your registration.
- To check that registration marks have been added, activate the hooping list in Print Preview. See also Print multi-hooped designs.
Correct alignment of multi-hooped designs requires some practice. Third-party training programs are available on the internet which demonstrate correct technique. Most recommend using a sticky-back tear-away stabilizer, heavy enough so that the registration marks do not tear the stabilizer. Use pins through the registration marks of one hooping to align the corresponding marks of the next hooping
 | Use Output Design > Export Design to export the current design to a machine file for stitching. |
Export multi-hooped design as machine files
Before you export a multi-hooped design as machine files, save it to EMB format for future editing. You have a choice of using the Export Design function or writing designs to machine card or USB. In either case, you are prompted to split the design for each hooping...
- Create or open your multi-hooped design. See also Creating multi-hoop designs.
- Click the Export Design icon. The Export Machine File dialog opens.
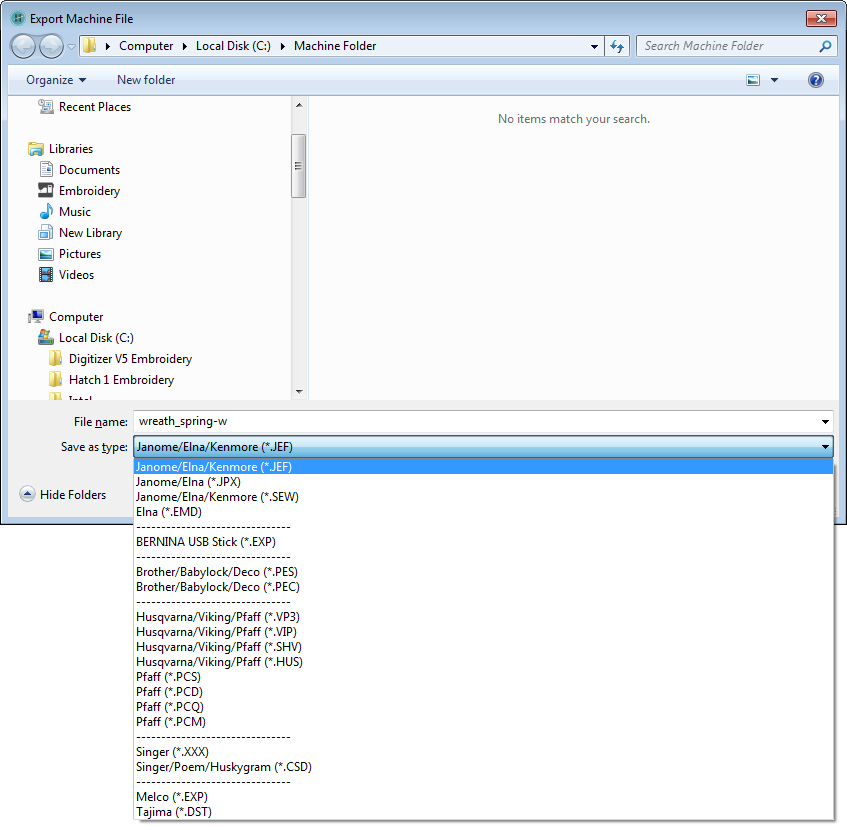
- Choose a machine file type from the droplist.
- Change the export file name as required and choose a destination folder. The system checks that all embroidery objects are covered. You will be warned if they are not.

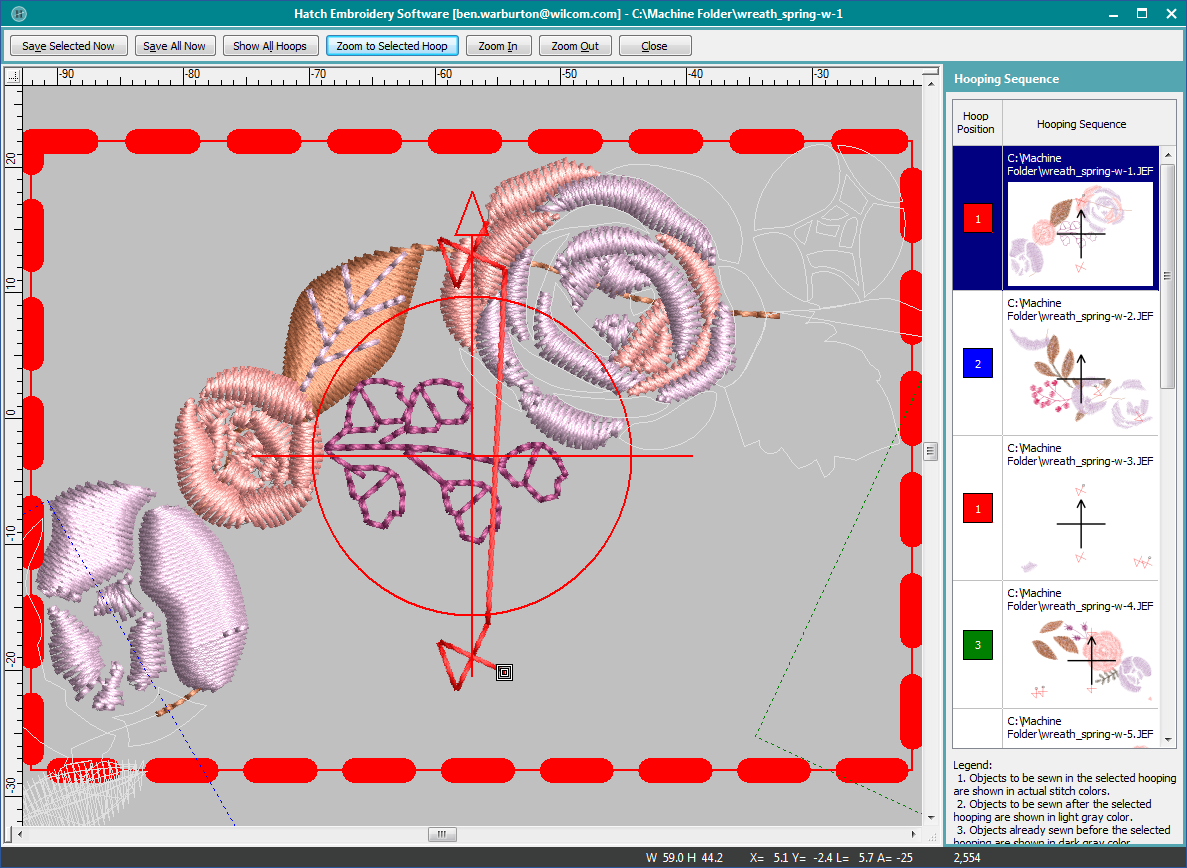
All hoopings needed to stitch the design are calculated and displayed in the Hooping Sequence dialog. Hoopings are named as files with the chosen file extension. Any split lines which may have been applied are calculated and objects split between their respective hoopings.
- Select a hooping and click 'Save Selected Now'. Alternatively, click Save All Now to save all files in the list, named as indicated in the Hooping Sequence panel. The software outputs the hoopings to their individual files.
- Optionally, click Zoom to Selected Hoop to view a closeup of each hooping. If you have activated registration marks, you will see them clearly marked in red.
- Click Close to return to the normal design window.
