Custom shapes
Motif stamps are ready-made design elements, such as hearts, leaves or geometric patterns which are contained in libraries or 'sets'. You can choose any of these patterns to use as 'motif stamps'. You can define your own stamps for individual use or for use in motif runs or fills. Similarly, you can create your own borders for use in monograms.
 | Use Digitize > Digitize Closed Shape to create closed shapes using either outline or fill stitching. Left-click for corner points, right-click for curves. |
 | Use Context > Create Motif to add selected shapes to a library or 'pattern set' for future use. Use as a Motif Stamp or as a motif outline or fill. |
Create custom motifs
The Create Motif function lets you save your own motif shapes for future use. Create your own ‘motif sets’ to organize and classify your motifs. See also Motif stamps.
- Select the object you want to use as a motif.
- Select Create Motif from the Context toolbar.
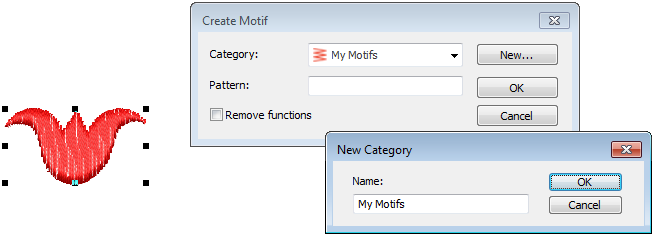
- Select a category from the droplist and enter a name in the Pattern field. Optionally, click New to create a new category.
- If you want to preserve machine functions such as color changes, leave the Remove Functions checkbox unticked. Otherwise, to remove unwanted machine functions from the motif, select the checkbox.
- Click OK.
- Click to mark two reference points. These determine default motif orientation in motif runs and fills. Reference point 1 becomes the anchor point in the final motif. Reference point 2 becomes the rotation point
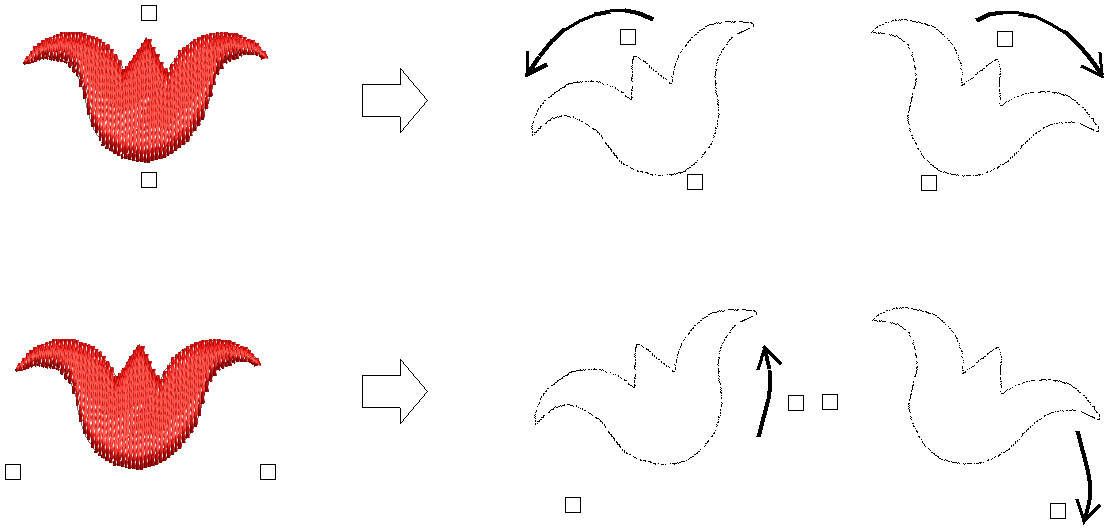
- Reference points also determine the spacing between motifs.
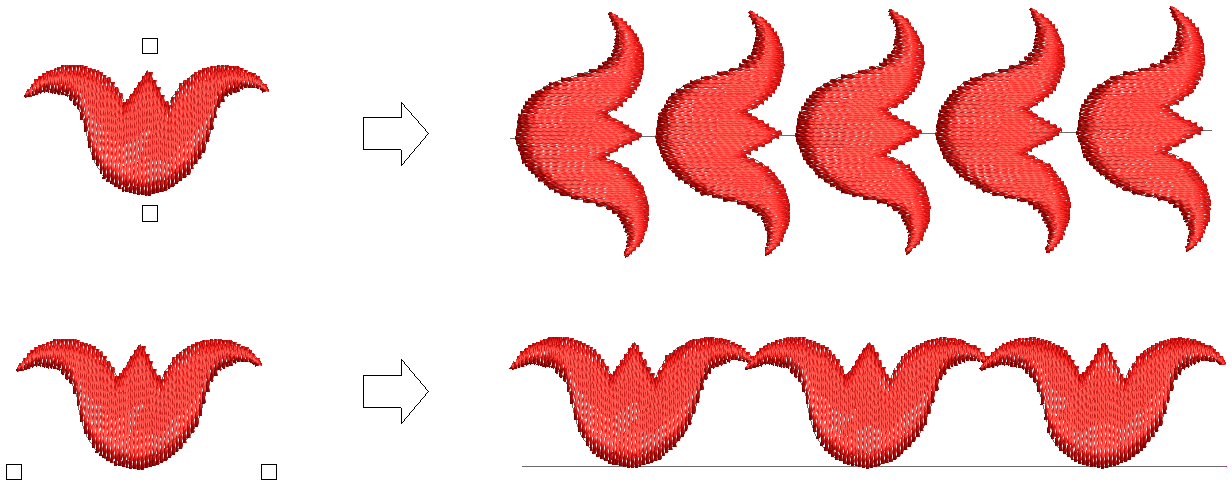
- Click OK. The motif is ready to use and will appear in the Pattern Gallery.
.
Manage motifs
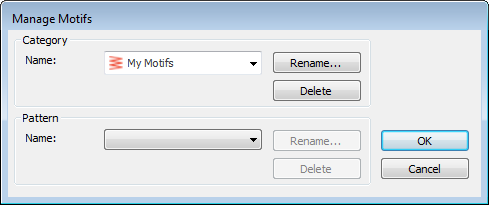
Once you have created your own motifs, you can manage them via the Software Settings menu. Select the Manage Motifs command to access the dialog. Use this to rename or delete individual motifs or entire custom categories.
| Use Digitize > Digitize Closed Shape to create closed shapes using either outline or fill stitching. Left-click for corner points, right-click for curves. |
 | Use Context > Create Border to add selected shapes to a border library for future use. Use as a border for selected objects or designs, or use with monograms. |
 | Use Context > Line to outline closed shapes with the current line stitch type. |
 | Use Context > Fill to fill closed shapes with the current fill stitch type. |
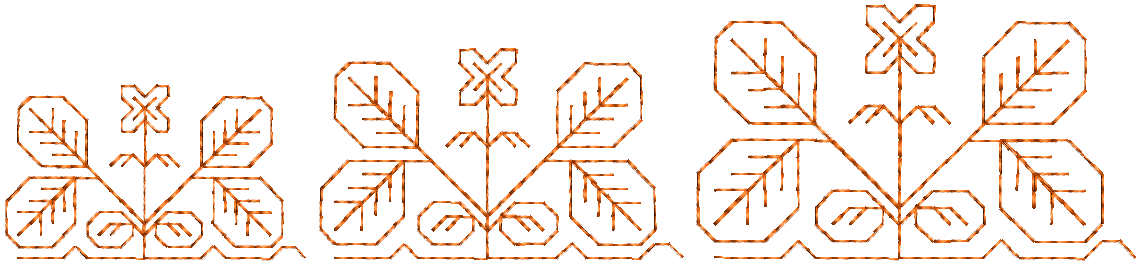
Create borders
The Create Border function allows you to create your own borders for use in monograms. These can be saved to the default ‘borders’ set or one of your own creation. See also Monogram borders.
- Digitize the border with the Closed Shape tool or select an existing closed shape. Outlines or fills can both be used. This can be changed once the border is selected for use. Don't use satin line as this results in a double border.
- Select Create Border from the Context toolbar.
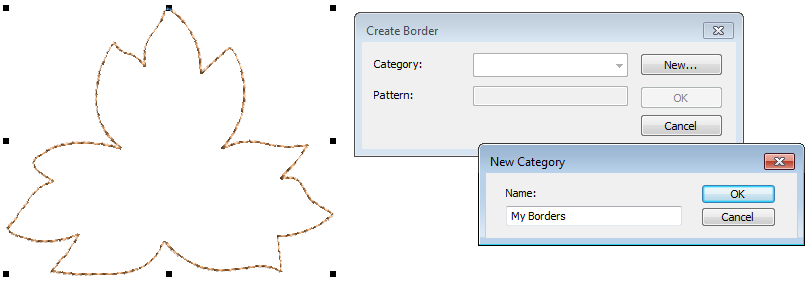
- If need be, create a new category to contain custom borders.
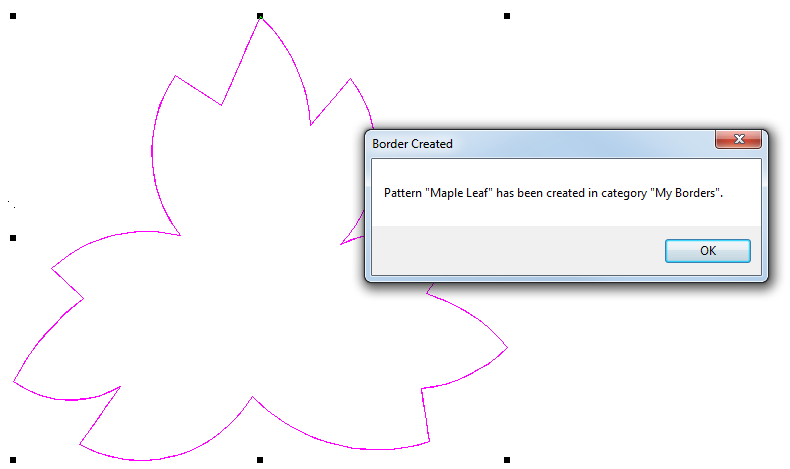
- Digitize two reference points. These determine default border orientation.
- Click OK when the confirmation message appears.
.
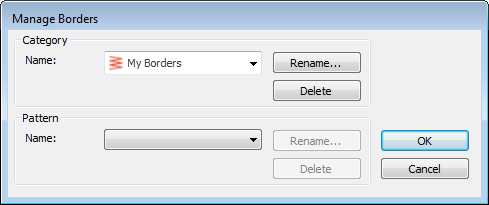
Manage borders
Once you have created your own borders, you can manage them via the Software Settings menu. Select the Manage Borders command to access the dialog. Use this to rename or delete individual borders or entire custom categories.