Toolboxes
 Toolboxes are like toolbars in that they contain software tools. However, each toolbox represents a typical scenario you will be engaged in, such as customizing designs or editing objects. Some tools may appear in more than one scenario. As such, toolboxes are organized more or less in order of common operations, starting with managing your designs.

Manage Designs toolbox
The Manage Designs toolbox provides an integrated way to view and organize all your embroidery designs. See also Manage designs.
 | Use Manage Designs > New From Selected to create new designs based on designs selected in the embroidery library. |
 | Use Manage Designs > Open Selected to open design(s) selected in the embroidery library. |
 | Use Manage Designs > Convert Selected Designs to convert the design selected in the embroidery library into different stitch file types. |
Use Manage Designs > Transfer Selected Design to transfer selected design to the preset machine folder. Right-click for settings. |
 | Use Manage Designs > Print Selected to print designs selected in the embroidery library. |
 | Use Manage Designs > Export List to export selected files to Tab and CSV (Comma Separated Value) formats suitable for use by most spreadsheets. |
 | Use Manage Designs > Find Embroidery Designs to locate all compatible designs on your hard disk. |
 | Use Manage Designs > Add Folder to Library to add an existing folder to the Embroidery Library. This enables faster searching and filtering of the folder. |
| Use Manage Designs > Remove Folder from Library to remove a folder from the Embroidery Library. This only removes the link to the folder from within the library. It does not actually delete the files in the folder from storage. |

Customize Design toolbox
The Customize Design toolbox provides functions which allow you to make global adjustments to your designs. See also Customize designs.
 | Use Customize Design > Design Information to view design information such as size and number of stitches. Add comments to print on worksheet. |
 | Use Customize Design / Context > Background and Display Colors to set colors, fabrics, or articles as design backgrounds. |
 | Use Customize Design > Auto Fabric to change the properties of the design for stitching on a different fabric. |
 | Use Customize Design / Output Design > Auto Start & End to set auto start and end points for entire design. |
 | Use Customize Design / Edit Objects > Adjust Stitch Spacing to manually override stitch densities of selected objects or entire designs. |
 | Use Customize Design > Change Thread Chart to manage thread charts or define your own. |
 | Use Customize Design > Change Design Color to show or hide the My Threads docker to find threads from different charts and change design colors. |
 | Use Customize Design / Standard / Layout > Insert Design to insert another embroidery design into the current design. Design palettes are merged. This tool is also available via File menu. |
 | Use Customize Design > Cycle Used Colors to cycle through combinations of used colors. Left- or right-click. |
 | Use Customize Design > Color Wheel to test combinations of related colors. |
 | Use Customize Design > Optimize Color Changes to optimize design by reducing color changes to a minimum, while maintaining color layers. |
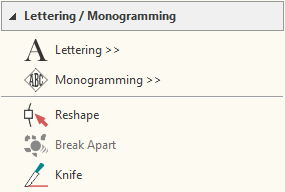
Lettering / Monogramming toolbox
The Lettering / Monogramming toolbox provides the tools needed to add high quality embroidery lettering to your designs as well as create monogram designs. See also Lettering.
 | Use Lettering / Monogramming > Lettering to create embroidery lettering onscreen using native embroidery alphabets or TrueType fonts. |
 | Use Lettering / Monogramming > Monogramming to create personalized monograms using a selection of pre-defined styles, border shapes and ornaments. |
 | Use Lettering / Monogramming > Reshape to reshape object outlines, stitch angles and enveloping. |
 | Use Edit Objects, Appliqué or Lettering / Monogramming > Break Apart to split composite objects - monograms, appliqués, lettering, etc - into components. Allows each to be edited individually. This tool is also available via Edit menu. |
Use Lettering / Monogramming > Knife to cut objects along a digitized line, preserving stitch settings and colors. |
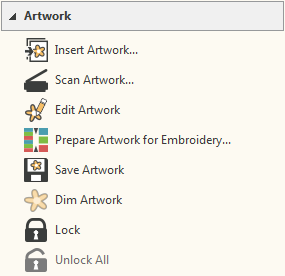
Artwork toolbox
The Artwork toolbox provides for importing electronic artwork into your embroidery software, editing it, and preparing it for automatic digitizing. See also Electronic artwork.
 | Use Artwork / Auto-Digitize / Standard > Insert Artwork to import graphic files - both bitmap and vector - for use as digitizing backdrops or for auto-digitizing. This tool is also available via File menu. |
 | Use Artwork > Scan Artwork to scan bitmap artwork directly into the open design from an attached scanner. |
 | Use Artwork > Edit Artwork to edit artwork in a selected graphics application. |
 | Use Artwork > Prepare Artwork for Embroidery to prepare bitmap images for automatic digitizing by reducing colors, removing image ‘noise’, and sharpening outlines. |
 | Use Artwork > Save Artwork As to save a backdrop as a separate file after image processing and/or editing. |
 | Use Artwork > Dim Artwork to show stitches more clearly when digitizing. |
 | Use Artwork > Lock to lock selected objects into position for protection. This tool is also available via Arrange menu. |
 | Use Artwork > Unlock All to unlock all locked objects to remove protection. This tool is also available via Arrange menu. |
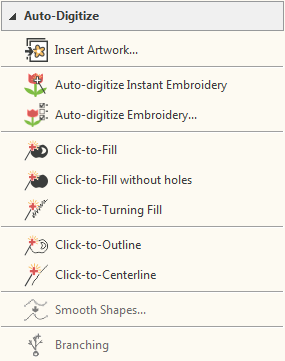
Auto-Digitize toolbox
The Auto-Digitize toolbox provides tools for the automatic digitizing of prepared artwork and photos. See also Auto-digitizing.
| Use Artwork / Auto-Digitize / Standard > Insert Artwork to import graphic files - both bitmap and vector - for use as digitizing backdrops or for auto-digitizing. This tool is also available via File menu. |
 | Use Auto-Digitize > Auto-Digitize Instant Embroidery to create embroidery designs directly from imported images using default settings. |
 | Use Auto-Digitize > Auto-Digitize Embroidery to create embroidery designs directly from imported images using conversion settings. |
 | Use Auto-Digitize > Auto-Digitize PhotoStitch to create embroidery designs directly from photographs or other images using default settings. |
 | Use Auto-Digitize > Click-to-Fill to digitize large artwork shapes with tatami fill, preserving any holes within. |
 | Use Auto-Digitize > Click-to-Fill without Holes to digitize large artwork shapes with tatami fill, ignoring any holes within. |
 | Use Auto-Digitize > Click-to-Turning Fill to digitize narrow column artwork shapes with satin stitch. |
 | Use Auto-Digitize > Click-to-Outline to digitize boundaries of shapes with run stitching using current properties. |
 | Use Auto-Digitize > Click-to-Centerline to digitize centerlines in artwork with run line stitches. |
 | Use Auto-Digitize / Edit Objects > Smooth Shapes to remove excess reshape-nodes from embroidery objects for smoother outlines. |
 | Use Digitize / Auto-Digitize / Edit Objects > Branching to automatically sequence selected outlines for efficient stitchout. |
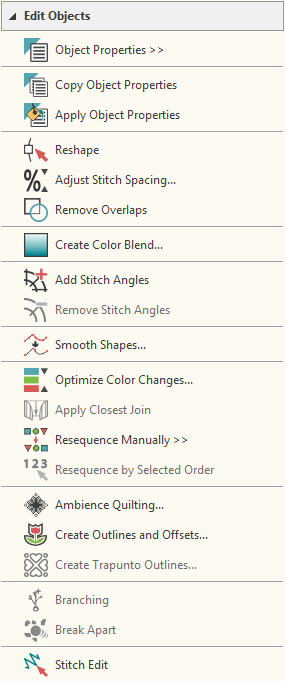
Edit Objects toolbox
The Edit Objects toolbox provides many tools for reshaping, resizing, rotating objects, as well as add or remove stitch angles. See Edit objects.
 | Use Edit Objects > Object Properties to preset properties or adjust them for selected objects. |
 | Use Edit Objects > Copy Object Properties to make properties of a selected object current for the design. |
 | Use Edit Objects > Apply Object Properties to apply current settings to selected objects. |
| Use Edit Objects / Select > Reshape to reshape an object outline, stitch angles or enveloping. |
| Use Customize Design / Edit Objects > Adjust Stitch Spacing to manually override stitch densities of selected objects or entire designs. |
 | Use Edit Objects > Remove Overlaps to remove unwanted stitching from underlying objects or lettering. |
 | Use Edit Objects / Digitize > Add Stitch Angles to add stitch angles to selected closed objects with or without holes. |
 | Use Edit Objects / Digitize > Remove Stitch Angles to remove stitch angles from selected objects with turning stitching. |
| Use Auto-Digitize / Edit Objects > Smooth Shapes to remove excess reshape-nodes from embroidery objects for smoother outlines. |
 | Use Edit Objects > Optimize Color Changes to optimize design by reducing color changes to a minimum, while maintaining color layers. |
 | Use Edit Objects > Apply Closest Join to join selected objects at the closest point. Re-apply closest join after editing. |
 | Use Edit Objects > Resequence Manually to show or hide Resequence docker. Use it to resequence objects and color blocks in a design. |
 | Use Edit Objects > Resequence by Selected Order to resequence objects in the order of selection. Hold down <Ctrl> and click to select. |
 | Use Edit Objects > Ambience Quilting to create 'echo' quilting blocks from a range of pre-defined quilt patterns. |
 | Use Edit Objects > Create Outlines & Offsets to create outlines or offset borders around closed objects or entire designs. |
 | Use Edit Objects > Create Trapunto Outlines to force travel runs to the edges of selected objects. Typically used with open stitching and no underlay. |
| Use Digitize / Auto-Digitize / Edit Objects > Branching to automatically sequence selected outlines for efficient stitchout. |
| Use Edit Objects, Appliqué or Lettering / Monogramming > Break Apart to split composite objects - monograms, appliqués, lettering, etc - into components. Allows each to be edited individually. This tool is also available via Edit menu. |
 | Use Edit Objects > Stitch Edit to place stitch cursor at selected insertion point. Allows editing of individual stitches. |

Digitize toolbar
The Digitize toolbox provides all the digitizing tools necessary to create embroidered shapes. See also Digitize objects.
 | Use Digitize > Rectangle / Square to quickly digitize rectangular shapes using current stitch settings. |
 | Use Digitize > Circle / Oval to quickly digitize circular shapes using current stitch settings. |
 | Use Digitize > Freehand Open Line to click & drag open lines on screen using current stitch settings for a hand-drawn look. |
 | Use Digitize > Freehand Closed Shape to draw closed shapes on screen using current stitch settings for a hand-drawn look. |
 | Use Digitize > Digitize Open Line to create a row of run or other outline stitching along a digitized line. Left-click for corner points, right-click for curves. |
 | Use Digitize > Digitize Closed Shape to create closed shapes using either outline or fill stitching. Left-click for corner points, right-click for curves. |
 | Use Digitize > Digitize Blocks to digitize shapes of varying width with turning stitching. |
 | Use Digitize > Carving Stamp to apply a pattern of needle penetrations using a ‘carving stamp’ as a template. Toggles Carving Stamp docker on / off. |
 | Use Digitize > Motif Stamp to add motifs singly. Rotate, scale, or mirror as you add. |
| Use Edit Objects / Digitize > Add Stitch Angles to add stitch angles to selected closed objects with or without holes. |
| Use Edit Objects / Digitize > Remove Stitch Angles to remove stitch angles from selected objects with turning stitching. |
 | Use Digitize > Digitize Holes to create holes in selected objects. Any closed object will do. |
 | Use Digitize > Fill Holes to fill holes in selected objects with current stitch type. Overlap is automatically calculated. |
 | Use Digitize > Remove Holes to remove holes from selected objects. |
 | Use Digitize > Backtrack to reinforce an outline, stitching it in the reverse direction to the original. Typically used with open shapes. |
 | Use Digitize > Repeat to duplicate an outline in the same direction. Typically used with closed shapes. |
| Use Digitize / Auto-Digitize / Edit Objects > Branching to automatically sequence selected outlines for efficient stitchout. |
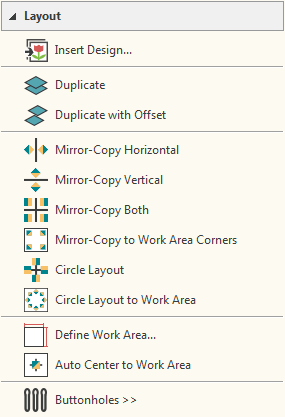
Layout toolbox
The Layout toolbox lets you easily combine designs and design elements by inserting the contents of one file into another. See also Design layouts.
| Use Customize Design / Standard / Layout > Insert Design to insert another embroidery design into the current design. Design palettes are merged. This tool is also available via File menu. |
 | Use Context / Layout > Duplicate to create a copy of a selected object in the same position. The duplicate is placed at end of stitching sequence. This tool is also available via Edit menu. |
 | Use Context / Layout > Duplicate with Offset to create copy at a preset offset position. Use to create regular patterns of duplicate objects. |
 | Use Layout > Mirror-Copy Horizontal to mirror and copy selected objects horizontally. |
 | Use Layout > Mirror-Copy Vertical to mirror and copy selected objects vertically. |
 | Use Layout > Mirror-Copy Both to mirror and copy selected objects around a center point. |
 | Use Layout > Mirror-Copy to Work Area Corners to copy selected object/s to each corner of the layout work area. |
 | Use Layout > Circle Layout to duplicate selected objects around a center point. Specify number of duplicates in the Context toolbar. |
 | Use Layout > Circle Layout to Work area to duplicate selected object/s around center of the work area. Specify number of duplicates in the Context toolbar. |
 | Use Layout > Define Work Area to open the Easy Layout Work Area dialog to define either a rectangular or round work area of a specified size. |
 | Use Layout > Auto Center to Work Area to automatically move selected object/s to center of the work area. |
 | Use Layout > Buttonholes to digitize a string of buttonholes with all necessary stitching. |
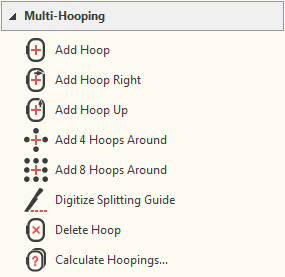
Multi-Hooping toolbox
If your embroidery is too large or contains a number of designs spaced around an article, you can use the Multi-Hooping toolbox to split it into multiple hoopings. See also Multi-hooping.
 | Use Multi-Hooping > Add Hoop to add a new hoop position to a multi-hooping layout. |
 | Use Multi-Hooping > Add Hoop Right to place a new hoop position to right of selected hoop. Allow 10mm overlap between sewing fields. |
 | Use Multi-Hooping > Add Hoop Up to place a new hoop position above selected hoop. Allows 10mm overlap between sewing fields. |
 | Use Multi-Hooping > Add 4 Hoops Around to create four hoop positions around a selected hoop's perimeter. Allows a 10mm overlap between sewing fields. |
 | Use Multi-Hooping > Add 8 Hoops Around to create eight hoop positions around a selected hoop's perimeter. Allows a 10mm overlap between sewing fields. |
 | Use Multi-Hooping > Splitting Guide to digitize one or more guides in a multi-hoop layout to split objects between hoop positions. |
 | Use Multi-Hooping > Delete Hoop to remove a selected hoop from multi-hoop layout. |
 | Use Multi-Hooping > Calculate Hoopings to calculate hoopings that will result from current layout. |
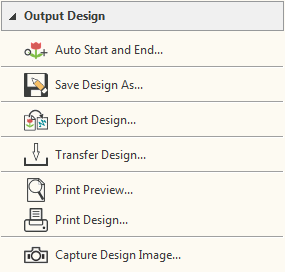
Output Design toolbox
Using the Output Design toolbox you can output embroidery designs in a variety of ways – by printing as worksheets, as appliqué patterns, color sequence, or as thread charts. The software also allows you to save your designs as images for use with fabric and garment applications. You can also send them directly to machine for stitching. When working with designs that are larger than the available physical hoop, you can split them into parts, each containing an object or group of objects. The software automatically calculates which files are to be sent and shows you how they will look. See also Output designs.
| Use Customize Design / Output Design > Auto Start & End to set auto start and end points for entire design. |
 | Use Output Design > Save Design As to save the current design with a different name, location or format. |
 | Use Output Design > Export Design to convert current design to a format other than your selected machine. |
Use Output Design / Context > Transfer Design to transfer current design to preset design folder. Right-click for settings. |
 | Use Output Design / Standard > Print Preview to preview design worksheet. Print from preview window. |
 | Use Output Design / Standard > Print Design to print the current design. |
 | Use Output Design > Capture Design Image to save design image as bitmap. Resulting image is as it appears on screen. |